1. Vue.js 인증과 권한 : 230508
1) Pinia 사용 방법
- pinia 설치 방법** :
npm install pinia
a. Pinia 기본 설정
- main.js
import { createApp } from 'vue'
import { createRouter, createWebHashHistory } from 'vue-router'
import { createPinia } from 'pinia'


  const pinia = createPinia();

  // Vue.createApp이 글로벌 라이브러리이다.
createApp(App)
.use(router)
.use(pinia)
.mount('#app') // -> ES6 라이브러리이다.
- useUserDetailsStore.js
- ‘export const’로 모듈을 설정하면, 옵션s API로 기능이 사용된다. 즉, 다른 컴포넌트에서 해당 전역 변수를 사용시, 함수인 ()로 불러내어 사용해야 한다.**
- export default로 쓰면, ()를 쓰면 안 된다! useUserDetailsStore라는 변수도 지우자
- 하지만, export const가 pinia 매뉴얼 대로 기본이다!
import {defineStore} from "pinia";

// export const로 하면, 옵션s API로 기능이 사용된다. 즉, 함수인 ()로 사용해야 한다.
// export default로 쓰면, ()를 쓰면 안 된다! 변수도 지우자
// 하지만 export const가 기본이다!
export const useUserDetailsStore = defineStore("userDetails", {
    state:()=>({
        id:0,
        username:null,
        email:null,
        role:null
    })
});
2) 로그인 기능에서 Pinia 사용 방법
a. Pinia 사용 방법 : 상태관리 전역 변수
-
import {useUserDetailsStore} from '../stores/useUserDetailsStore'; -
import된 pinia 상태 관리 변수를 함수로 만들어서 사용한다.
-
여기서 ()가 ‘state:()=>{}’ 를 의미한다.
-
인증된 정보를 저장하기 위해서 SSR에서는 Session이나 쿠키를 사용했는데
-
CSR에서는 session이나 쿠키가 필요없다. 페이지를 갱신하지 않으면 전역변수가 존재해서 편리하다.
-
‘export const’로 모듈을 설정하면, 옵션s API로 기능이 사용된다. 즉, 다른 컴포넌트에서 해당 전역 변수를 사용시, 함수인 ()로 불러내어 사용해야 한다.**
-
export default로 쓰면, ()를 쓰면 안 된다! useUserDetailsStore라는 변수도 지우자
-
하지만, export const가 pinia 매뉴얼 대로 기본이다!
b. 실습 코드 :
- Login.vue
<script setup>
import {reactive} from 'vue';
import { useRouter } from 'vue-router';

// 전역 변수를 선언! store에서 가져온다.
// 하나의 모듈에다가 만들어서 공유하면 전역변수가 된다.
// 모두다 같은 객체를 공유하는지가 궁금하다! 그래서, 여기서 담아서 다른페이지에서 읽어보자!!
// import userDetails from '../stores/UserDetails.js';


let userDetails = useUserDetailsStore();

let router = useRouter();

let user = reactive({
  username:"newlec",
  password:"111",
  role:""
});

async function logHandler(){
  console.log(user.username);
  let response = await fetch("http://localhost:8080/members/login",{
    method:"POST",
    headers:{
      "Accept":"application/json",
      "Content-type":"application/x-www-form-urlencoded"
    },
    body:`username=${user.username}&password=${user.password}`
  });
  let json = await response.json();
  console.log(json);

  // ** 로그인하고 나서 전역 객체(global object)에 로그인한 인증 정보를 담기 **
  // 자바의 entity 값과 같게 반환해줘야 한다.
  userDetails.username = json.result.userName;
  userDetails.password = json.result.pwd;
  userDetails.email = json.result.email;

  // router.push로서 사용하는 방법
  router.push("/index");
}
</script>

<template>
    <main>
      <div class="sign-in">
        <div class="sign-in-logo">
          <img src="/image/logo-black.svg" alt="Rland" />
        </div>
        <form class="sign-in-form">
          <div class="sign-in-form-input">
            <div>
              <input
                type="text"
                class="input-bottom-line"
                placeholder="아이디"
                required
                v-model="user.username"
              />
            </div>
            <div>
              <input
                type="password"
                class="input-bottom-line"
                placeholder="비밀번호"
                required
                v-model="user.password"
              />
            </div>
          </div>

          <div class="sign-in-form-button">
            <div class="wd-100">
              <input type="submit" value="로그인" class="btn btn-default" @click.prevent="logHandler"/>
            </div>
            <div class="font-14">또는</div>
            <div class="wd-100">
              <a href="" class="deco icon-logo-google btn btn-outline"
                >구글로 로그인</a
              >
            </div>
          </div>
        </form>
        <div class="sign-in-find-user font-14">
          <a href="/sign-up.html">회원가입</a> |
          <a href="">비밀번호 찾기</a>
        </div>
      </div>
    </main>

</template>

<style scoped>
    @import url("/css/sign-in.css")
</style>
- Header.vue
<script setup>
  // import userDetails from '../../stores/UserDetails';
  import {useUserDetailsStore} from '../../stores/useUserDetailsStore';
  import {useRouter} from 'vue-router';

  let router = new useRouter();

  let userDetails = useUserDetailsStore();

  async function logoutHandler(){
    console.log("logout");

    // ** logout 처리 ***
    // userDetails.id = 0;
    // userDetails.username = null;
    // userDetails.email = null;
    userDetails.logout();

    router.push('/index');
  }
</script>
<template>
    <header class="header-container">
      <h1 class="d-none">알랜드</h1>
      <div>
        <router-link to="/index" title="index페이지로 이동합니다.">
          <img src="/image/logo.svg" />
        </router-link>
        <router-link to="/admin/menu/list" class="icon icon-setting" title="메뉴관리로 이동합니다.">
          메뉴관리
        </router-link>
        <a class="icon icon-menu">메뉴</a>
      </div>
      <nav class="nav-wrap">
        <h1 class="d-none">네비게이션 목록</h1>
        <ul>
          <li>
            <a
              href="/index"
              class="icon icon-home"
              title="index페이지로 이동합니다."
              >홈</a
            >
          </li>
          <li>  <!-- v-show는 DOM이 있지만 보이지만 않는다. v-if는 DOM이 아예없어서 보이지 않는다. -->
                <!-- pinia store 대로 ''를 null로 바꾸자  -->
            <router-link v-if="!userDetails.username" to="/login" class="icon icon-sign-on" title="로그인">로그인</router-link>
            <router-link v-if="userDetails.username" to="/logout" class="icon icon-sign-out" title="로그아웃" @click="logoutHandler">로그아웃</router-link>
          </li>
        </ul>
      </nav>
    </header>
</template>
3) 로그아웃 기능에서 Pinia 사용 방법
1) getters 이용 방법 : Pinia 기능
-
Pinia의 getters 이용 방법 : 계산하는 식도 사용할 수 있거나 ‘속성’으로도 사용할 수 있다.
-
속성이라서 함수의 인자를 넘겨 받을 수 없다.
- useUserDetailsStore.js
import {defineStore} from "pinia";

// export const로 하면, 옵션s API로 기능이 사용된다. 즉, 함수인 ()로 사용해야 한다.
// export default로 쓰면, ()를 쓰면 안 된다! 변수도 지우자
// 하지만 export const가 기본이다!
export const useUserDetailsStore = defineStore("userDetails", {
    state:()=>({
        id:0,
        username:null,
        email:null,
        role:null
    }),

    // Pinia의 getters 이용 방법 : 계산하는 식도 사용할 수 있거나 '속성'으로도 사용할 수 있다.
    // 속성이라서 함수의 인자를 넘겨 받을 수 없다.
    getters:{
        isAuthenticated:(state)=>state.username==null?false:true
    },

});
–
2) actions 이용 방법 : Pinia 기능
- actions : 함수의 인자를 넘겨 받을 수 있다. 로그아웃 기능에서 사용 가능
- useUserDetailsStore.js
import {defineStore} from "pinia";

// export const로 하면, 옵션s API로 기능이 사용된다. 즉, 함수인 ()로 사용해야 한다.
// export default로 쓰면, ()를 쓰면 안 된다! 변수도 지우자
// 하지만 export const가 기본이다!
export const useUserDetailsStore = defineStore("userDetails", {
    state:()=>({
        id:0,
        username:null,
        email:null,
        role:null
    }),

    // Pinia의 getters 이용 방법 : 계산하는 식도 사용할 수 있거나 '속성'으로도 사용할 수 있다.
    // 속성이라서 함수의 인자를 넘겨 받을 수 없다.
    getters:{
        isAuthenticated:(state)=>state.username==null?false:true
    },

    // actions : 함수의 인자를 넘겨 받을 수 있다. 로그아웃 기능에서 사용 가능
    actions:{
        logout(){
            this.id=0;
            this.username =null;
            this.email =null;
        }
    }

});
c. 로그아웃 실습코드 : pinia 이용
- useUserDetailsStore.js
import {defineStore} from "pinia";

// export const로 하면, 옵션s API로 기능이 사용된다. 즉, 함수인 ()로 사용해야 한다.
// export default로 쓰면, ()를 쓰면 안 된다! 변수도 지우자
// 하지만 export const가 기본이다!
export const useUserDetailsStore = defineStore("userDetails", {
    state:()=>({
        id:0,
        username:null,
        email:null,
        role:null
    }),

    // Pinia의 getters 이용 방법 : 계산하는 식도 사용할 수 있거나 '속성'으로도 사용할 수 있다.
    // 속성이라서 함수의 인자를 넘겨 받을 수 없다.
    getters:{
        isAuthenticated:(state)=>state.username==null?false:true
    },

    // actions : 함수의 인자를 넘겨 받을 수 있다. 로그아웃 기능에서 사용 가능
    actions:{
        logout(){
            this.id=0;
            this.username =null;
            this.email =null;
        }
    }

    // *** 권한 : 허락받지 않는 페이지로 이동해서는 안 된다.
    // 그래서, 실습을 위해 우리는 허락 받지 않은 페이지가 필요하다!
});
- Header.vue
<script setup>
  // import userDetails from '../../stores/UserDetails';
  import {useUserDetailsStore} from '../../stores/useUserDetailsStore';
  import {useRouter} from 'vue-router';

  let router = new useRouter();

  let userDetails = useUserDetailsStore();

  async function logoutHandler(){
    console.log("logout");

    // ** logout 처리 ***
    // userDetails.id = 0;
    // userDetails.username = null;
    // userDetails.email = null;
    userDetails.logout();

    router.push('/index');
  }
</script>
<template>
    <header class="header-container">
      <h1 class="d-none">알랜드</h1>
      <div>
        <router-link to="/index" title="index페이지로 이동합니다.">
          <img src="/image/logo.svg" />
        </router-link>
        <router-link to="/admin/menu/list" class="icon icon-setting" title="메뉴관리로 이동합니다.">
          메뉴관리
        </router-link>
        <a class="icon icon-menu">메뉴</a>
      </div>
      <nav class="nav-wrap">
        <h1 class="d-none">네비게이션 목록</h1>
        <ul>
          <li>
            <a
              href="/index"
              class="icon icon-home"
              title="index페이지로 이동합니다."
              >홈</a
            >
          </li>
          <li>  <!-- v-show는 DOM이 있지만 보이지만 않는다. v-if는 DOM이 아예없어서 보이지 않는다. -->
                <!-- pinia store 대로 ''를 null로 바꾸자  -->
            <router-link v-if="!userDetails.username" to="/login" class="icon icon-sign-on" title="로그인">로그인</router-link>
            <router-link v-if="userDetails.username" to="/logout" class="icon icon-sign-out" title="로그아웃" @click="logoutHandler">로그아웃</router-link>
          </li>
        </ul>
      </nav>
    </header>
</template>
4) Vue.js 권한 기능
-
권한** : 허락받지 않는 페이지로 이동해서는 안 된다.
-
그래서, 실습을 위해 우리는 허락 받지 않은 페이지가 필요하다!
-
Admin이 이용하는 MenuList 페이지를 구성한다.
a. 실습코드
- Layout.vue
<script setup>
import Header from '../../inc/Header.vue';
import Aside from './Aside.vue';
import Footer from '../../inc/Footer.vue';


</script>

<template>
    <!-- <Header/>는 자동 임포트 가능하다. -->
    <!-- Header-vue라고 쓰는 경우도 있는데 컴포넌트 이름 그대로 가는 것이 식별하기 쉽다. -->
    <Header/>
    <Aside/>
    <router-view></router-view>
    <Footer/>

    <!-- 메인페이지 가운데 빗금 문양 -->
    <div class="slash-background">
        <div></div>
        <div></div>
        <div></div>
      </div>
</template>

<style scoped>
    main{
        background-color: var(--color-bg-2);
    }
</style>
- List.vue
<template>
    <!-- ----------------------메인---------------------------- -->
    <main>
      <div class="tab-search-container">
        <div class="top-img-title">
          <h1>메뉴 관리</h1>
        </div>
        <!-- ----------------메뉴 탭 -->
        <div class="tab-search-wrap">
          <section class="tab-section">
            <h1>탭 목록</h1>
            <ul>
              <li class="selected"><a href="">전체메뉴</a></li>
              <li><a href="">커피</a></li>
              <li><a href="">수제청</a></li>
              <li><a href="">샌드위치</a></li>
              <li><a href="">쿠키</a></li>
            </ul>
          </section>
          <!-- --------------------------------------------------검색바 -->
          <section class="search-section">
            <h1>검색</h1>
            <form action="">
              <input type="text" value="" name="search" />
              <button type="submit" class="icon icon-search"></button>
            </form>
          </section>
        </div>
      </div>
      <div class="flex-align">
        <!-- ----------------상품추가 박스 모바일 -->
        <a href="../menu/reg.html" class="menu-add-box-mobile">
          <span class="icon icon-plus-circle"></span>
        </a>
        <!-- ----------------메뉴 목록 -->
        <section class="menu-edit-section">
          <h1 class="d-none">메뉴 목록</h1>
          <!-- ----------------상품추가 박스 pc -->
          <a href="../menu/reg.html" class="menu-add-box-pc">
            <span class="icon icon-plus-circle"></span>
          </a>

          <section class="menu">
            <div>
              <a href="../../anonymous/menu/detail.html">
                <img src="/image/espresso.svg" alt="에스프레소" />
              </a>
            </div>
            <h1>에스프레소</h1>
            <h2>Espresso</h2>
            <div>2,500원</div>
            <div>
              <a class="icon icon-arrow-up">추천메뉴 보기</a>
            </div>
            <div>
              <a href="" class="icon icon-lg icon-pencil">수정</a>
              <a href="" class="icon icon-lg icon-trash">삭제</a>
            </div>
          </section>
          <!-- ----------------추천메뉴 목록 -->
          <section class="recommend-menu-section">
            <div class="bl-2 pl-12 flex-cloumn-gap-12">
              <h1>추천 메뉴</h1>
              <section class="menu-delete-section">
                <h1 class="d-none">메뉴 목록</h1>
                <section class="menu">
                  <div>
                    <a href="">
                      <img src="/image/espresso.svg" alt="에스프레소" />
                    </a>
                  </div>
                  <h1>에스프레소</h1>
                  <h2>Espresso</h2>
                  <div>2,500원</div>
                  <div>
                    <a href="" class="icon icon-trash">삭제</a>
                  </div>
                </section>

                <!-- ----------------상품추가 박스 pc small-->
                <a href="../menu/reg.html" class="menu-add-box-pc-sm">
                  <span class="icon icon-plus-circle"></span>
                </a>
                <!-- ----------------상품추가 박스 모바일 -->
                <a href="../menu/reg.html" class="menu-add-box-mobile">
                  <span class="icon icon-plus-circle"></span>
                </a>
              </section>
            </div>
          </section>

          <section class="menu">
            <div>
              <a href="../../anonymous/menu/detail.html">
                <img src="/image/espresso.svg" alt="에스프레소" />
              </a>
            </div>
            <h1>에스프레소</h1>
            <h2>Espresso</h2>
            <div>2,500원</div>
            <div>
              <a class="icon icon-arrow-up">추천메뉴 보기</a>
            </div>
            <div>
              <a href="" class="icon icon-lg icon-pencil">수정</a>
              <a href="" class="icon icon-lg icon-trash">삭제</a>
            </div>
          </section>

          <section class="menu">
            <div>
              <a href="">
                <img src="/image/espresso.svg" alt="에스프레소" />
              </a>
            </div>
            <h1>에스프레소</h1>
            <h2>Espresso</h2>
            <div>2,500원</div>
            <div>
              <a class="icon icon-arrow-up">추천메뉴 보기</a>
            </div>
            <div>
              <a href="" class="icon icon-lg icon-pencil">수정</a>
              <a href="" class="icon icon-lg icon-trash">삭제</a>
            </div>
          </section>
        </section>
      </div>
    </main>
</template>

<style scoped>
    @import url(/css/menu.css);
    @import url(/css/admin/menu/list.css);
</style>
2. 권한 : 230509
1) 권한 부여하는 과정 : Pinia
a.
-
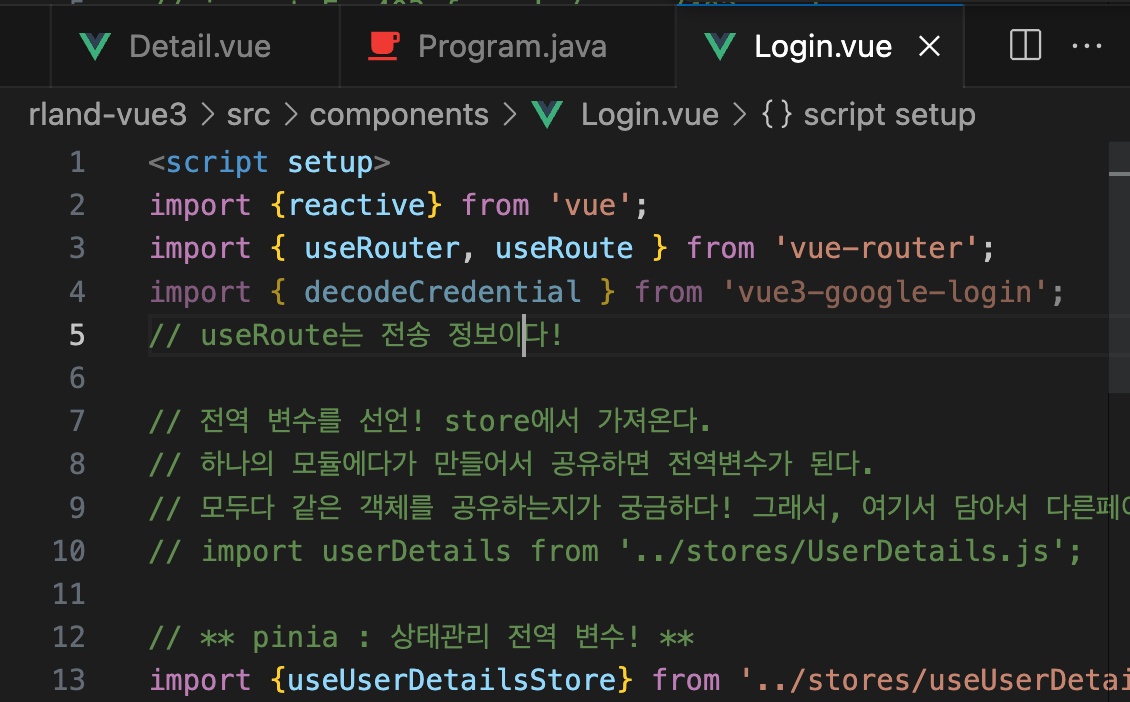
useRoute는 전송 정보이다!
-
composition API로 코드가 변경되면서 JS 코드가 읽히면서 바로 로드가 된다.
-
composition API에서는 created 단계가 없어지면서 바로 모든 코드가 로드된다.
b. 실습 코드 :
- useUserDetailsStore.js
import {defineStore} from "pinia";

// export const로 하면, 옵션s API로 기능이 사용된다. 즉, 함수인 ()로 사용해야 한다.
// export default로 쓰면, ()를 쓰면 안 된다! 변수도 지우자
// 하지만 export const가 기본이다!
export const useUserDetailsStore = defineStore("userDetails", {
    state:()=>({
        id:0,
        username:null,
        email:null,
        // 권한도 역할이 여러개 필요한 경우에 이렇게 배열로 받는다!
        roles:[] // ["ADMIN","TEACHER"]
    }),

    // Pinia의 getters 이용 방법 : 계산하는 식도 사용할 수 있거나 '속성'으로도 사용할 수 있다.
    // 속성이라서 함수의 인자를 넘겨 받을 수 없다.
    getters:{
        isAuthenticated:(state)=>state.username==null?false:true
    },

    // actions : 함수의 인자를 넘겨 받을 수 있다. 로그아웃 기능에서 사용 가능
    actions:{
        logout(){
            this.id=0;
            this.username =null;
            this.email =null;
        },
        hasRole(role){
            // 여기서 role은 ["ADMIN","TEACHER"]가 되어 role을 찾는 작업이 필요!
            // 해당 역할이 없으면 false 있으면 true 반환!
            let result = this.roles.indexOf(role)<0?false:true;
            return result;
        }

    }

    // *** 권한 : 허락받지 않는 페이지로 이동해서는 안 된다.
    // 그래서, 실습을 위해 우리는 허락 받지 않은 페이지가 필요하다!
});
- MemberController.java
- 권한 중요 :
dto.put("roles", new String[]{"ADMIN","TEACHER"});
- 권한 중요 :
@RestController
@RequestMapping("members")
public class MemberController {

    @Autowired
    private MemberService service;

    @PostMapping("login")
    public ResponseEntity<Map<String, Object>> login(
        String username,
        String password){

        System.out.println(username);
        Map<String, Object> dto = new HashMap<>();

        dto.put("result",null);

        // ** DB 이용시 사용하기! **
        if(service.isValid(username, password)){
            Member member = service.getUsername(username);
            dto.put("result", member);
            dto.put("roles", new String[]{"ADMIN","TEACHER"});
            // 권한 중요!
        }

        return new ResponseEntity<Map<String, Object>>(dto, HttpStatus.OK);
    }
}
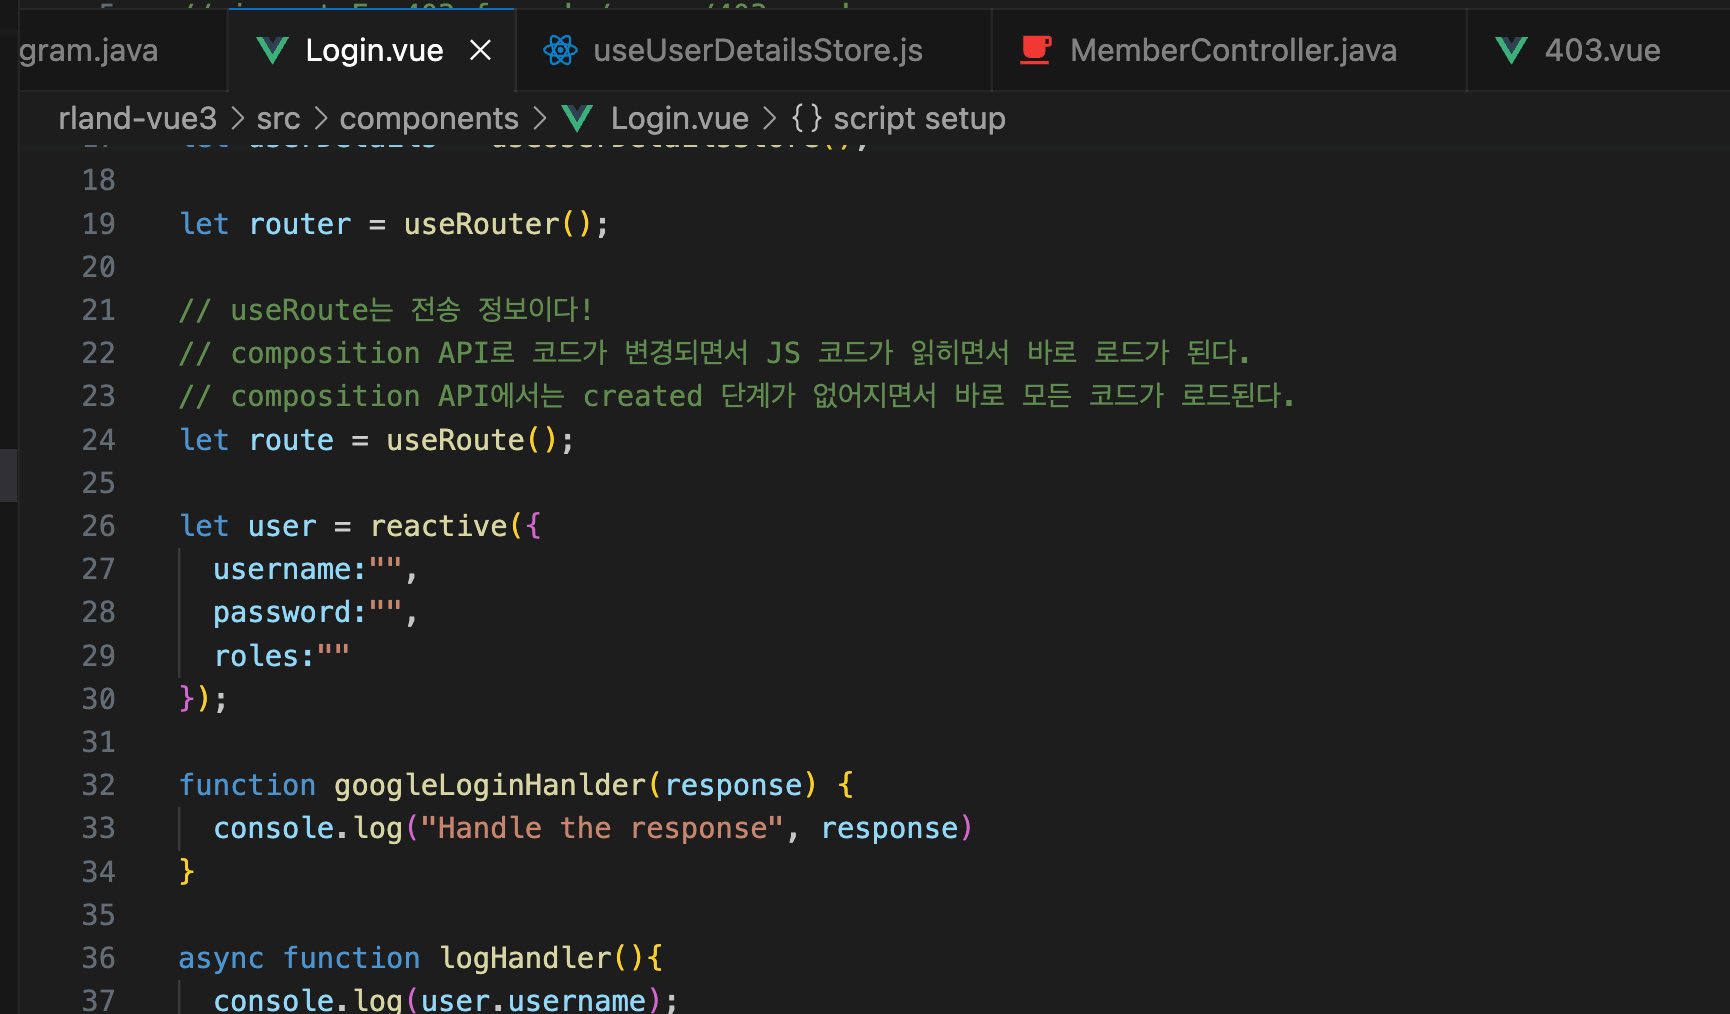
- Login.vue
<script setup>
import {reactive} from 'vue';
import { useRouter, useRoute } from 'vue-router';
// useRoute는 전송 정보이다!

// 전역 변수를 선언! store에서 가져온다.
// 하나의 모듈에다가 만들어서 공유하면 전역변수가 된다.
// 모두다 같은 객체를 공유하는지가 궁금하다! 그래서, 여기서 담아서 다른페이지에서 읽어보자!!
// import userDetails from '../stores/UserDetails.js';

// ** pinia : 상태관리 전역 변수! **
import {useUserDetailsStore} from '../stores/useUserDetailsStore';
// import된 pinia 상태 관리 변수를 함수로 만들어서 사용한다.
// 여기서 ()가 'state:()=>{}' 를 의미한다.
// 인증된 정보를 저장하기 위해서 SSR에서는 Session이나 쿠키를 사용했는데
// CSR에서는 session이나 쿠키가 필요없다. 페이지를 갱신하지 않으면 전역변수가 존재해서 편리하다.
let userDetails = useUserDetailsStore();

let router = useRouter();

// useRoute는 전송 정보이다!
// composition API로 코드가 변경되면서 JS 코드가 읽히면서 바로 로드가 된다.
// composition API에서는 created 단계가 없어지면서 바로 모든 코드가 로드된다.
let route = useRoute();

let user = reactive({
  username:"",
  password:"",
  roles:""
});

async function logHandler(){
  console.log(user.username);
  let response = await fetch("http://localhost:8080/members/login",{
    method:"POST",
    headers:{
      "Accept":"application/json",
      "Content-type":"application/x-www-form-urlencoded"
    },
    body:`username=${user.username}&password=${user.password}`
  });
  let json = await response.json();
  console.log(json);

  // ** 로그인하고 나서 전역 객체(global object)에 로그인한 인증 정보를 담기 **
  // 자바의 entity 값과 같게 반환해줘야 한다.
  userDetails.username = json.result.userName;
  // userDetails.password = json.rescult.pwd;
  userDetails.email = json.result.email;
  userDetails.roles = json.roles;

  // returnURL 사용방법 : 이동할 때, Route 정보 얻기!

  let returnURL = route.query.returnURL;

  if(returnURL)
    router.push(returnURL);
  else
    router.push("/index");


    // router.push로서 사용하는 방법
  // router.push("/index");
}
</script>

<template>
    <main>
      <div class="sign-in">
        <div class="sign-in-logo">
          <img src="/image/logo-black.svg" alt="Rland" />
        </div>
        <form class="sign-in-form">
          <div class="sign-in-form-input">
            <div>
              <input
                type="text"
                class="input-bottom-line"
                placeholder="아이디"
                required
                v-model="user.username"
              />
            </div>
            <div>
              <input
                type="password"
                class="input-bottom-line"
                placeholder="비밀번호"
                required
                v-model="user.password"
              />
            </div>
          </div>

          <div class="sign-in-form-button">
            <div class="wd-100">
              <input type="submit" value="로그인" class="btn btn-default" @click.prevent="logHandler"/>
            </div>
            <div class="font-14">또는</div>
            <div class="wd-100">
              <a href="" class="deco icon-logo-google btn btn-outline"
                >구글로 로그인</a
              >
            </div>
          </div>
        </form>
        <div class="sign-in-find-user font-14">
          <a href="/sign-up.html">회원가입</a> |
          <a href="">비밀번호 찾기</a>
        </div>
      </div>
    </main>

</template>

<style scoped>
    @import url("/css/sign-in.css")
</style>
- route.js
import Index from './Index.vue'
import Layout from './inc/Layout.vue'
import MenuList from './menu/List.vue'

import {useUserDetailsStore} from '../../stores/useUserDetailsStore.js';

const admin = {
    path: '/admin',
    component: Layout,
    children:[
        {
            path:'index',
            component:Index
        },
        {
        path:'menu', children:
            [
                {
                    path: 'list', component: MenuList
                }
            ]
        }
    ],
    beforeEnter(to, from, next){
        console.log("어딜가시려나요?");
        console.log(`to:${to.path}, from:${from.path}`);

        let userDetails = useUserDetailsStore();

        console.log(userDetails.isAuthenticated);

        let url = `/login?returnURL=${to.path}`;

        if(!userDetails.isAuthenticated)
            next(url);
        // 권한에 대한 조건이 1개 더 필요! 에러 페이지도 추가로 필요!!**
        else if(!userDetails.hasRole("ADMIN"))
            next("/error/403");
        else
            next();
    }
}

export default admin;
2) 에러를 대신 해주는 페이지 구현
a. 페이지 구성
- 403.vue
<template>
    <main>
        <h2>에러 403: 권한이 없는 페이지를 접근하였습니다.</h2>
    </main>
</template>
- 404.vue
<template>
    <main>
        <h2>에러 404 : 요청하신 페이지가 존재하지 않습니다.</h2>
    </main>
</template>
b. 경로 구성
- route.js
- Lazy Loading Routes도 이용할 수 있다.
- 느슨한 화면 생성
- 화면이 조건에 의해 필요할 때만 import 시킨다.
import Layout from './inc/Layout.vue'
import Index from './Index.vue'
import Login from './Login.vue'

// import Err403 from './error/403.vue'
import NotFound from './error/404.vue'

const root = { path: '/', component: Layout, children:[
    { path: 'index', component: Index},
    { path: 'login', component: Login},
    {
        path:'error', children:[
            // 'Lazy Loading Routes'
            // 모든 페이지를 처음에 다 로드하지 않을 때 사용 : 느슨한 화면 생성
            // 화면이 조건에 의해 필요할 때만 import 시킨다.
            // 하지만, 모든 것을 다 Lasy로 구현해서는 안된다.
            {path:"403", component:()=> import('./error/403.vue')}
        ]
    },
    {
        // 무엇이든 일치시키려면 매개변수 바로 뒤에 괄호 안에 정규 표현식을 추가하여 사용자 정의 매개변수 정규 표현식을 사용할 수 있습니다 .
        // 일치하는 것이 없으면, 404 에러로 반환!
        path:"/:pathMatch(.*)*",
        component:NotFound
    }
]}

export default root;
3) Vue의 css Transition
- admin/menu/List.vue
<script setup>
import {ref} from 'vue'
  let showRcmdMenu = ref(false);
</script>

<template>
    <!-- ----------------------메인---------------------------- -->
    <main>
      <div class="tab-search-container">
        <div class="top-img-title">
          <h1>메뉴 관리</h1>
        </div>
        <!-- ----------------메뉴 탭 -->
        <div class="tab-search-wrap">
          <section class="tab-section">
            <h1>탭 목록</h1>
            <ul>
              <li class="selected"><a href="">전체메뉴</a></li>
              <li><a href="">커피</a></li>
              <li><a href="">수제청</a></li>
              <li><a href="">샌드위치</a></li>
              <li><a href="">쿠키</a></li>
            </ul>
          </section>
          <!-- --------------------------------------------------검색바 -->
          <section class="search-section">
            <h1>검색</h1>
            <form action="">
              <input type="text" value="" name="search" />
              <button type="submit" class="icon icon-search"></button>
            </form>
          </section>
        </div>
      </div>
      <div class="flex-align">
        <!-- ----------------상품추가 박스 모바일 -->
        <a href="../menu/reg.html" class="menu-add-box-mobile">
          <span class="icon icon-plus-circle"></span>
        </a>
        <!-- ----------------메뉴 목록 -->
        <section class="menu-edit-section">
          <h1 class="d-none">메뉴 목록</h1>
          <!-- ----------------상품추가 박스 pc -->
          <a href="../menu/reg.html" class="menu-add-box-pc">
            <span class="icon icon-plus-circle"></span>
          </a>

          <section class="menu">
            <div>
              <a href="../../anonymous/menu/detail.html">
                <img src="/image/espresso.svg" alt="에스프레소" />
              </a>
            </div>
            <h1>에스프레소</h1>
            <h2>Espresso</h2>
            <div>2,500원</div>
            <div>
              <a class="icon icon-arrow-up" @click.prevent="showRcmdMenu = !showRcmdMenu">추천메뉴 보기</a>
            </div>
            <div>
              <a href="" class="icon icon-lg icon-pencil">수정</a>
              <a href="" class="icon icon-lg icon-trash">삭제</a>
            </div>
          </section>
          <!-- ----------------추천메뉴 목록 -->
          <Transition>
          <section class="recommend-menu-section" v-if="showRcmdMenu">
            <div class="bl-2 pl-12 flex-cloumn-gap-12">
              <h1>추천 메뉴</h1>
              <section class="menu-delete-section">
                <h1 class="d-none">메뉴 목록</h1>
                <section class="menu">
                  <div>
                    <a href="">
                      <img src="/image/espresso.svg" alt="에스프레소" />
                    </a>
                  </div>
                  <h1>에스프레소</h1>
                  <h2>Espresso</h2>
                  <div>2,500원</div>
                  <div>
                    <a href="" class="icon icon-trash">삭제</a>
                  </div>
                </section>
                <section class="menu">
                  <div>
                    <a href="">
                      <img src="/image/espresso.svg" alt="에스프레소" />
                    </a>
                  </div>
                  <h1>에스프레소</h1>
                  <h2>Espresso</h2>
                  <div>2,500원</div>
                  <div>
                    <a href="" class="icon icon-trash">삭제</a>
                  </div>
                </section>
                <section class="menu">
                  <div>
                    <a href="">
                      <img src="/image/espresso.svg" alt="에스프레소" />
                    </a>
                  </div>
                  <h1>에스프레소</h1>
                  <h2>Espresso</h2>
                  <div>2,500원</div>
                  <div>
                    <a href="" class="icon icon-trash">삭제</a>
                  </div>
                </section>

                <!-- ----------------상품추가 박스 pc small-->
                <a href="../menu/reg.html" class="menu-add-box-pc-sm">
                  <span class="icon icon-plus-circle"></span>
                </a>
                <!-- ----------------상품추가 박스 모바일 -->
                <a href="../menu/reg.html" class="menu-add-box-mobile">
                  <span class="icon icon-plus-circle"></span>
                </a>
              </section>
            </div>
          </section>
        </Transition>
          <section class="menu">
            <div>
              <a href="../../anonymous/menu/detail.html">
                <img src="/image/espresso.svg" alt="에스프레소" />
              </a>
            </div>
            <h1>에스프레소</h1>
            <h2>Espresso</h2>
            <div>2,500원</div>
            <div>
              <a class="icon icon-arrow-up">추천메뉴 보기</a>
            </div>
            <div>
              <a href="" class="icon icon-lg icon-pencil">수정</a>
              <a href="" class="icon icon-lg icon-trash">삭제</a>
            </div>
          </section>

          <section class="menu">
            <div>
              <a href="">
                <img src="/image/espresso.svg" alt="에스프레소" />
              </a>
            </div>
            <h1>에스프레소</h1>
            <h2>Espresso</h2>
            <div>2,500원</div>
            <div>
              <a class="icon icon-arrow-up">추천메뉴 보기</a>
            </div>
            <div>
              <a href="" class="icon icon-lg icon-pencil">수정</a>
              <a href="" class="icon icon-lg icon-trash">삭제</a>
            </div>
          </section>
        </section>
      </div>
    </main>
</template>

<style scoped>
  @import url(/css/menu.css);
  @import url(/css/admin/menu/list.css);

  /* vue용 css 트랜지션 이용!*** */
  /* 여기 v-로 시작하는 태그는 익명의 이름으로 스타일을 줄 때, 사용한다. */
  /* 이름을 부여하고 싶으면 Transition 속성인 name 속성에다가 추가한다.  */
  .v-enter-active,
  .v-leave-active {
    transition: opacity 0.5s ease;
  }

  .v-enter-from,
  .v-leave-to {
    opacity: 0;
  }
</style>
4. Vue3 css Transition : 230510
- 페이지 이동시 마다 Transition 이벤트 걸어주기!
<script setup>
import Header from './Header.vue';
import Footer from './Footer.vue';
import Aside from './Aside.vue';
</script>

<template>
    <Header />
    <Aside />
        <Transition>
           <router-view></router-view>
        </Transition>
    <Footer />
      <!-- 메인페이지 가운데 빗금 문양 -->
      <div class="slash-background">
        <div></div>
        <div></div>
        <div></div>
      </div>
</template>

<style scoped>

.v-enter-active,
.v-leave-active {
  transition: opacity 3s ease;
}

.v-enter-from,
.v-leave-to {
  opacity: 0;
}


</style>
5. OAuth2 : 230512
1) Open Auth 개념
-
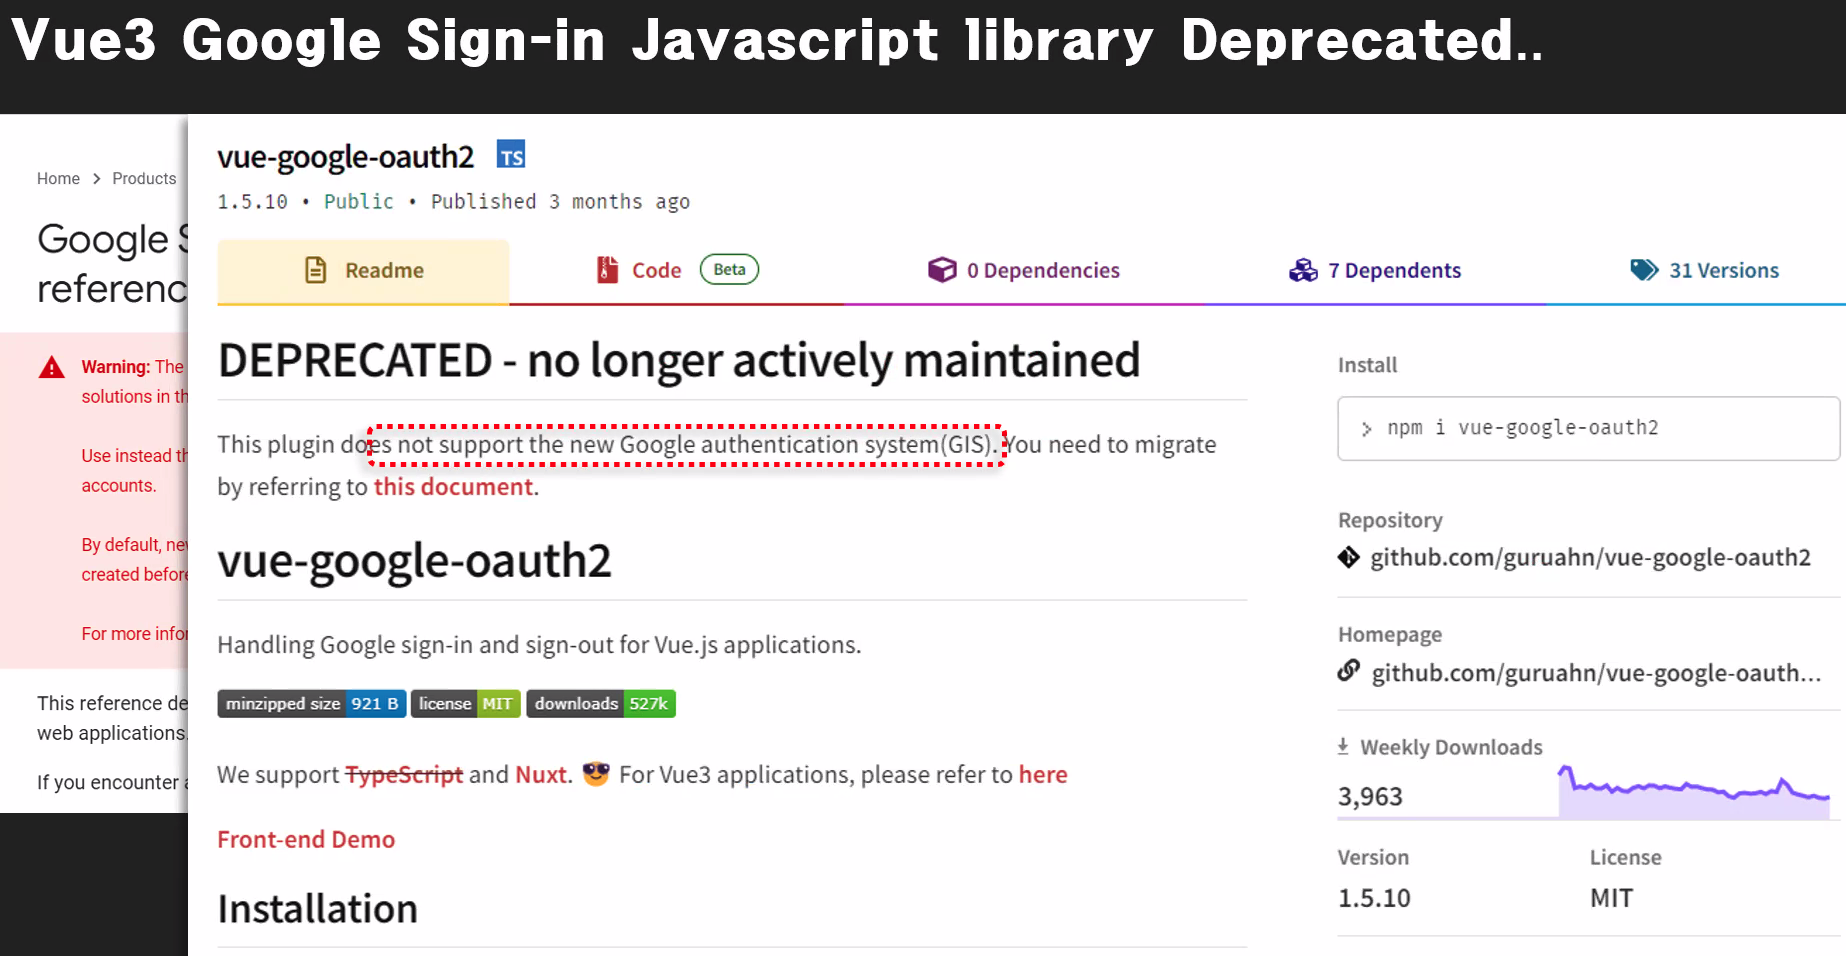
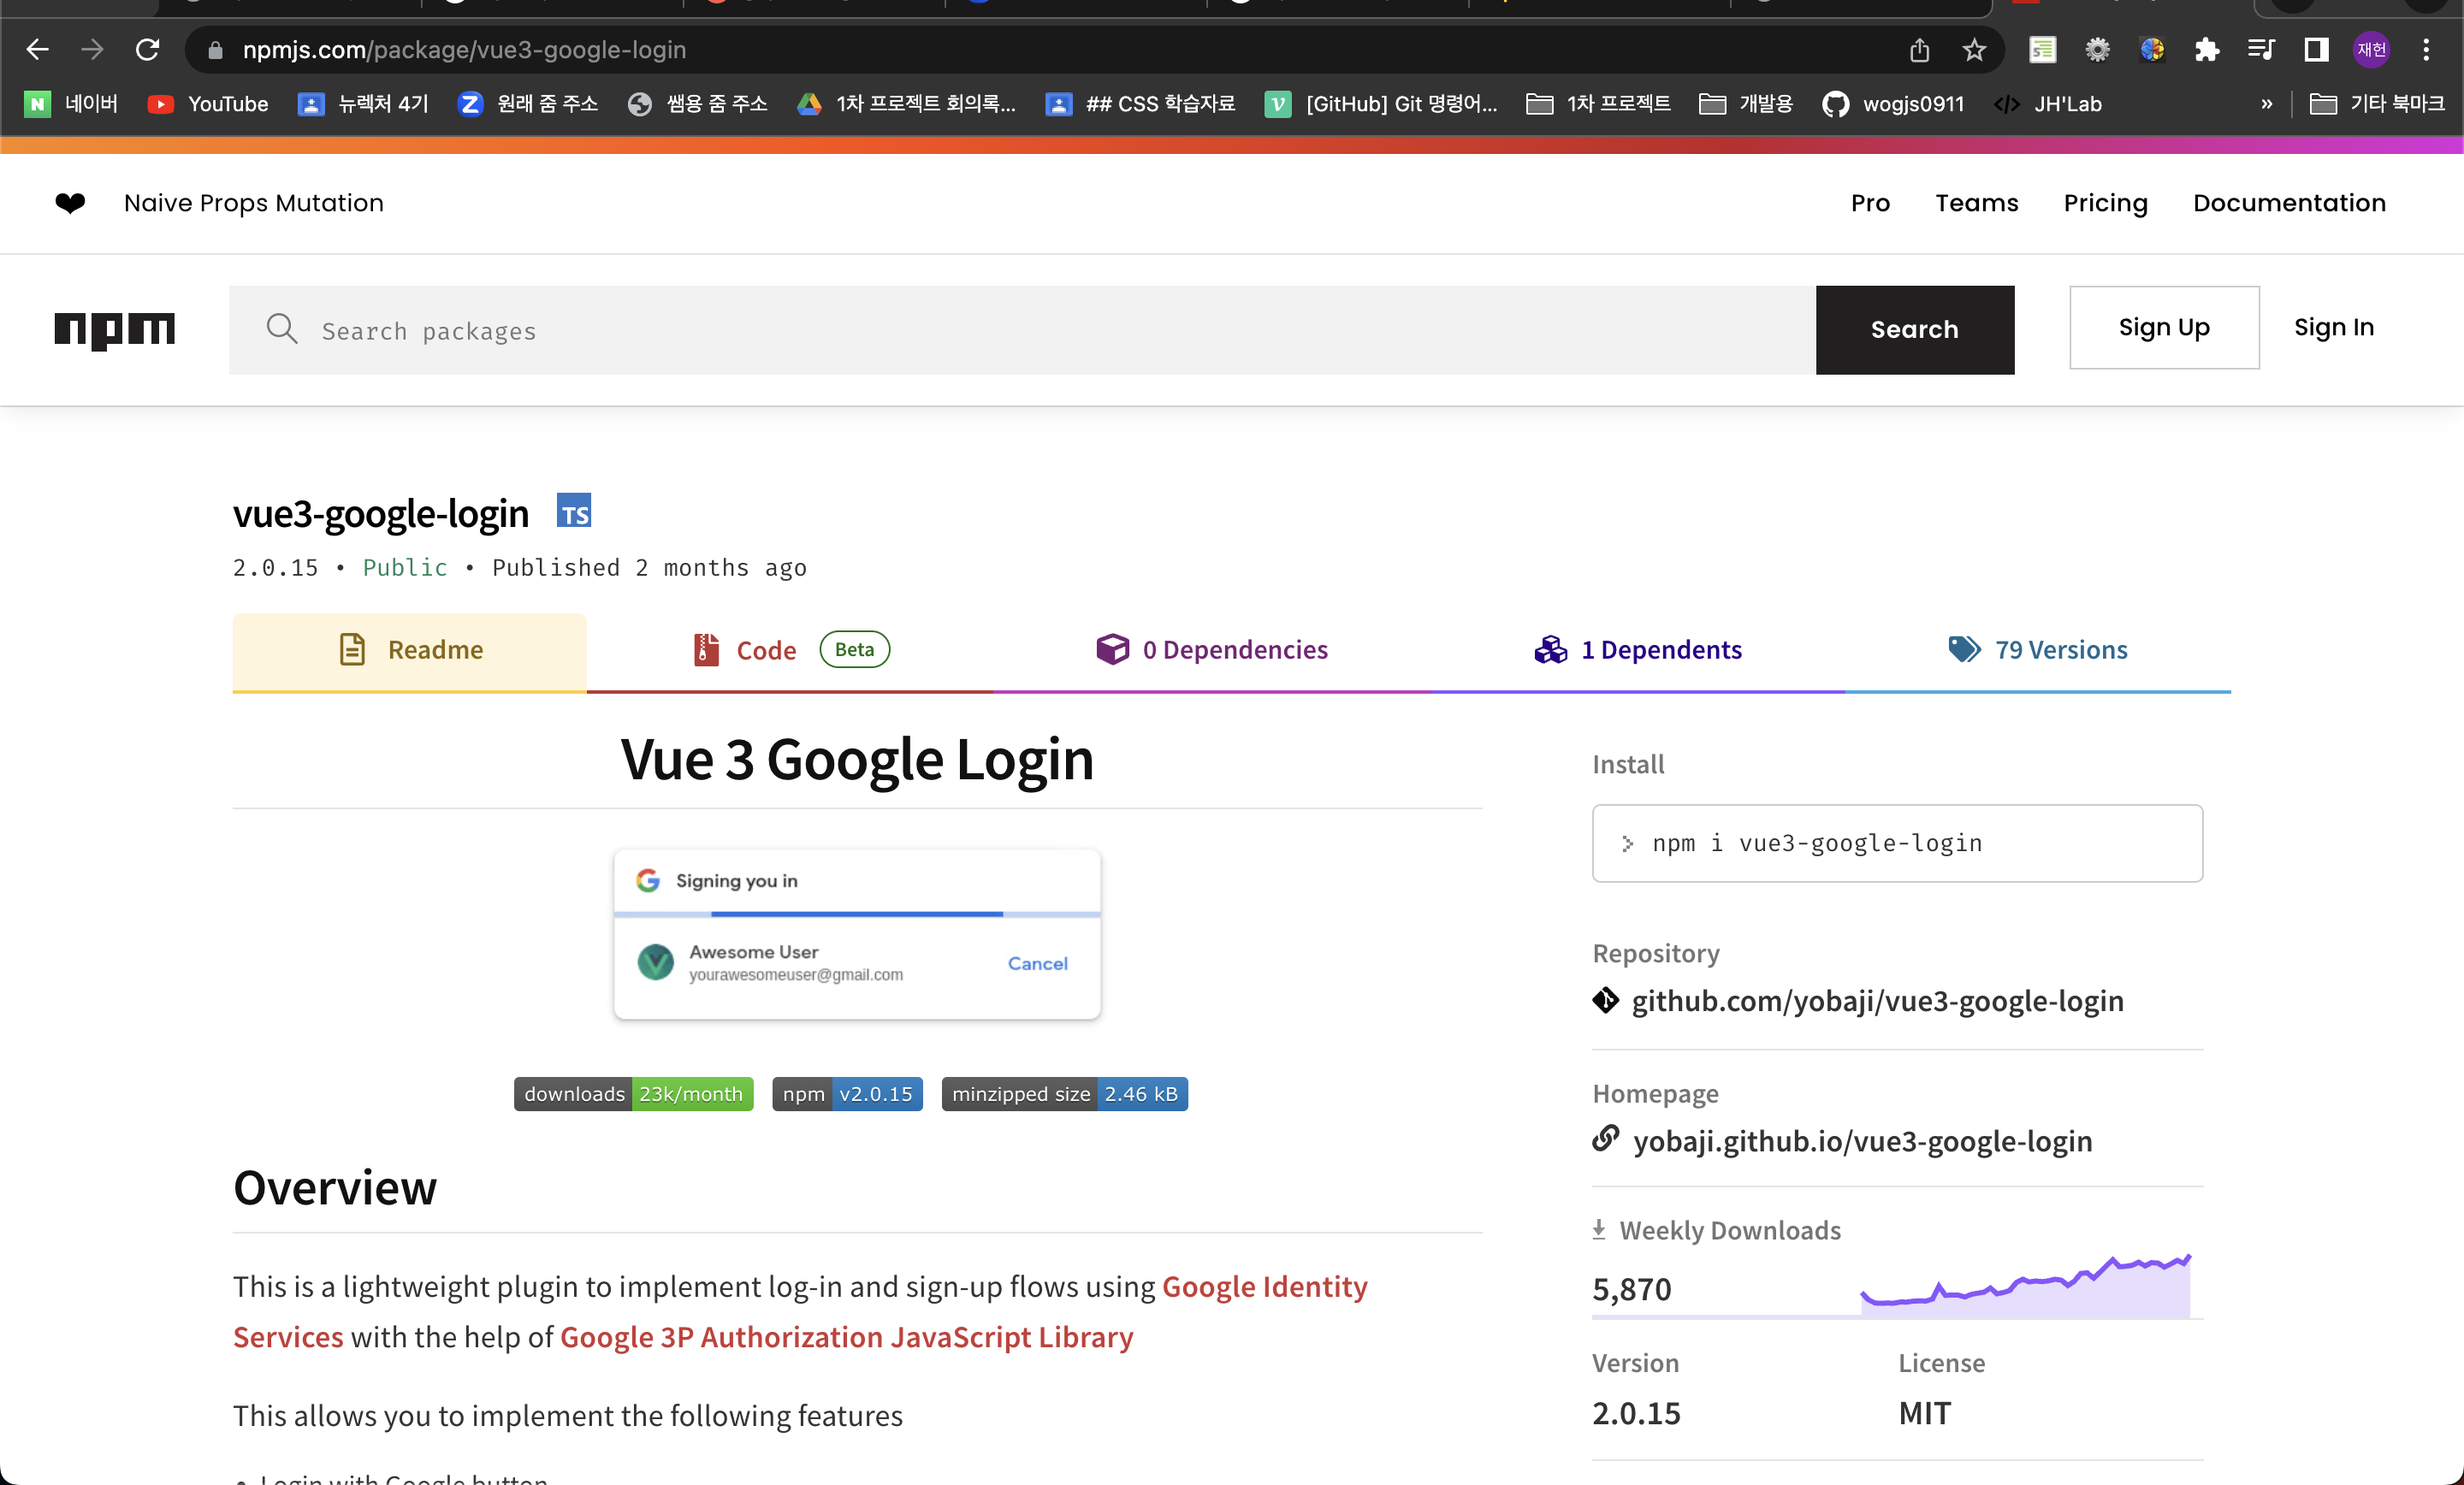
Vue3에서 이전에는 구글 로그인을 위해서
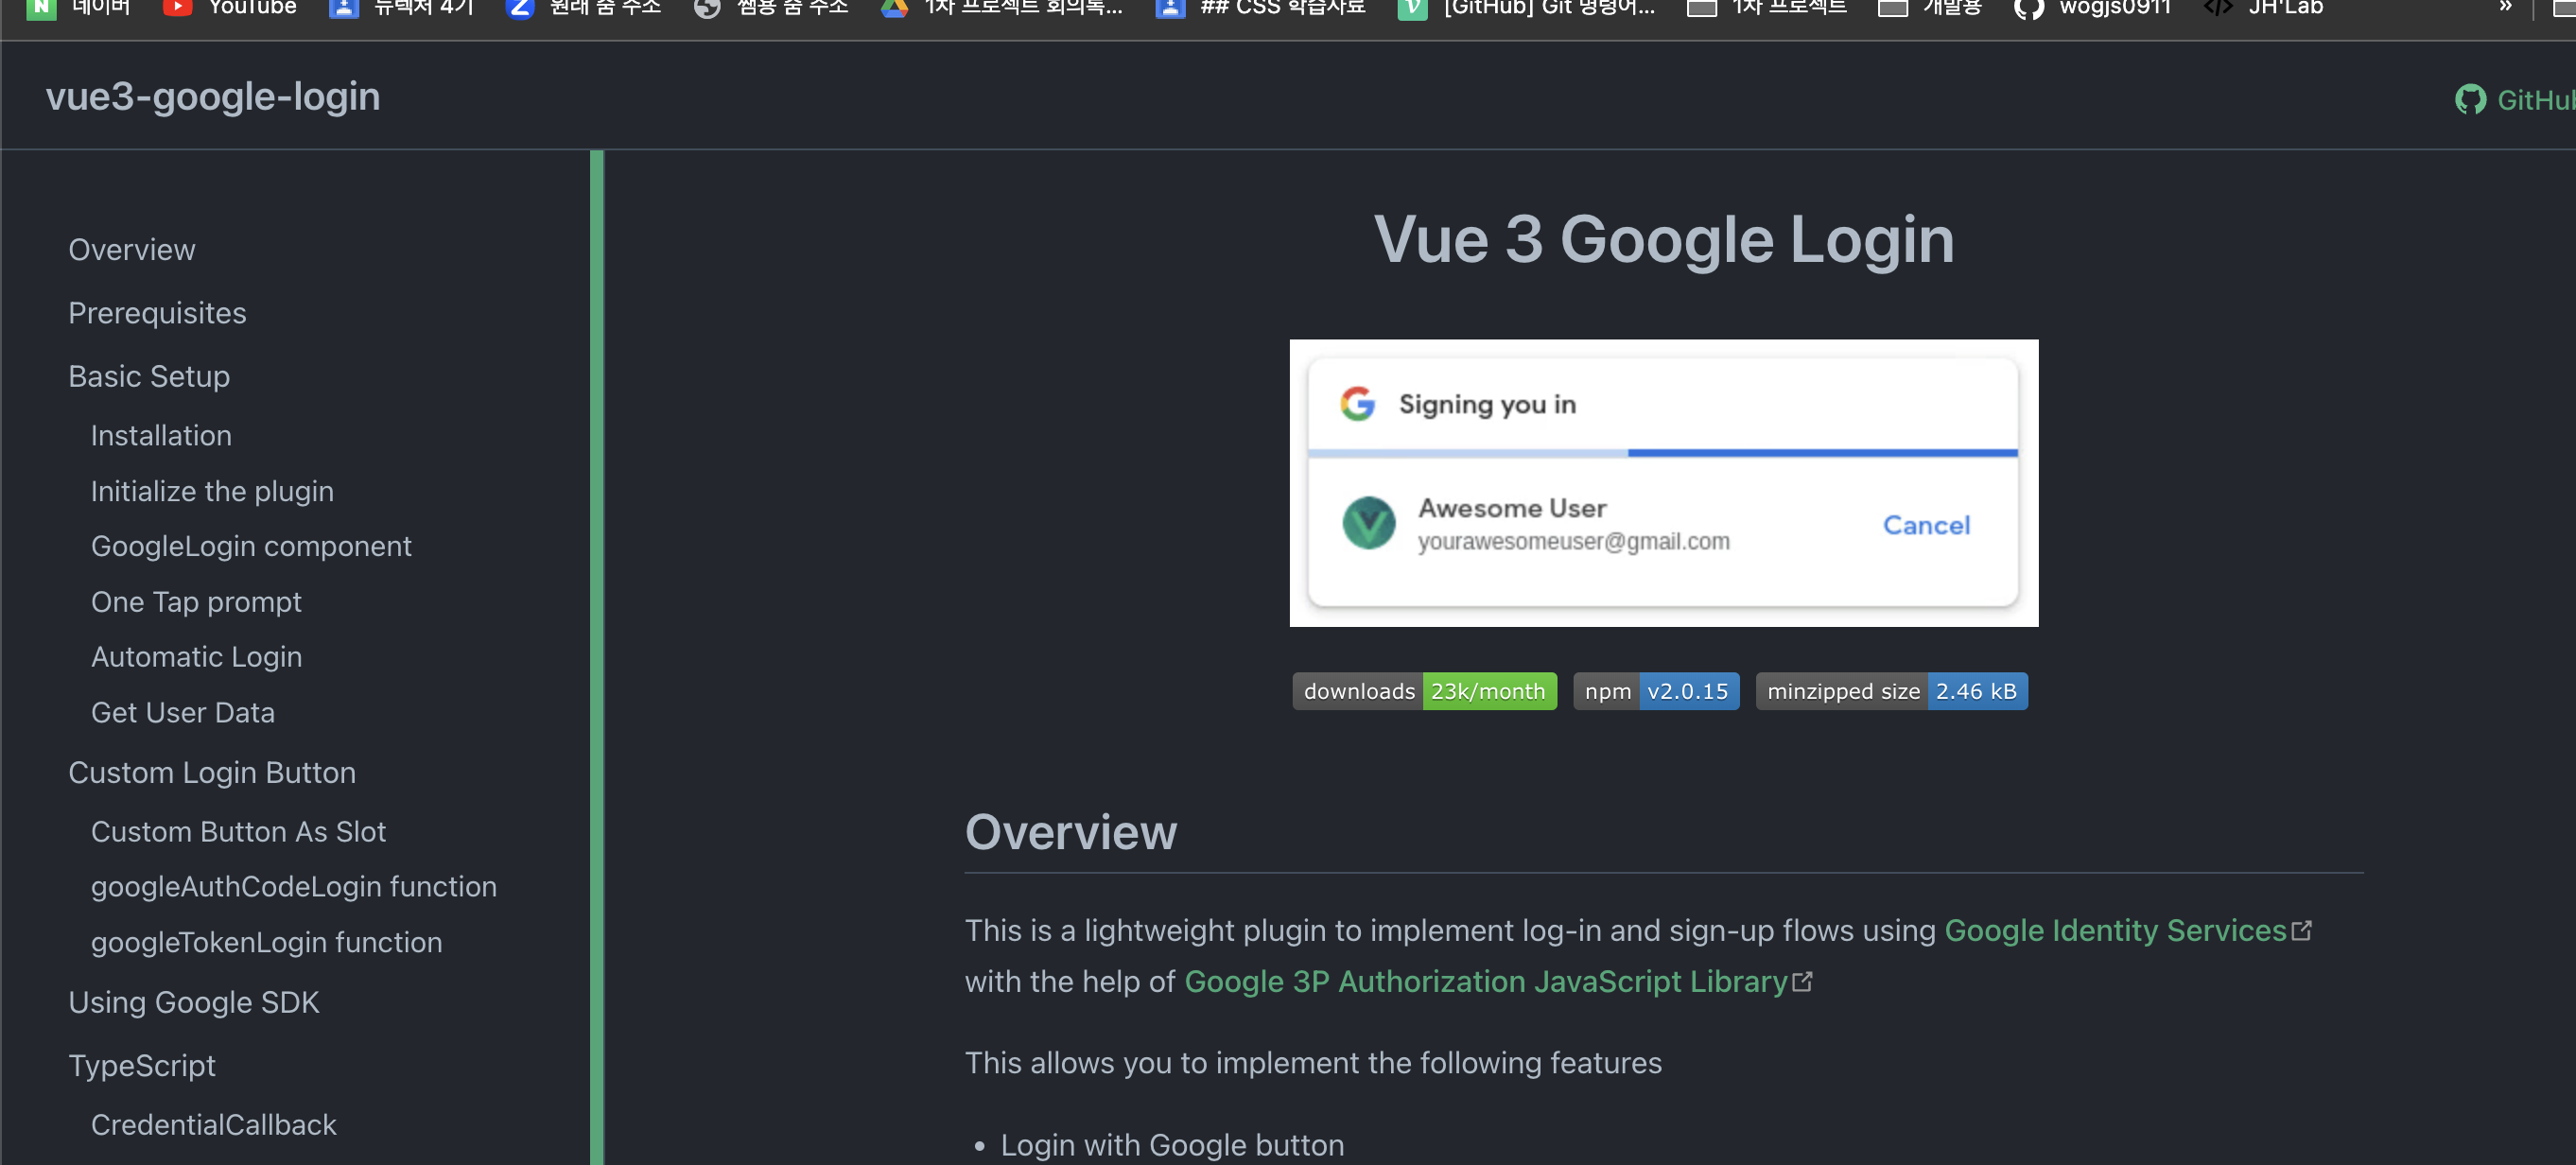
vue-google-oauth2라이브러리를 이용했지만 더 이상 지원하지 않아서 -
이제는
vue3-google-login라이브러리를 이용하기!!!** -
추후에는 Spring Boot에서 구글 로그인도 할 예정이다.
a. 변경 되기 전의 라이브러리
b. 변경된 후의 라이브러리
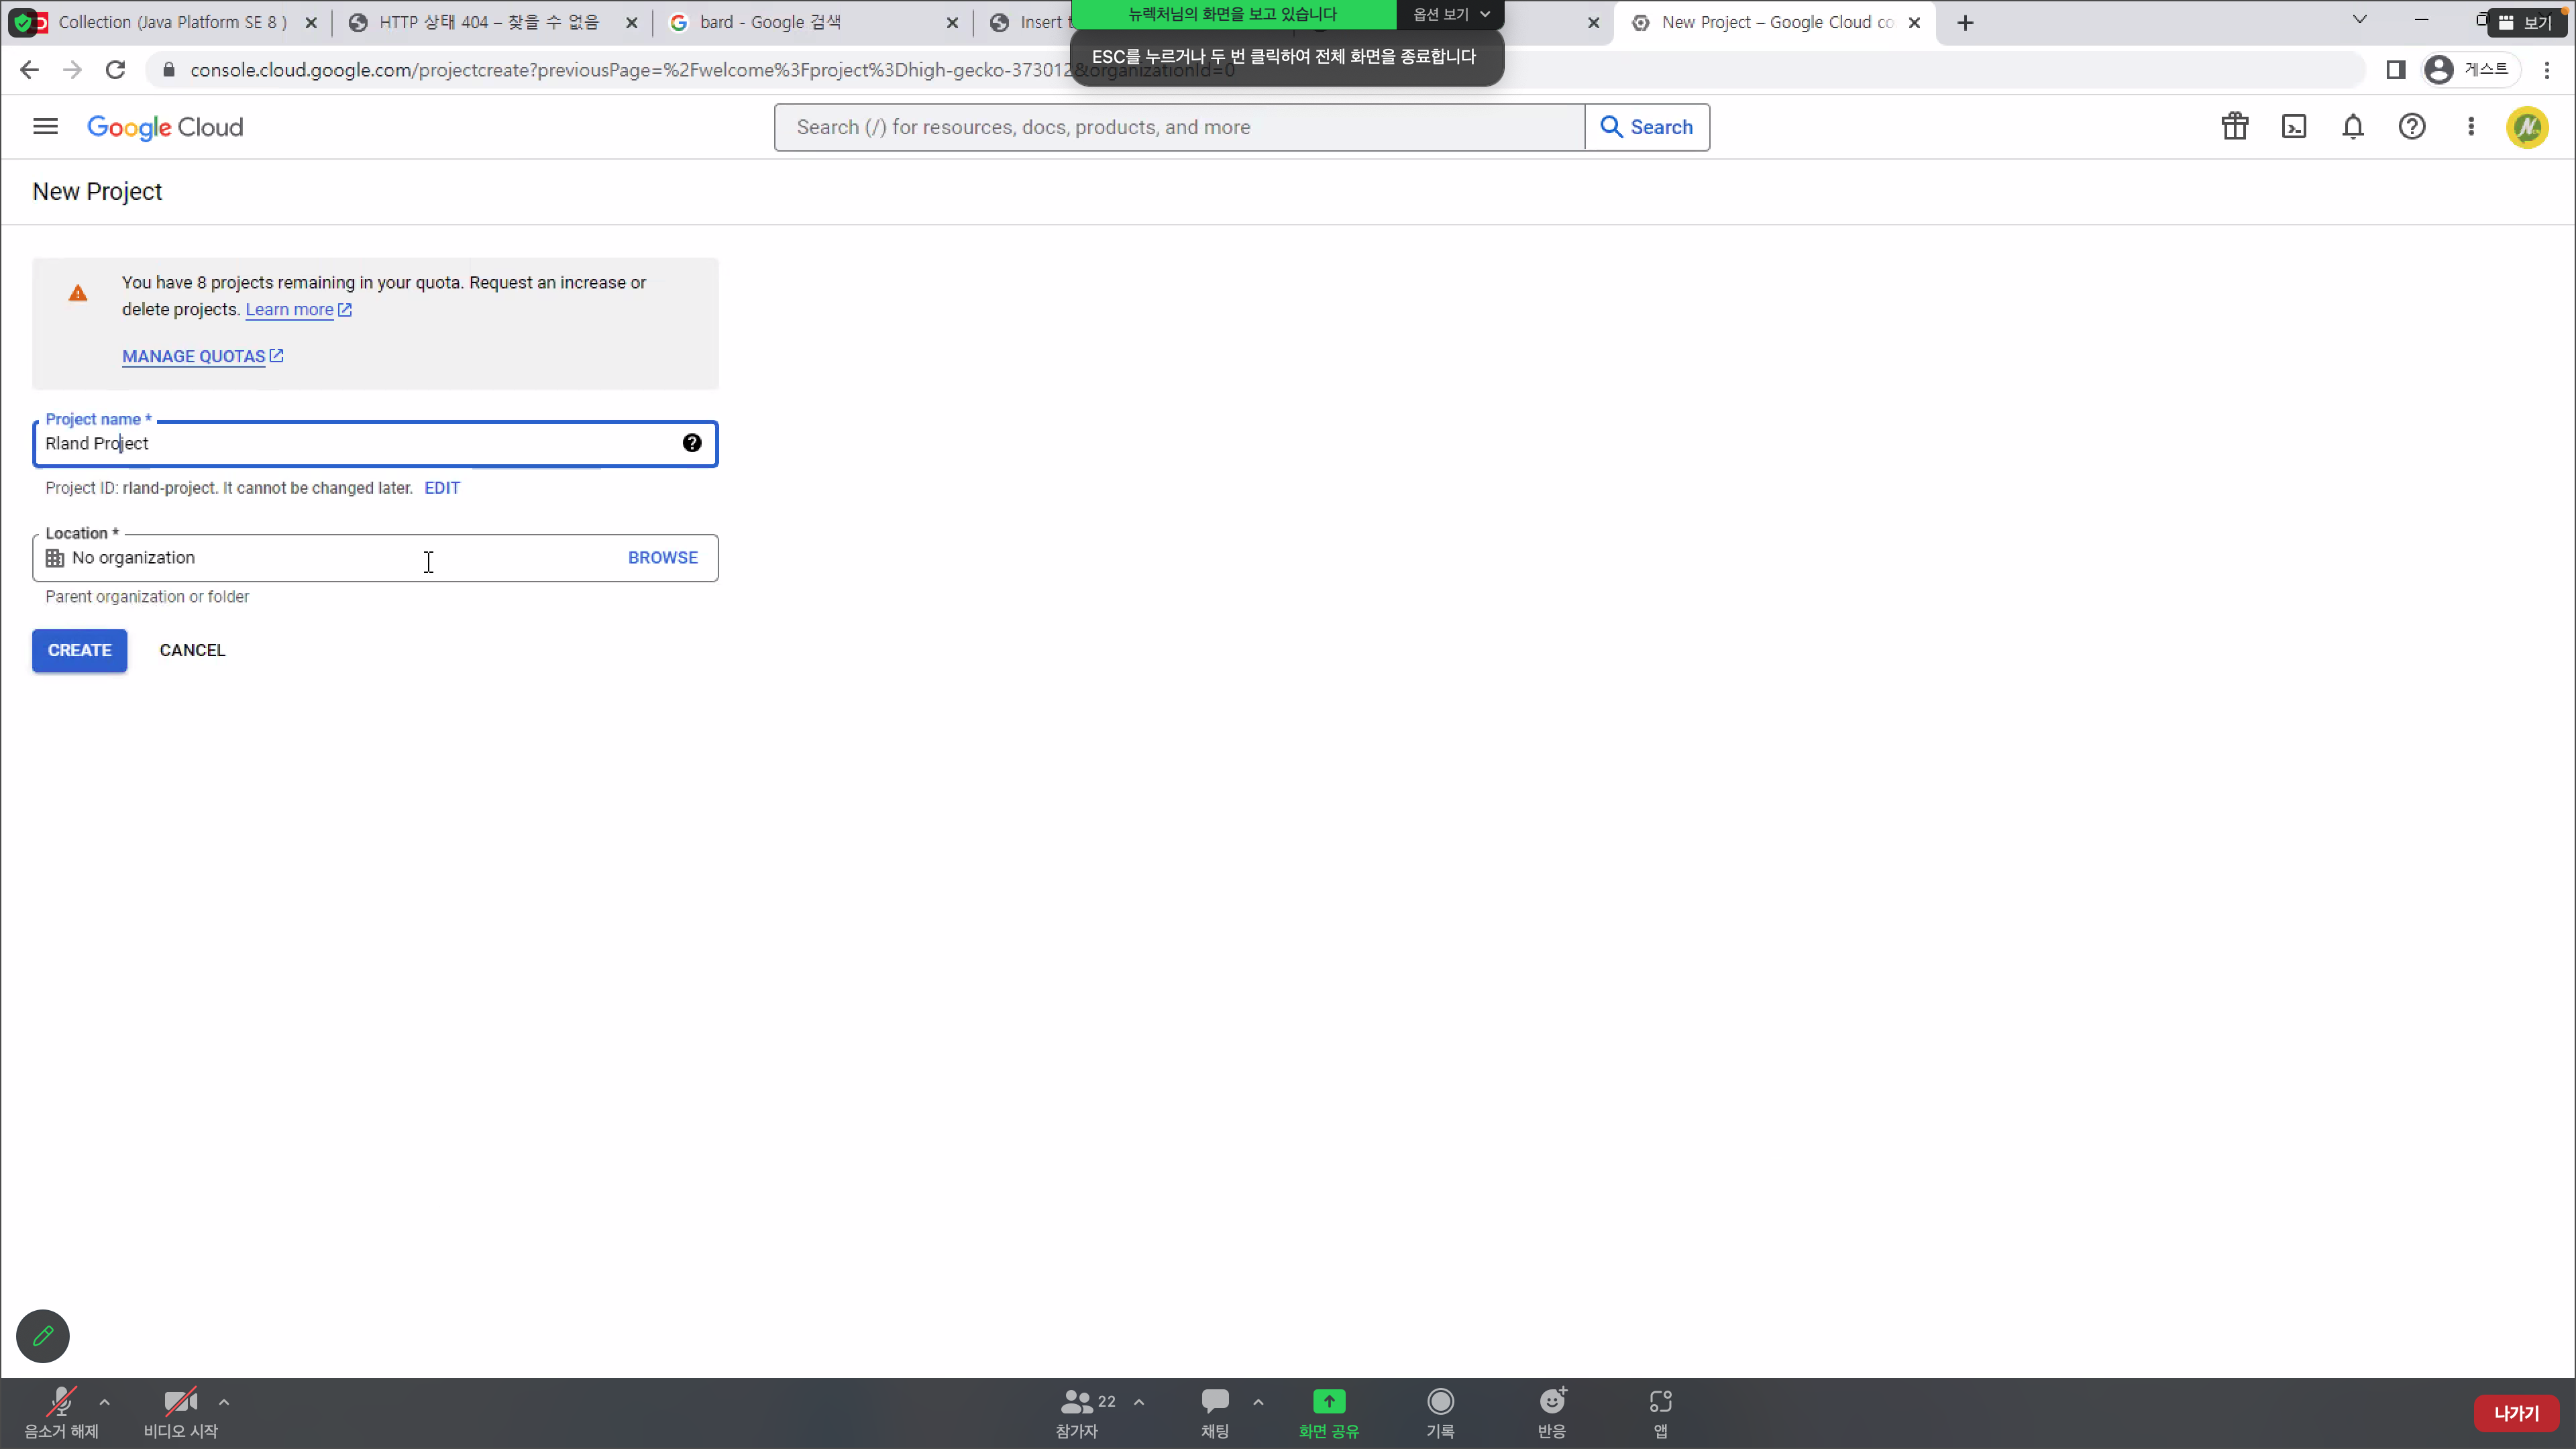
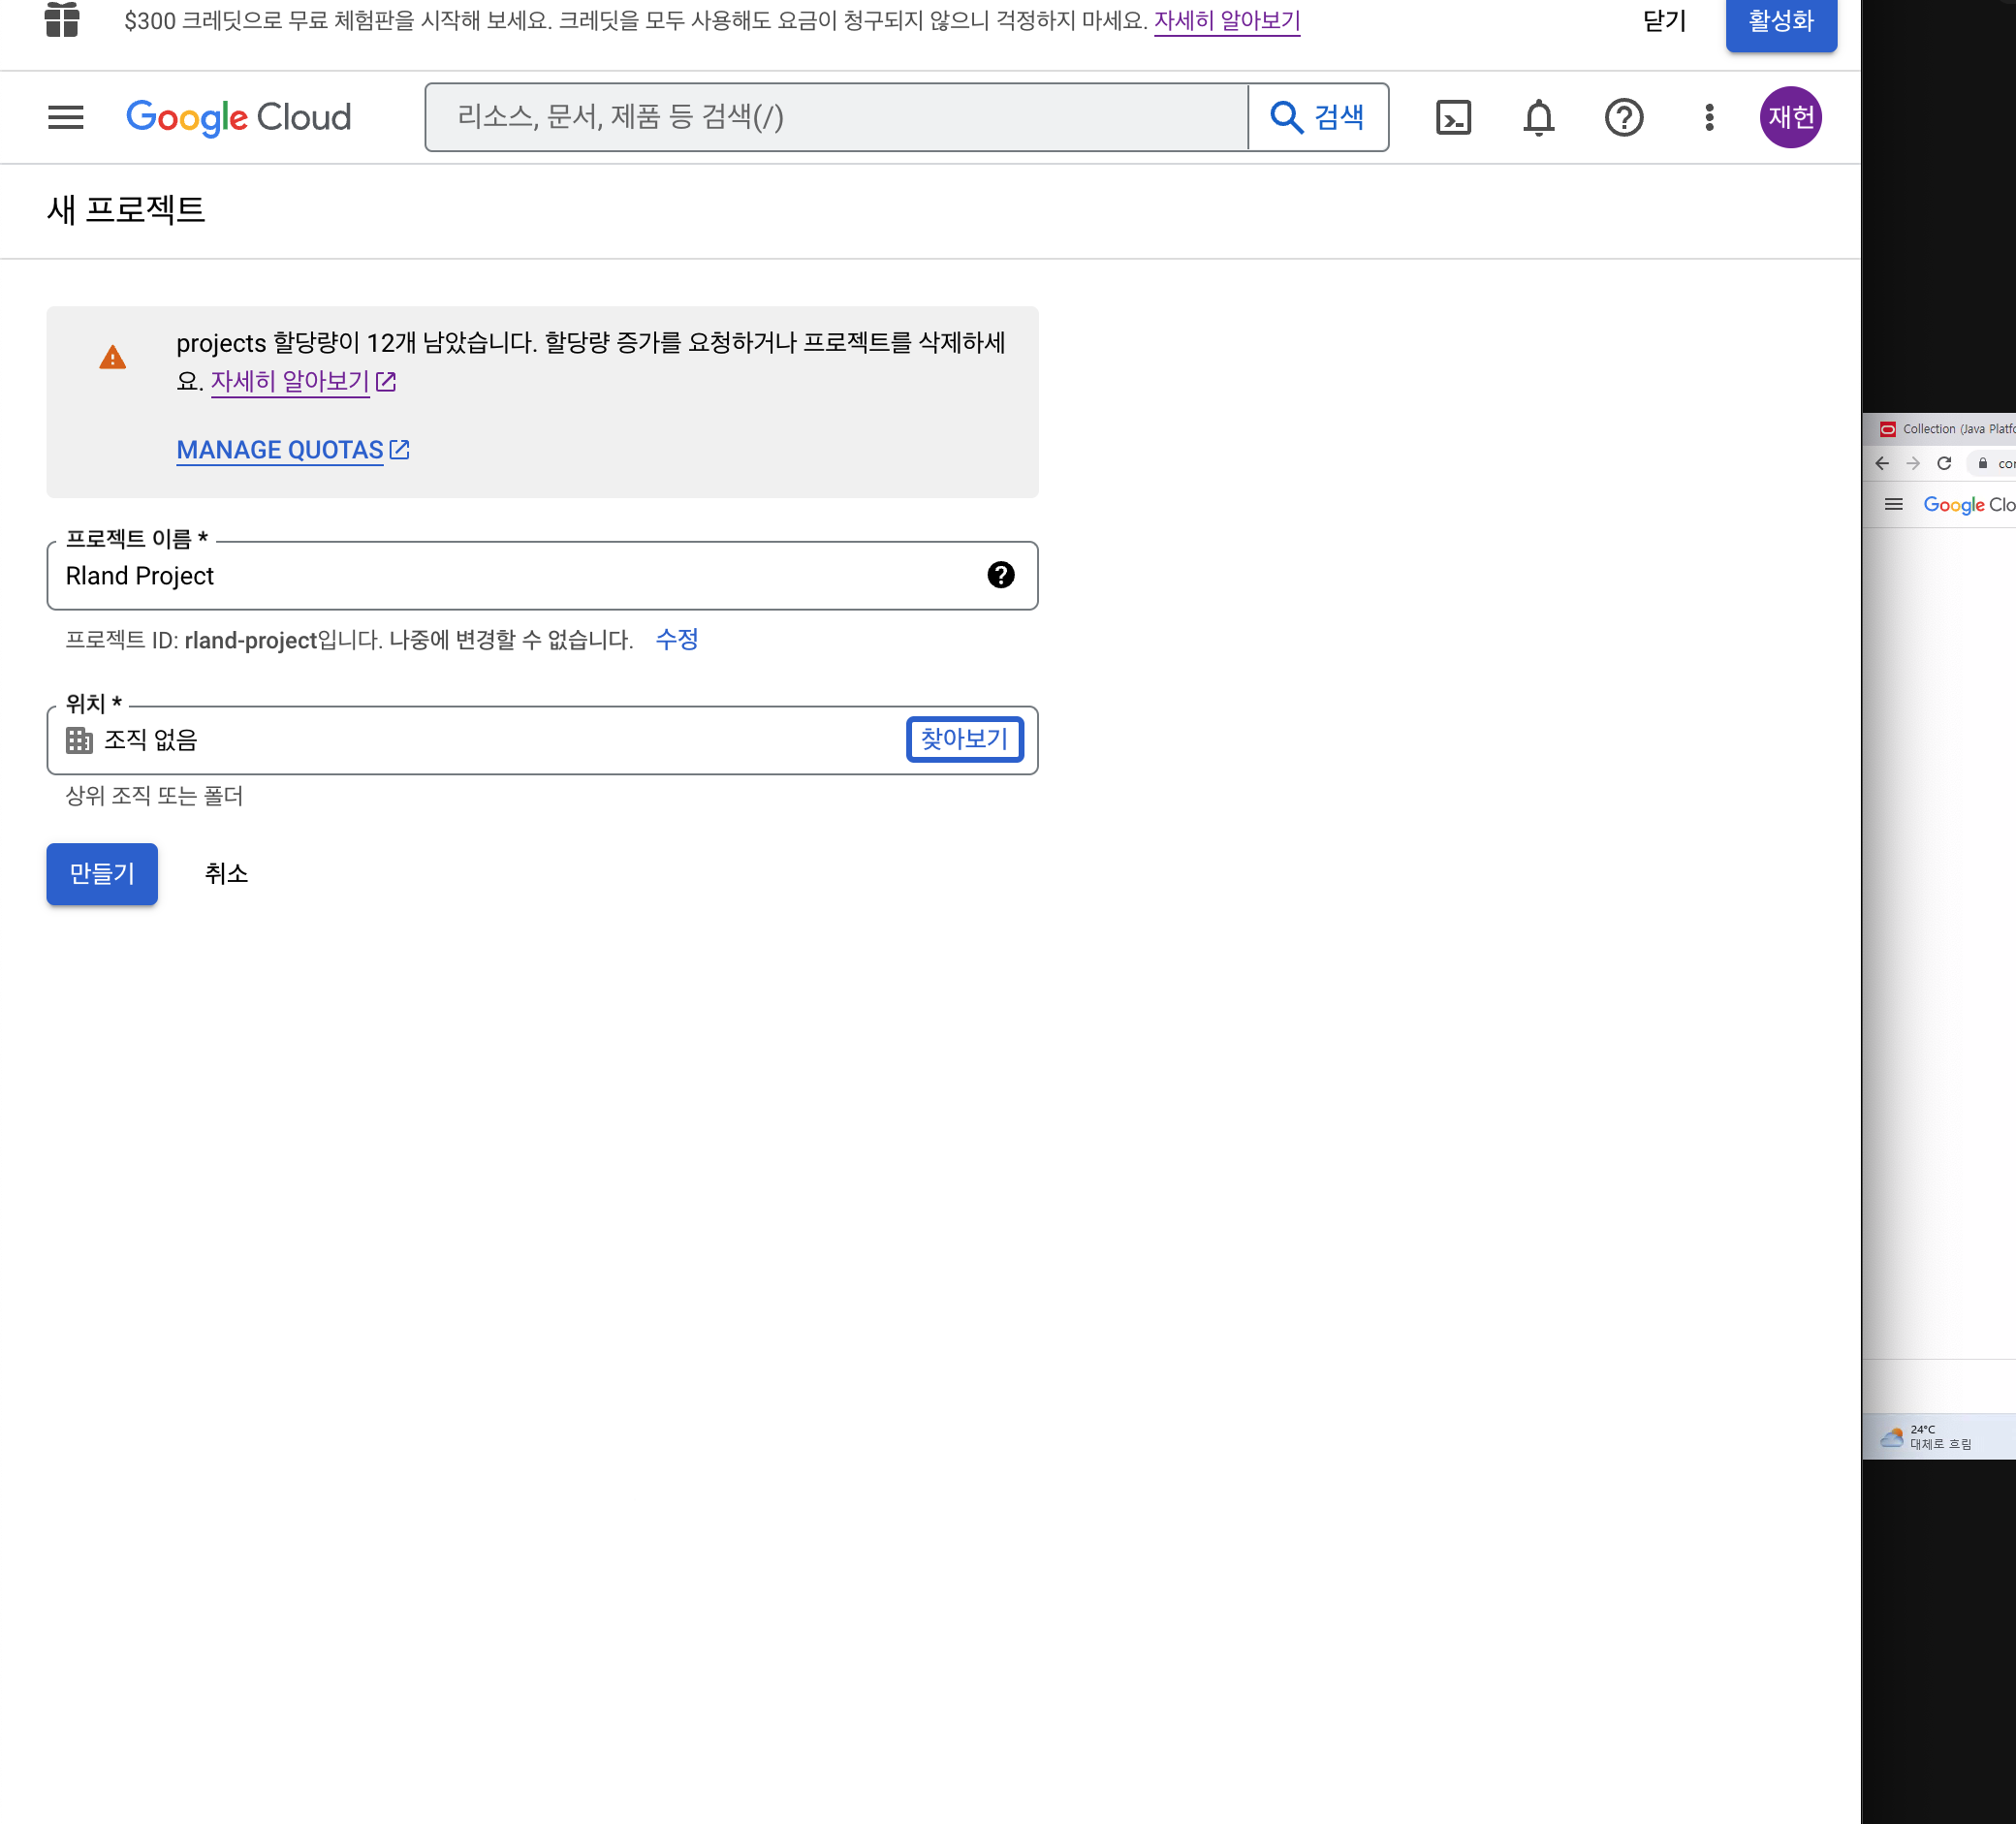
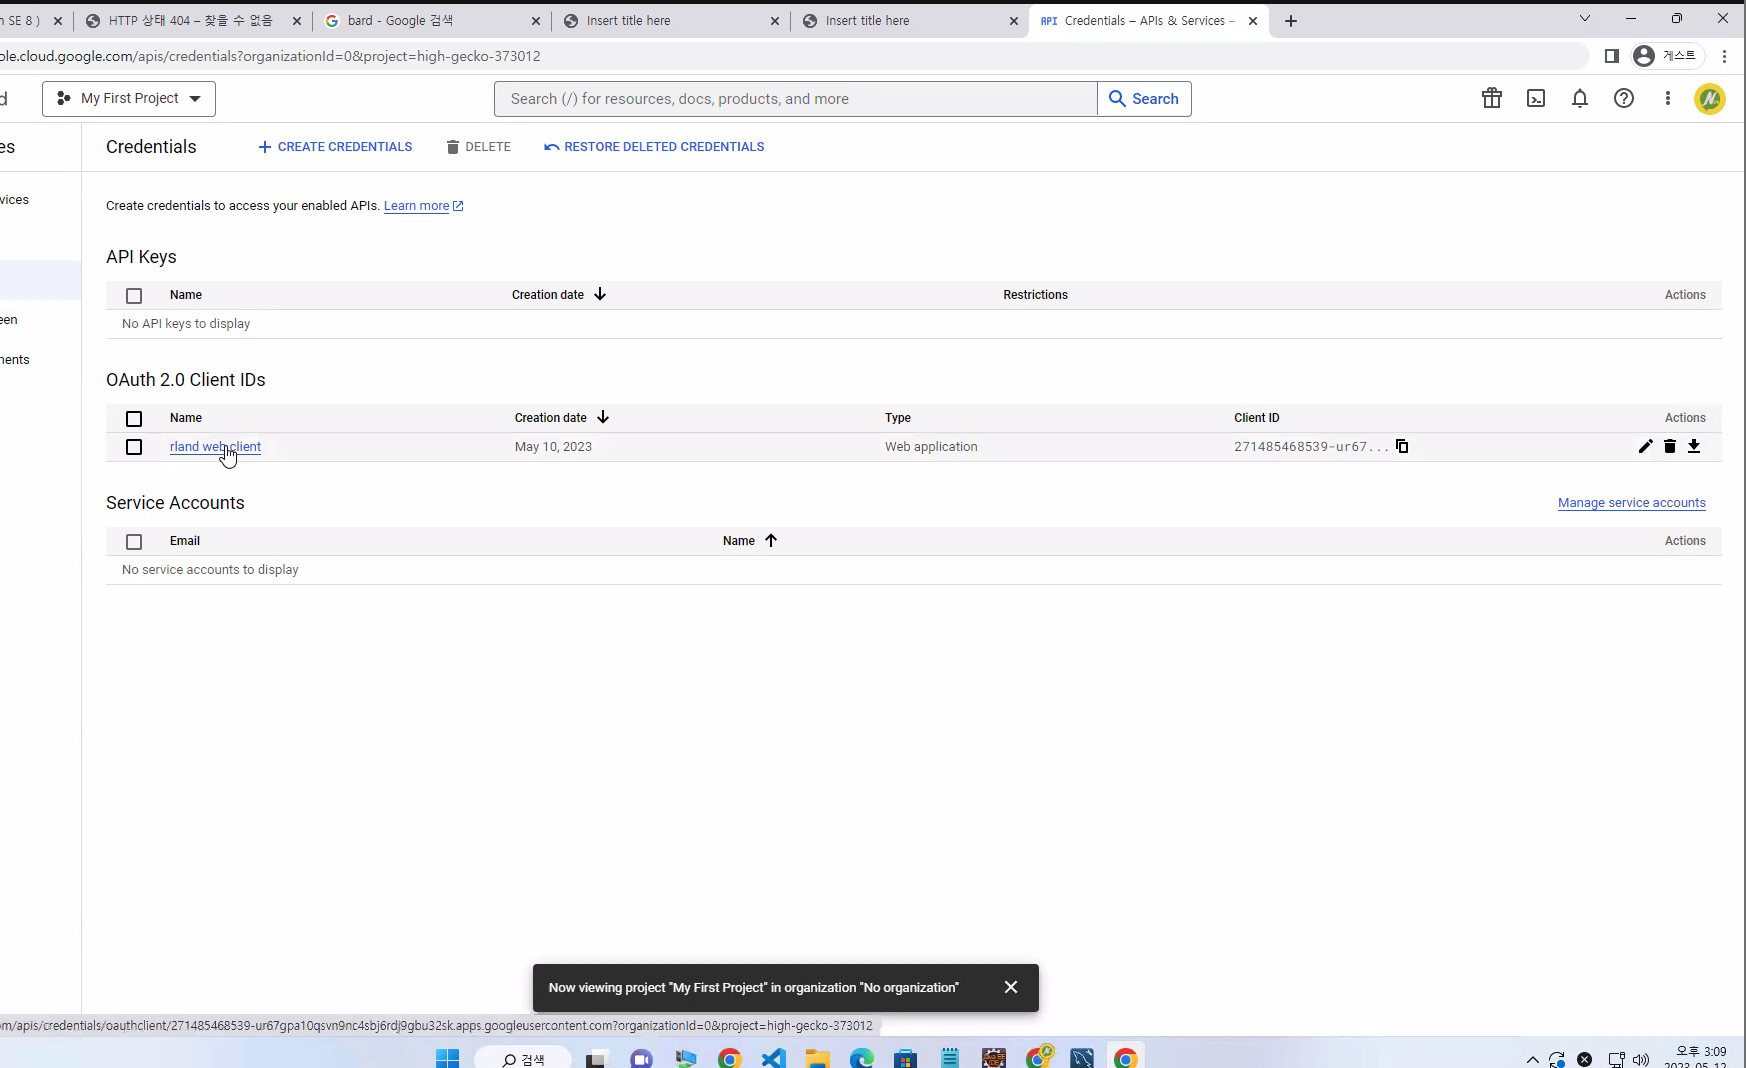
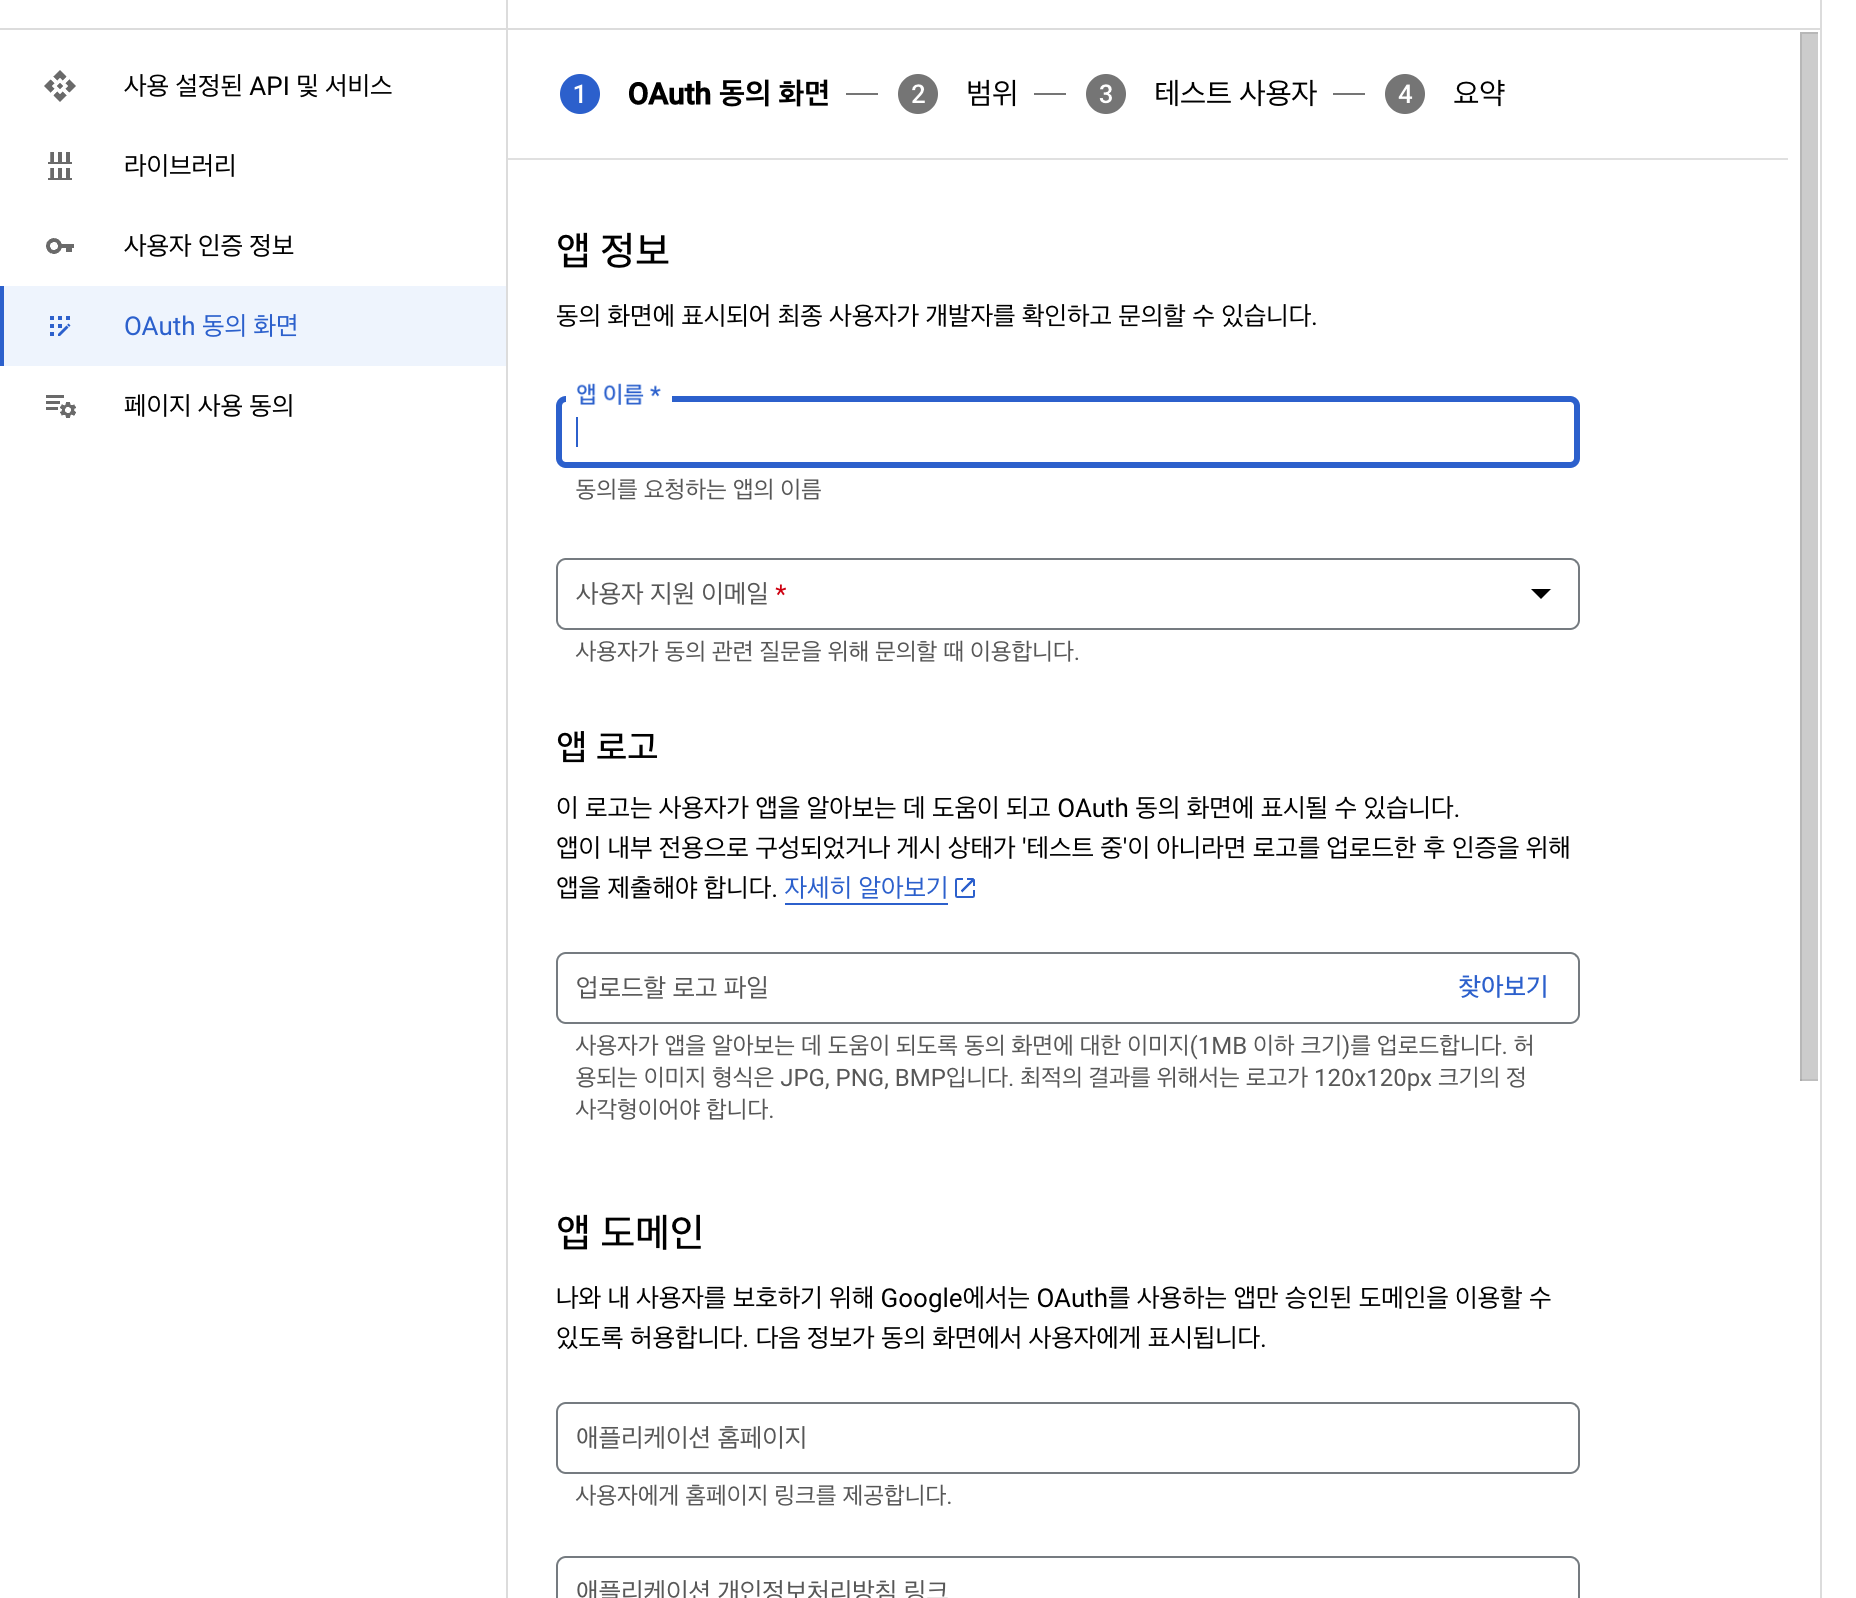
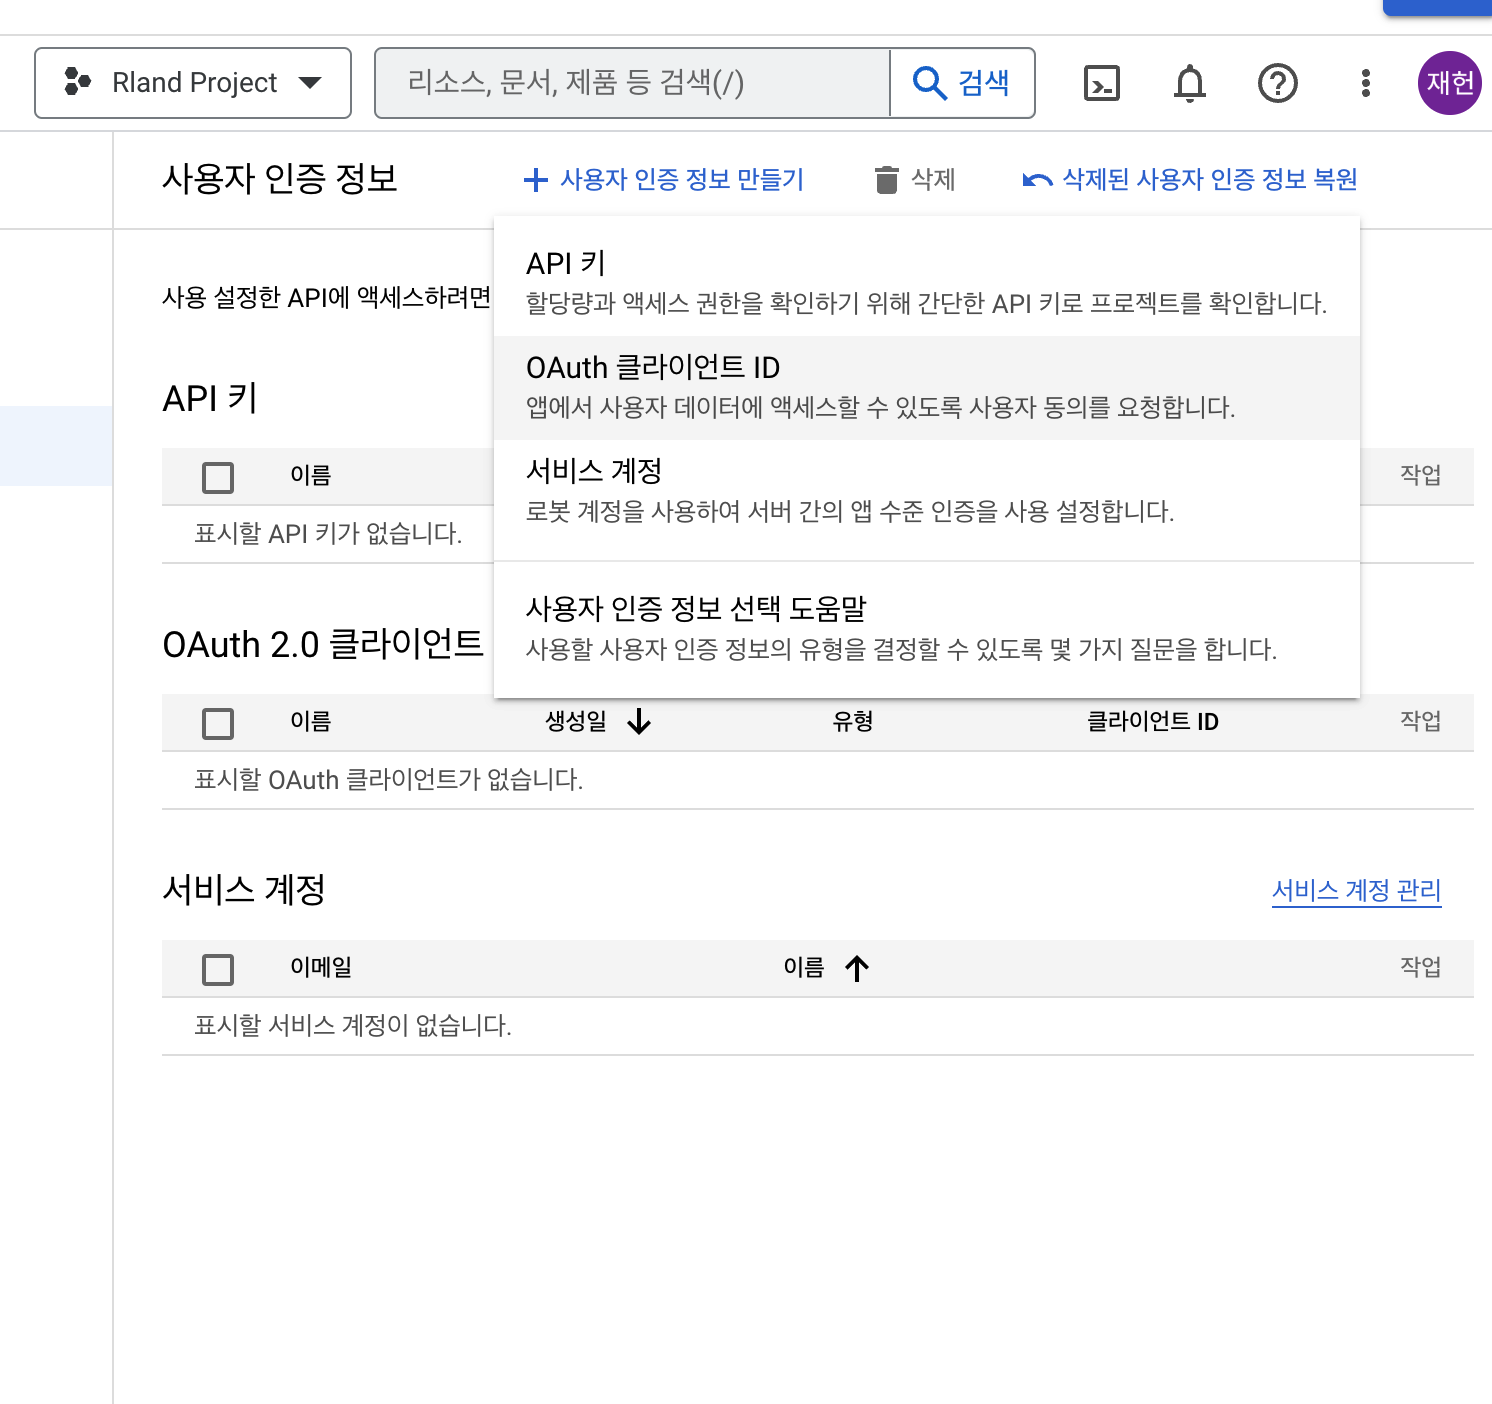
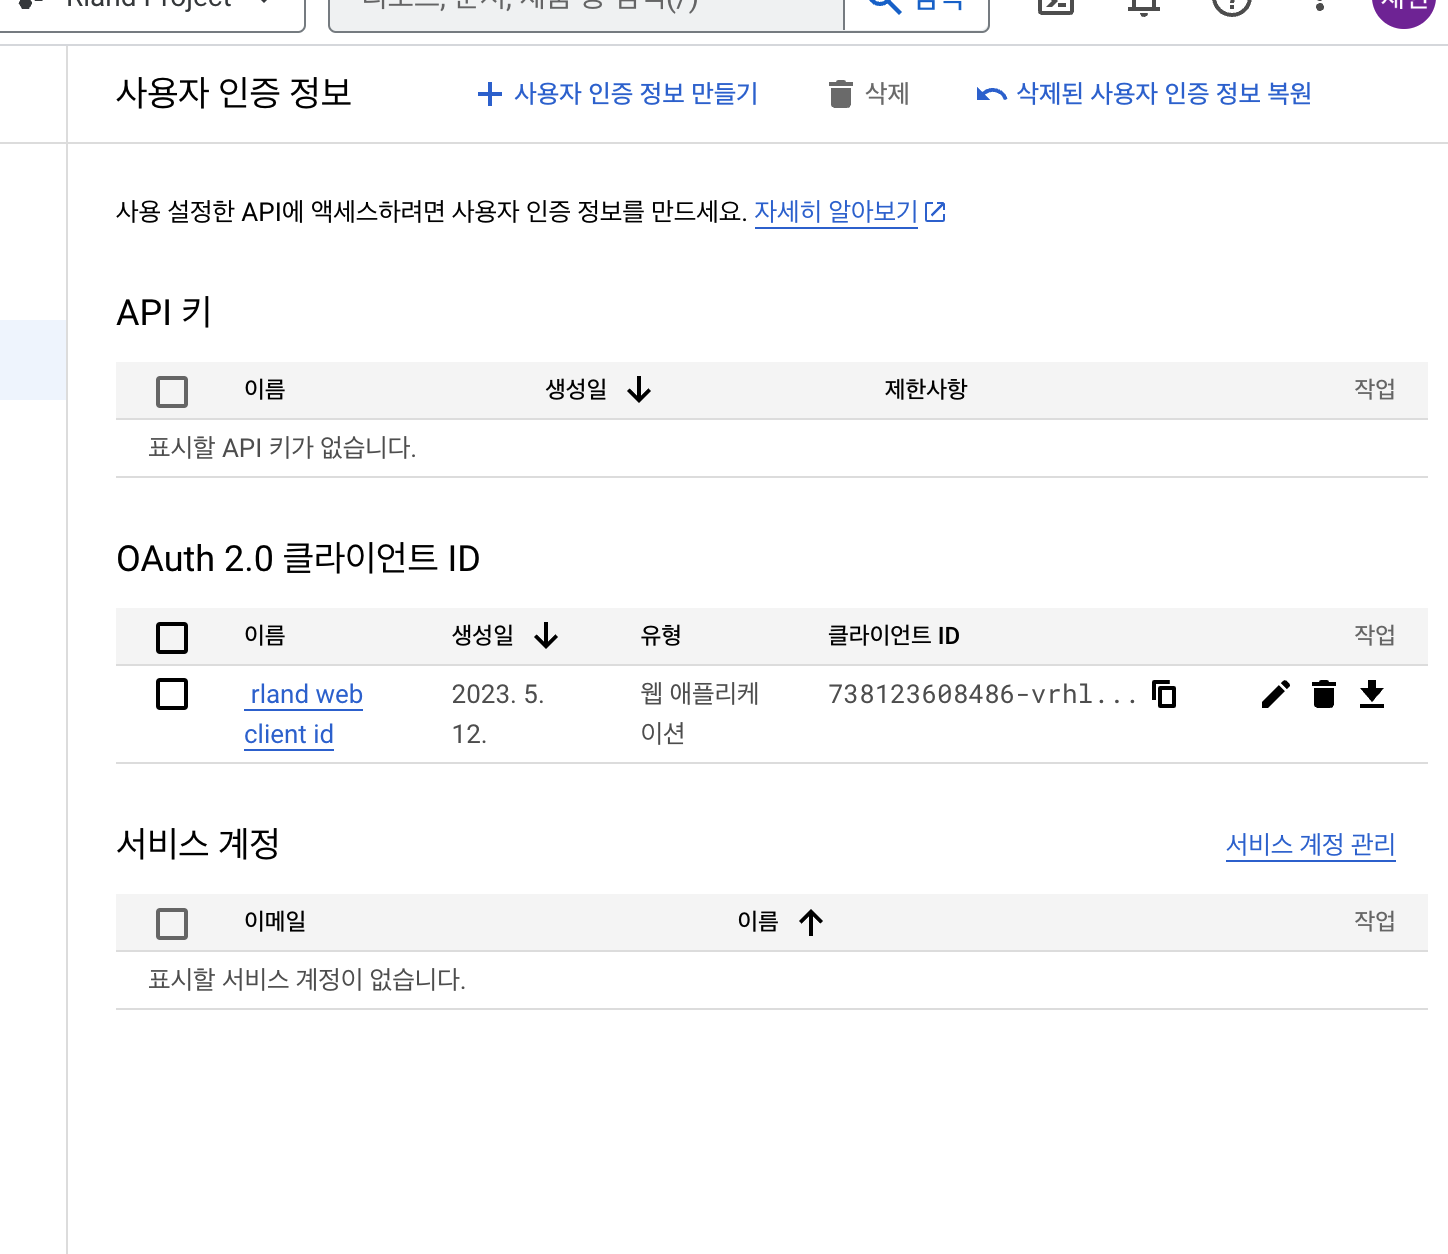
2) Google OAuth2 설정하기
- console.cloud.google.com 사이트에 들어가서 설정하기
a. ‘콘솔 클라우드 구글’에서 ‘Google OAuth2’ 설정하기 1
- ‘콘솔 클라우드 구글’에서 ‘새 프로젝트 설정’하기
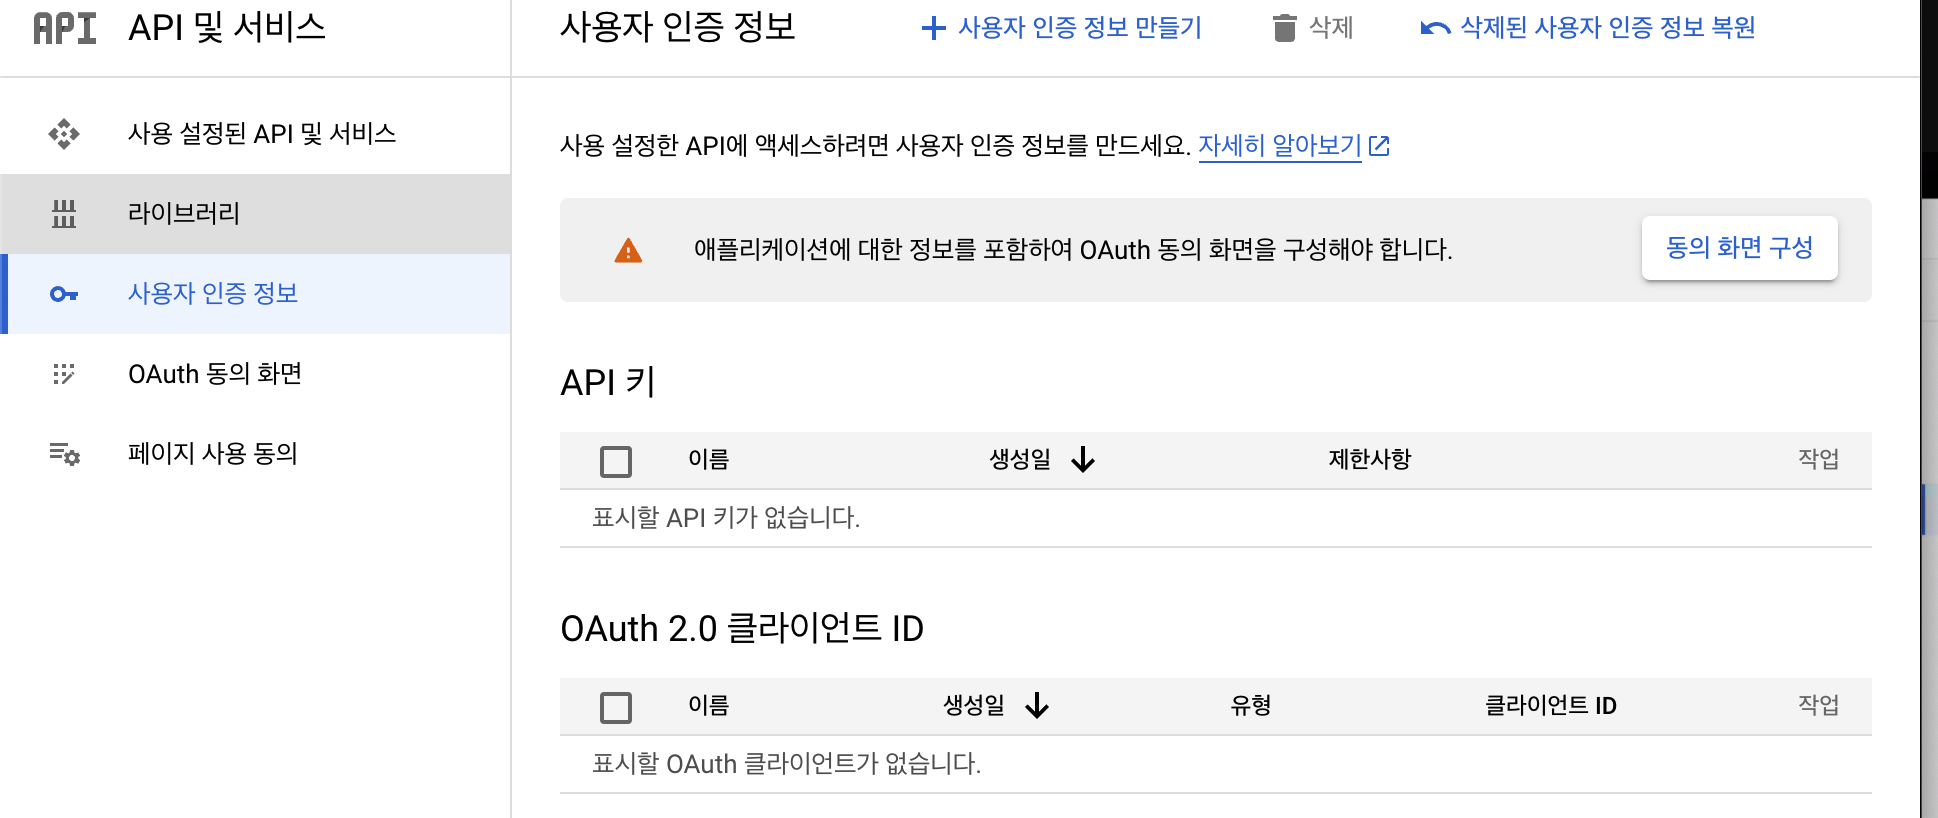
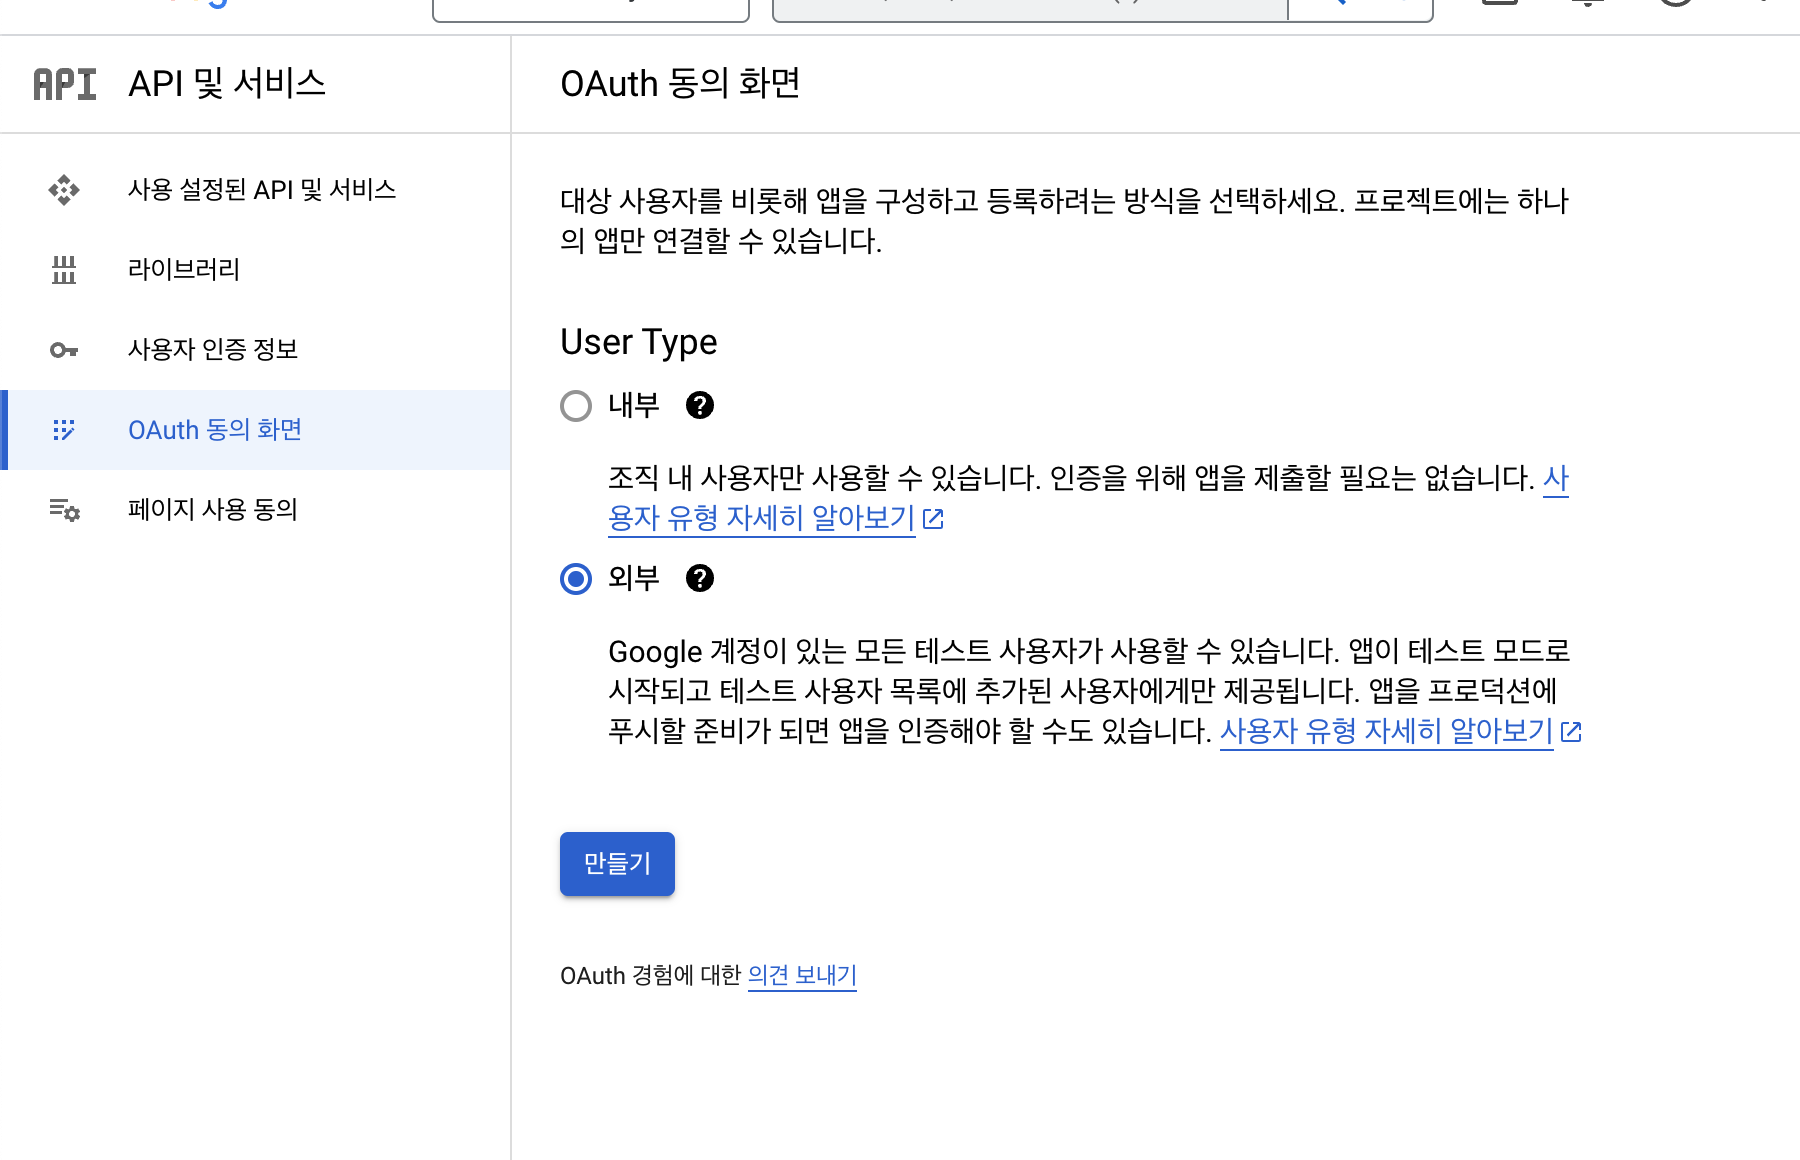
b. ‘콘솔 클라우드 구글’에서 ‘Google OAuth2’ 설정하기 2
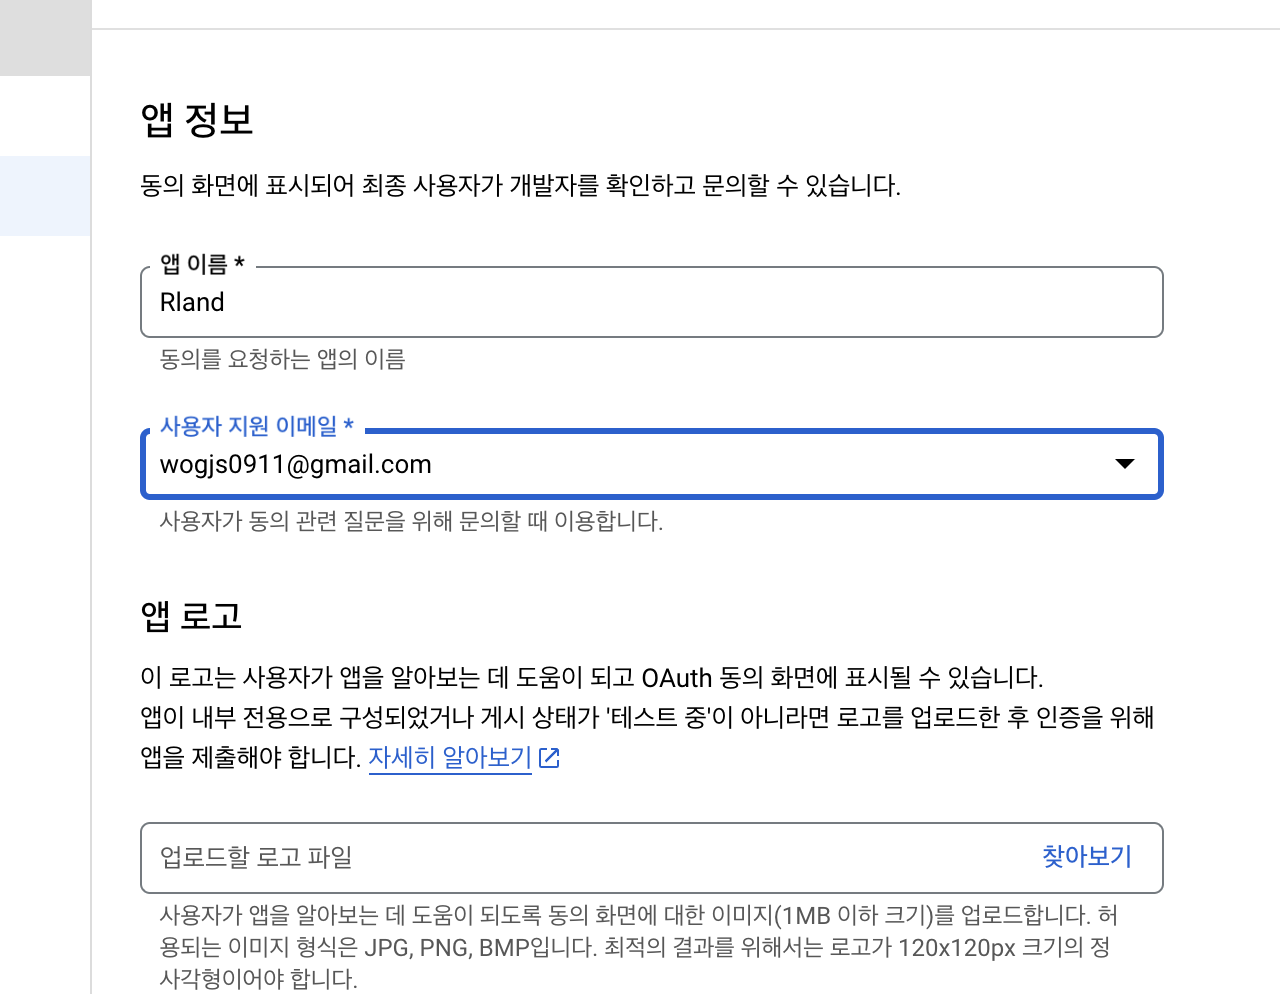
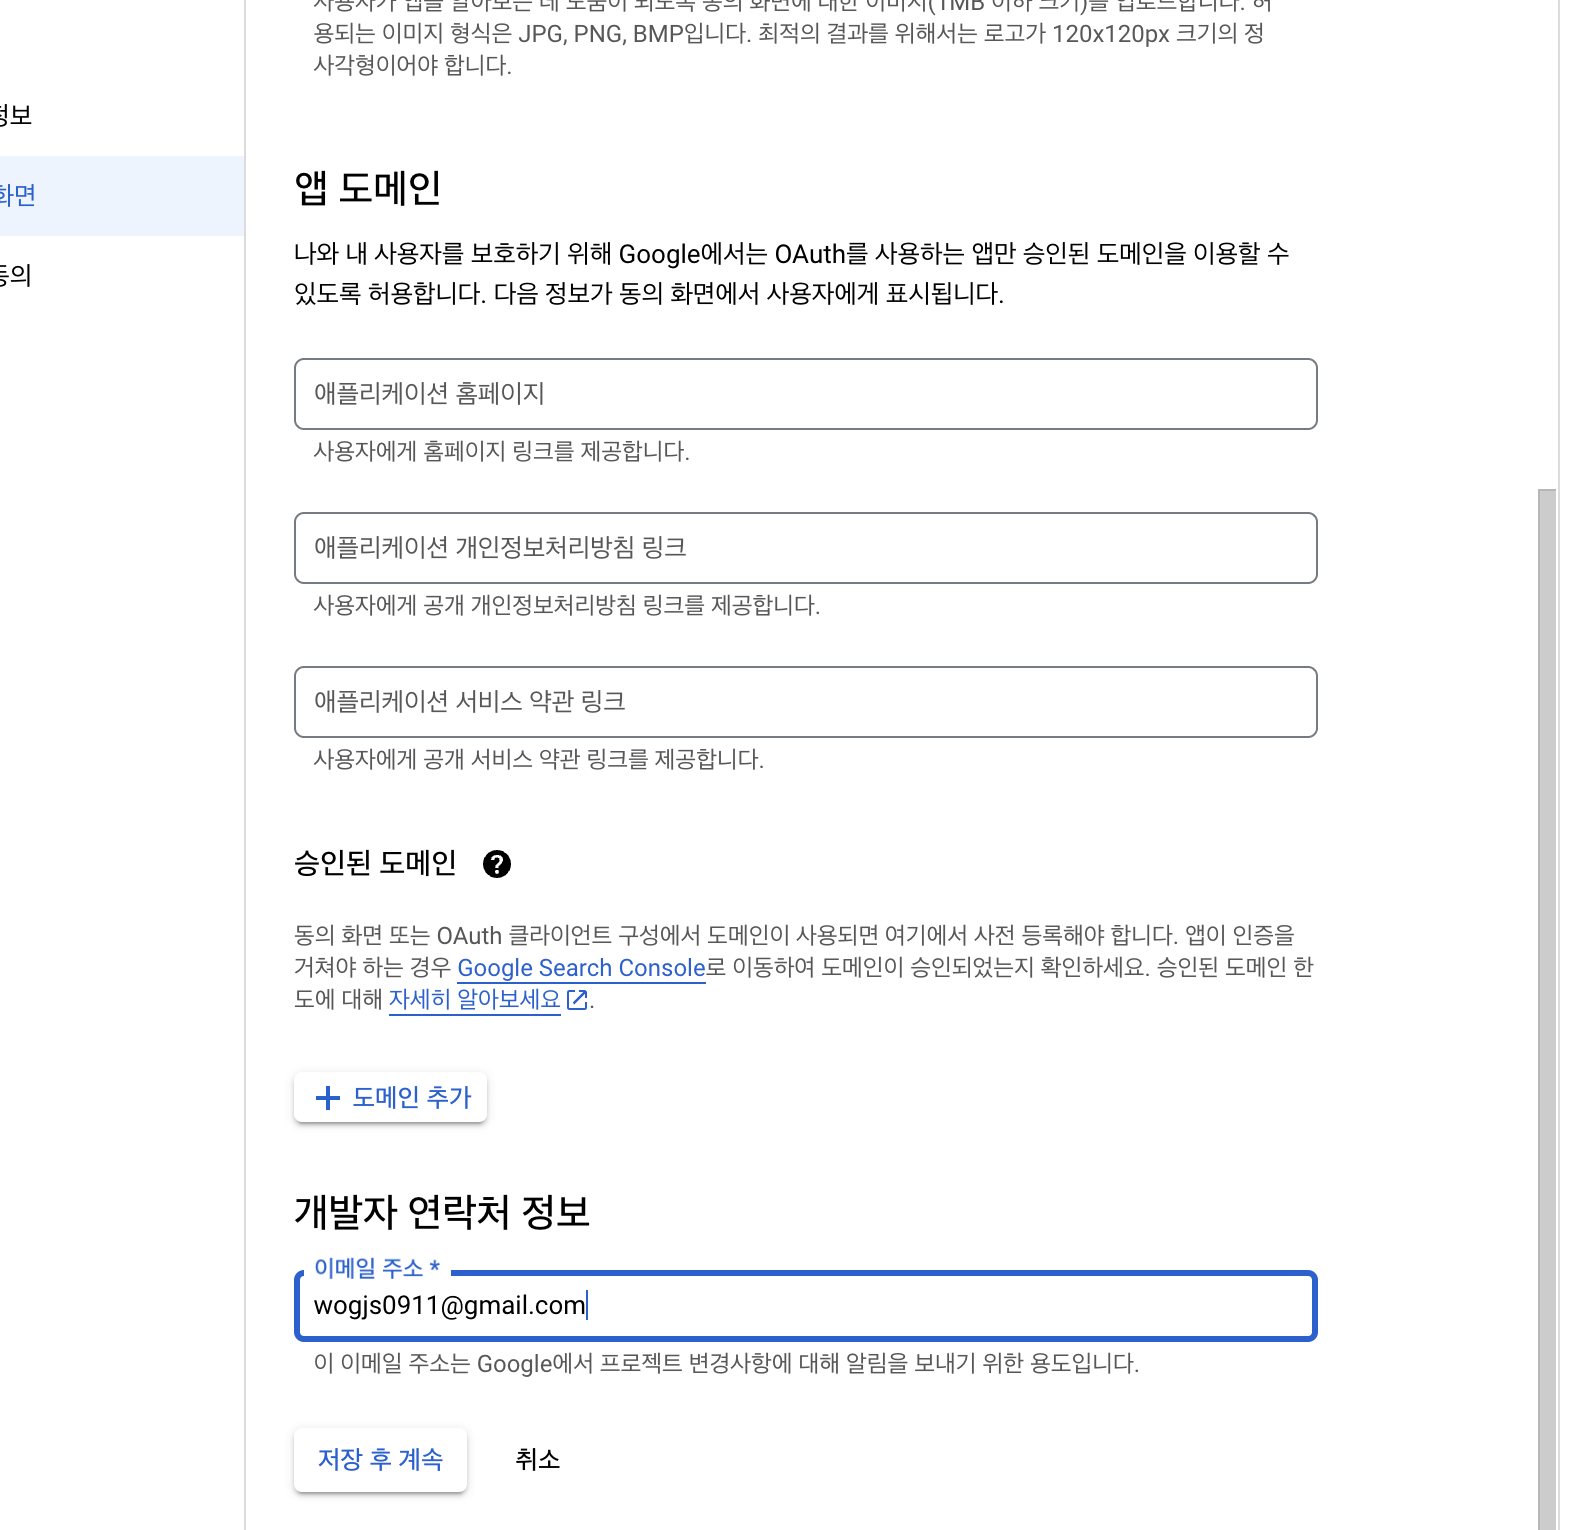
- ‘콘솔 클라우드 구글’에서 ‘Oauth 동의 화면’ 설정하기
c. ‘콘솔 클라우드 구글’에서 ‘Google OAuth2’ 설정하기 3
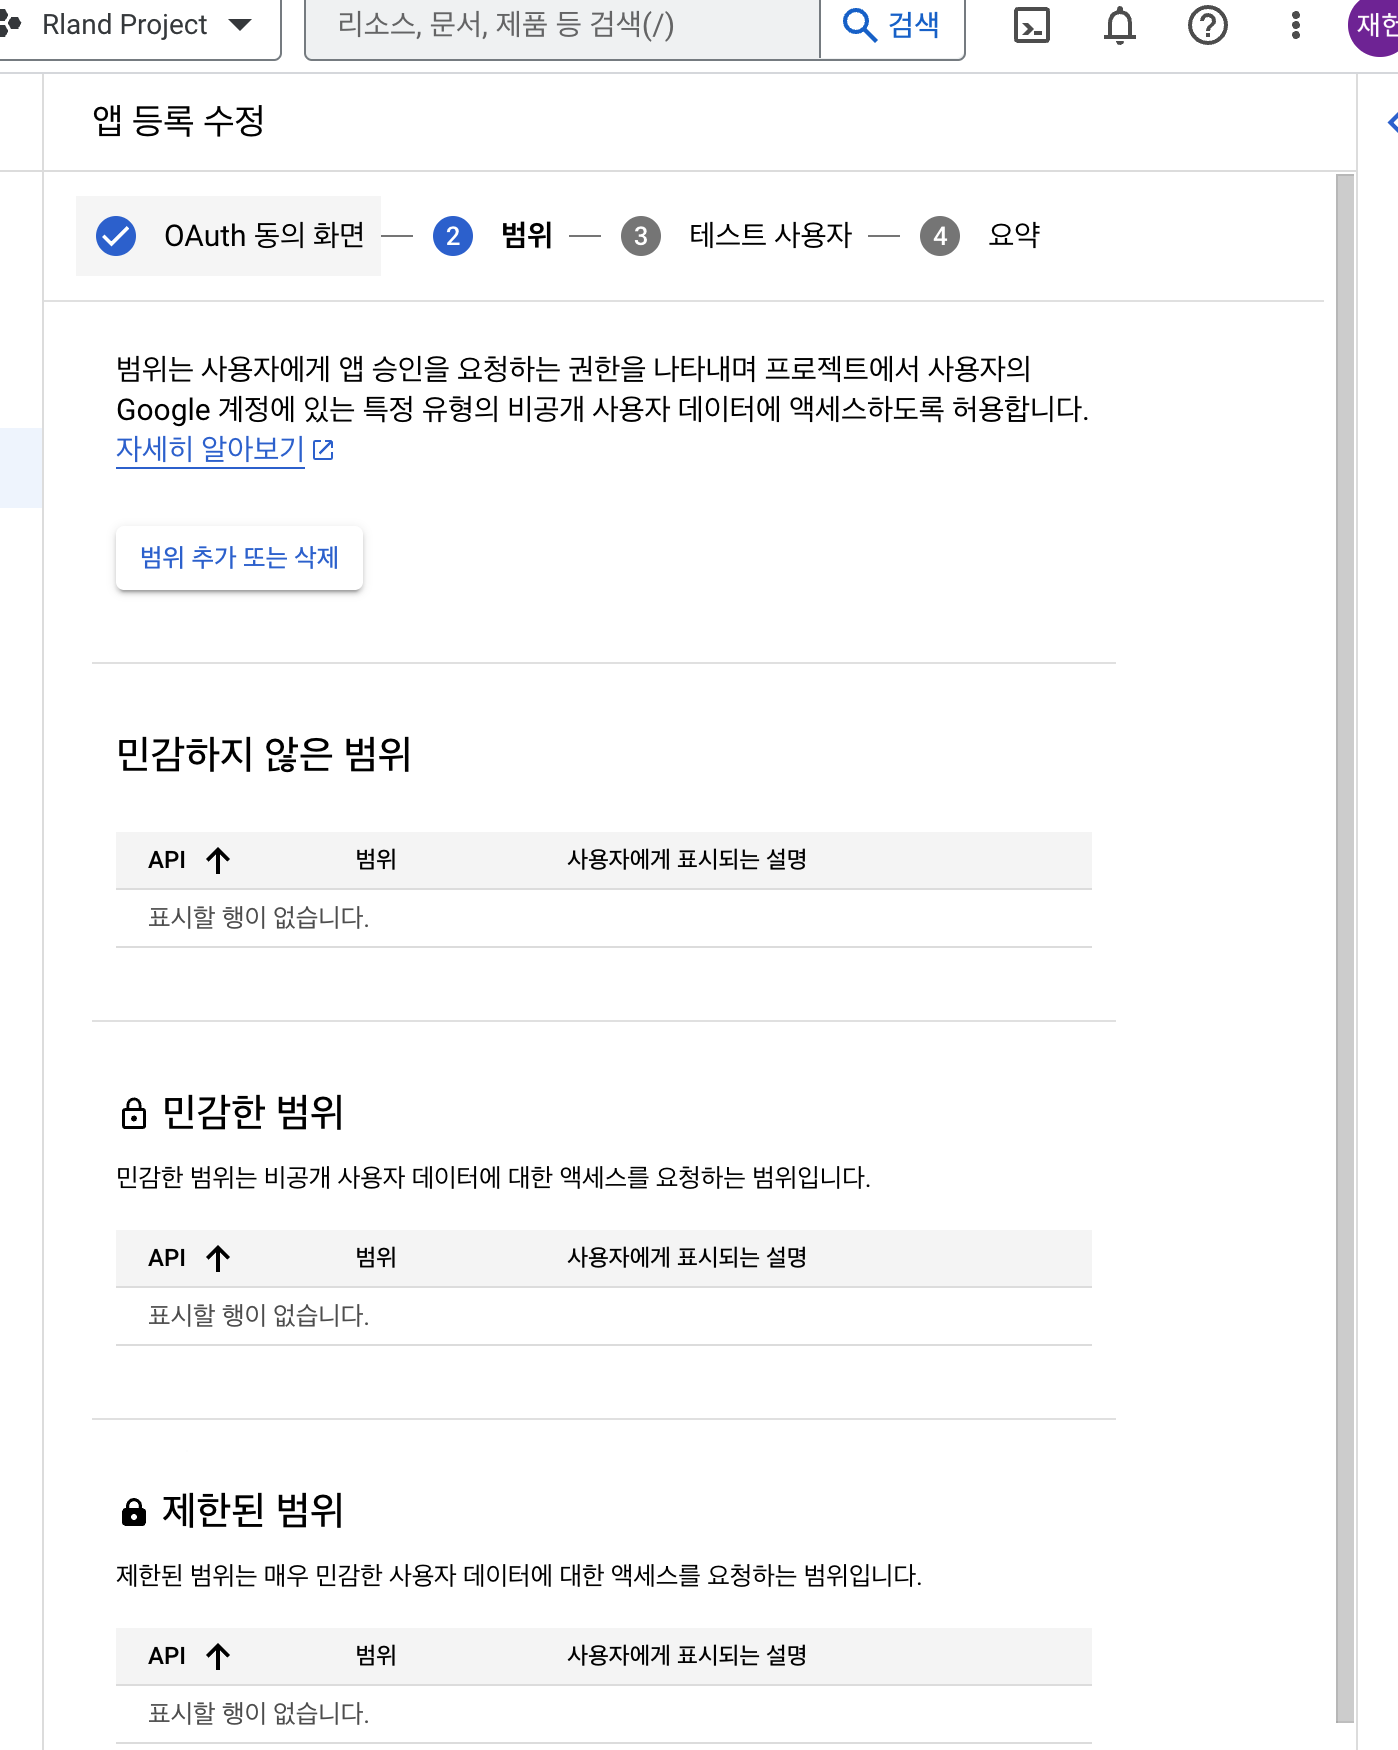
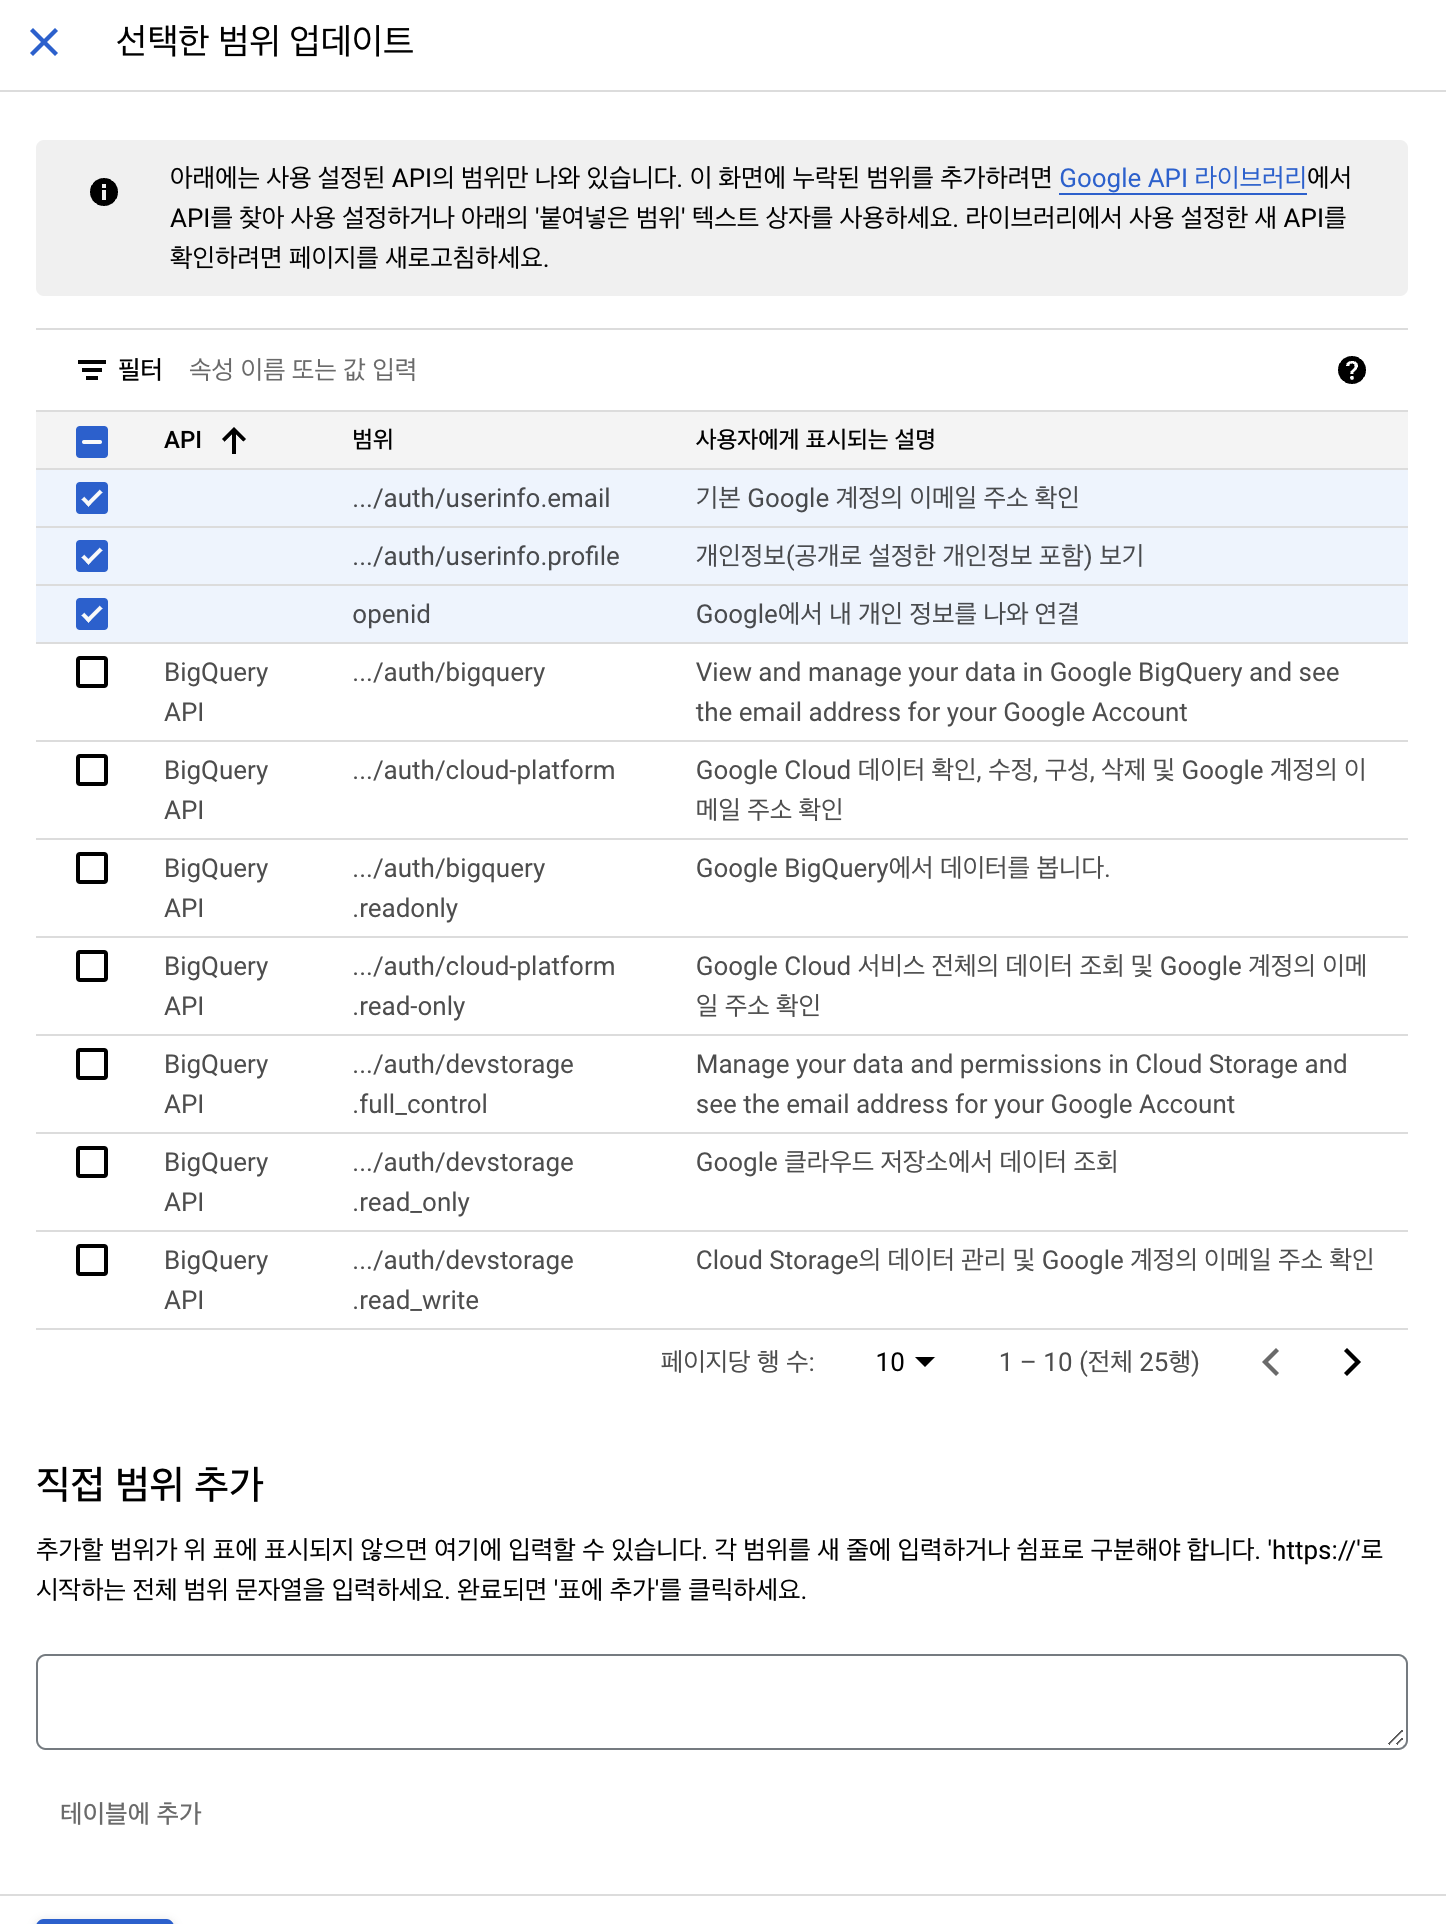
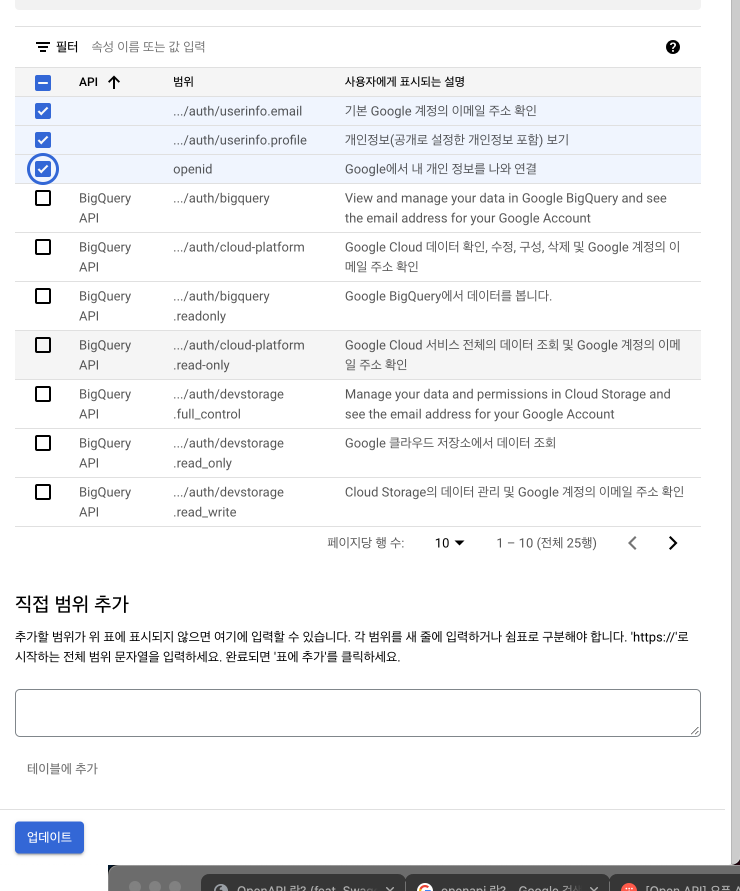
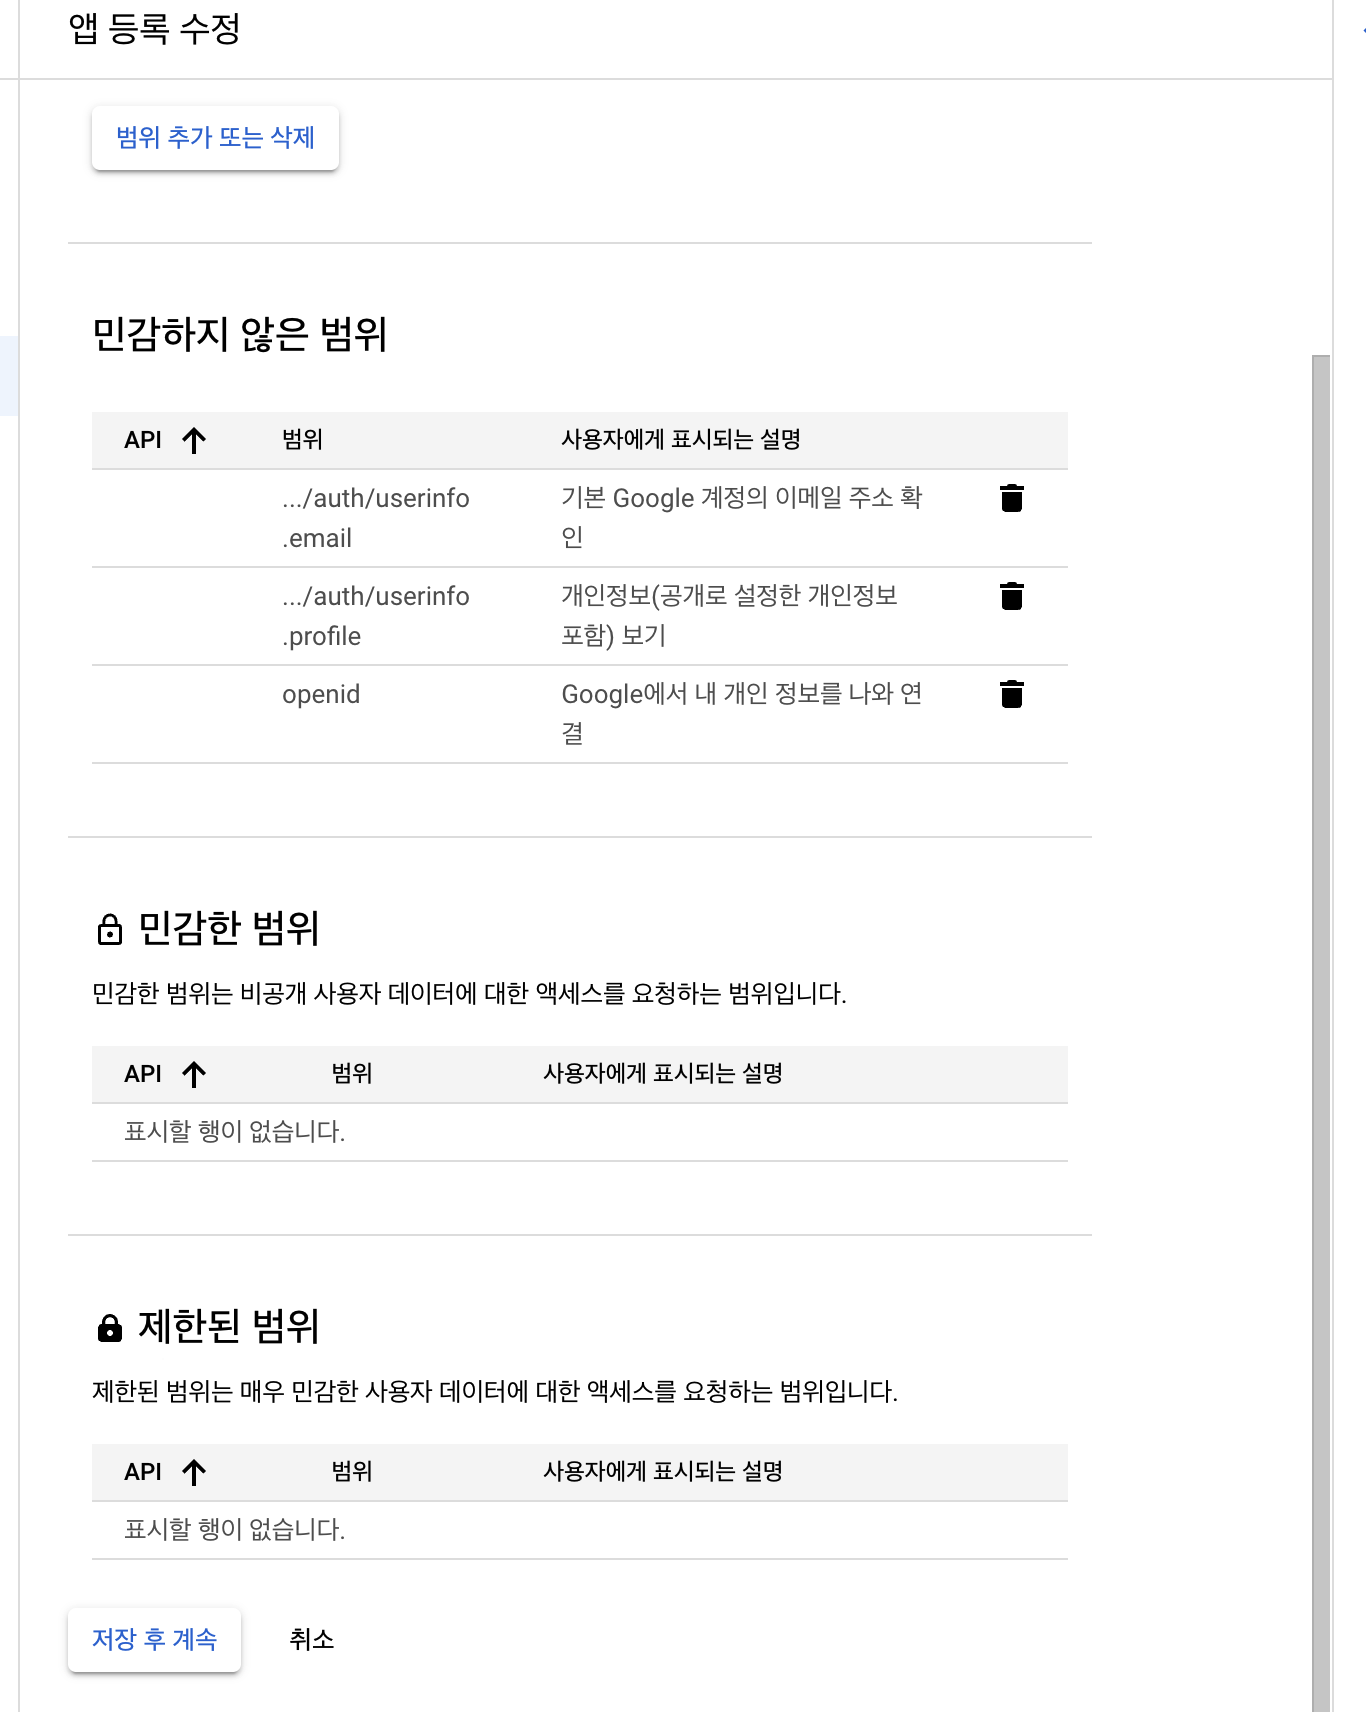
- ‘콘솔 클라우드 구글’에서 ‘범위 추가/삭제’ 설정하기
d. ‘콘솔 클라우드 구글’에서 ‘Google OAuth2’ 설정하기 4
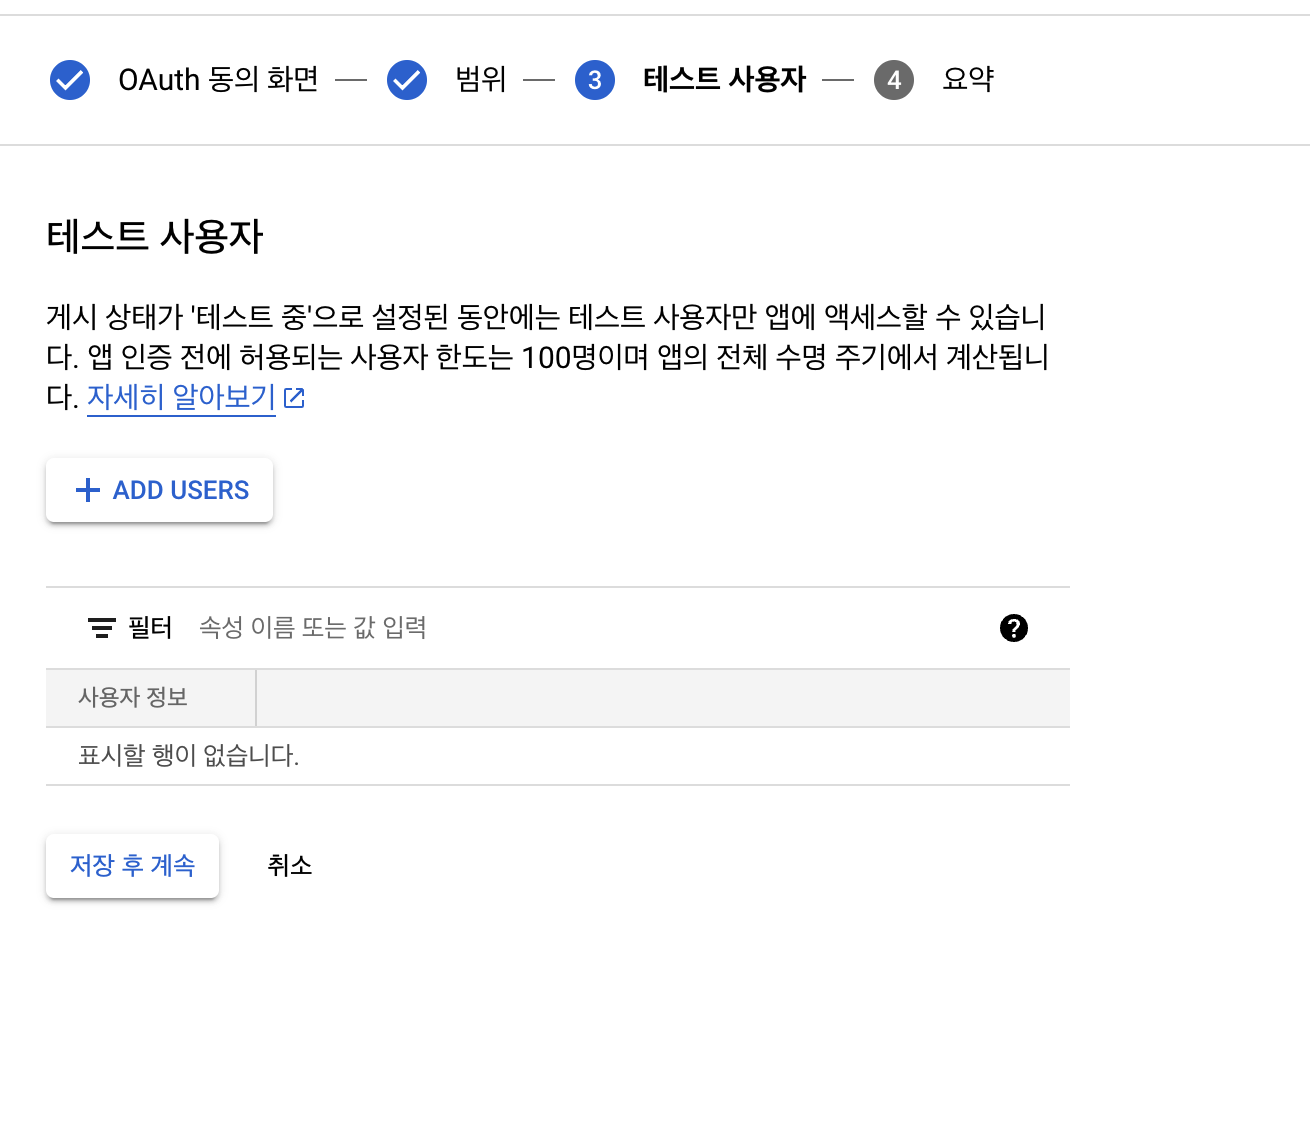
- ‘콘솔 클라우드 구글’에서 ‘동의 화면 설정’ 마무리 하기
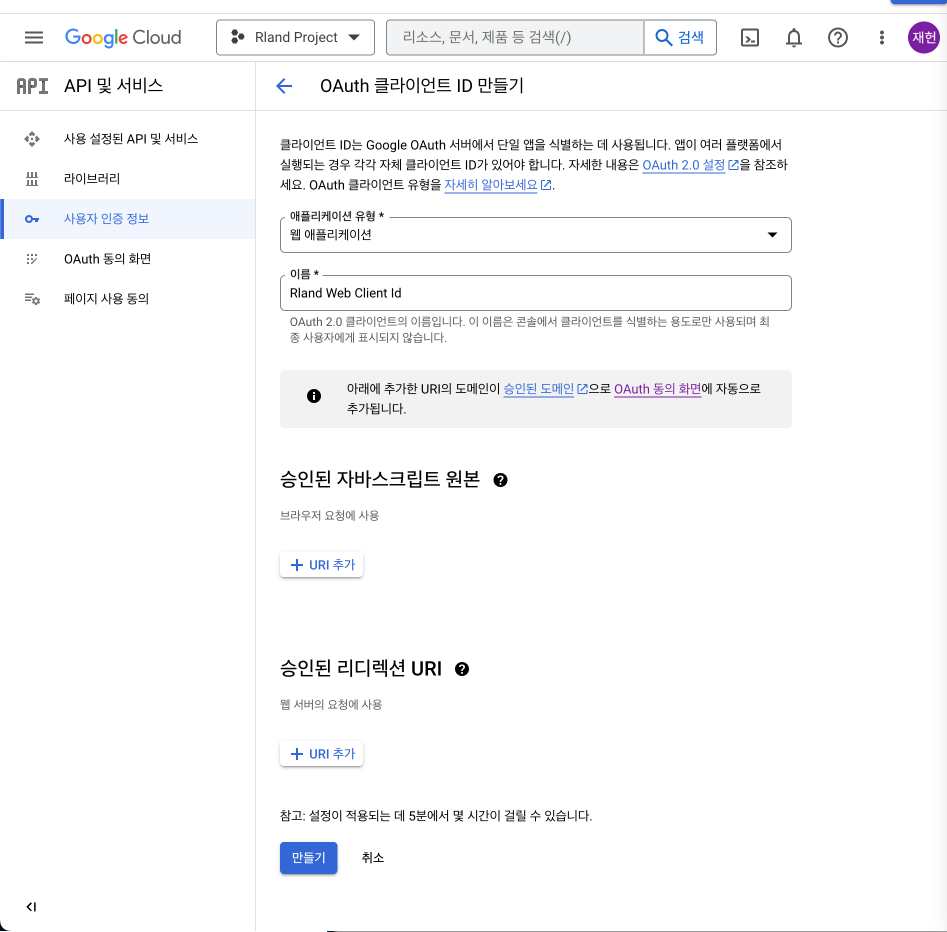
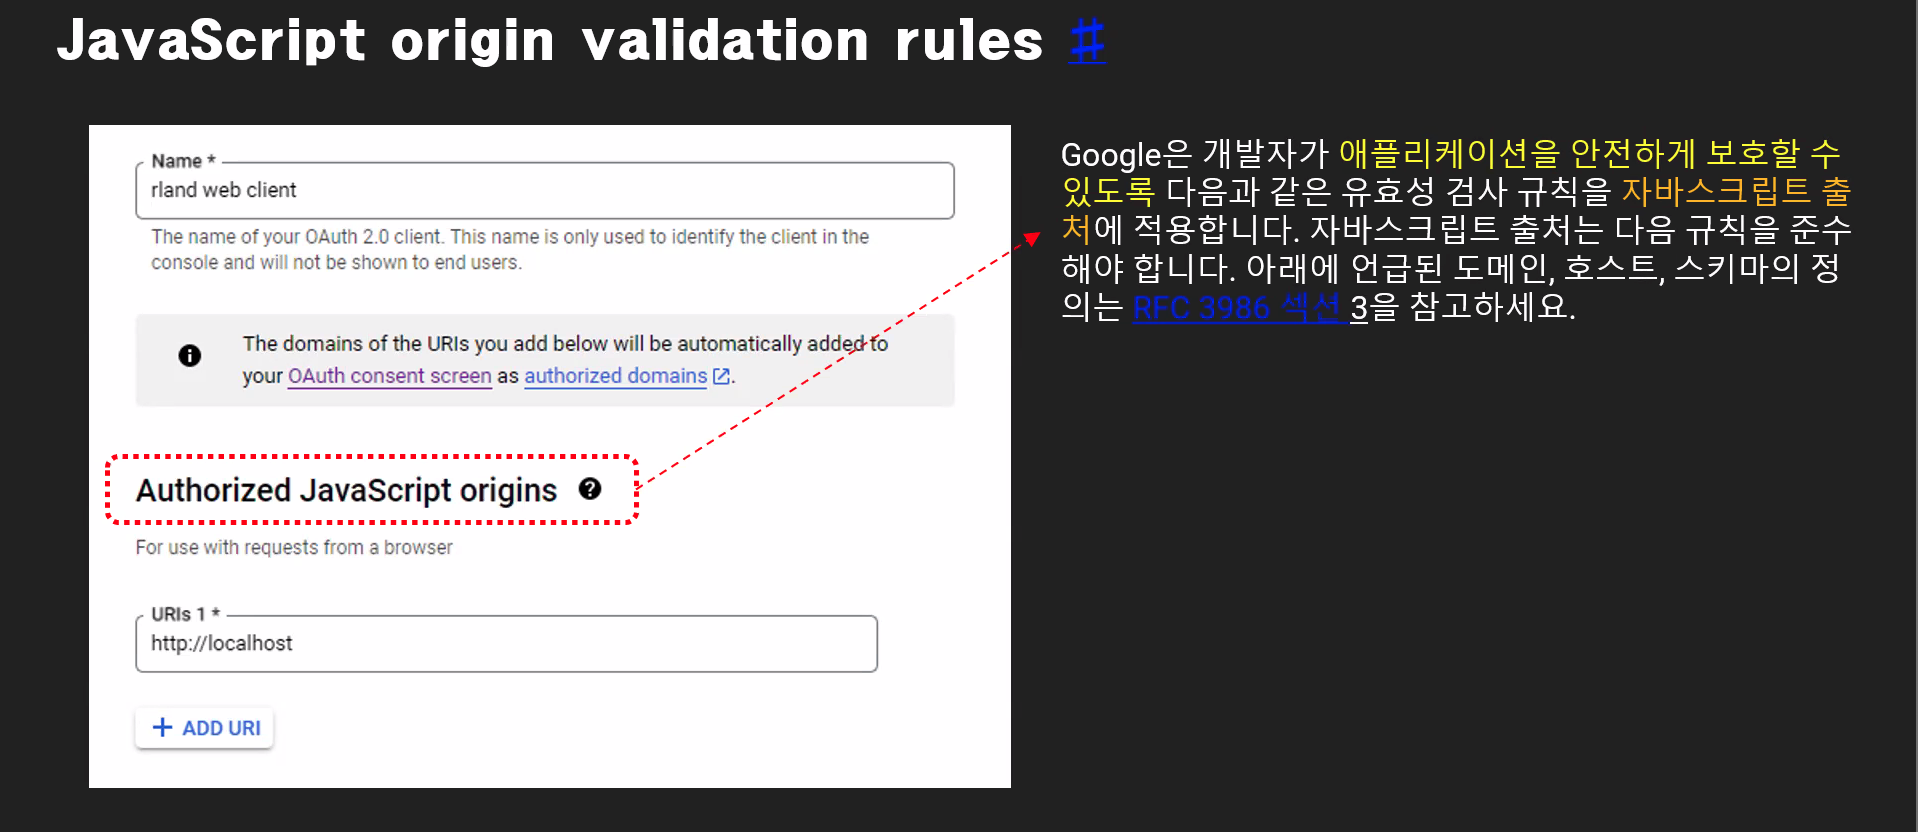
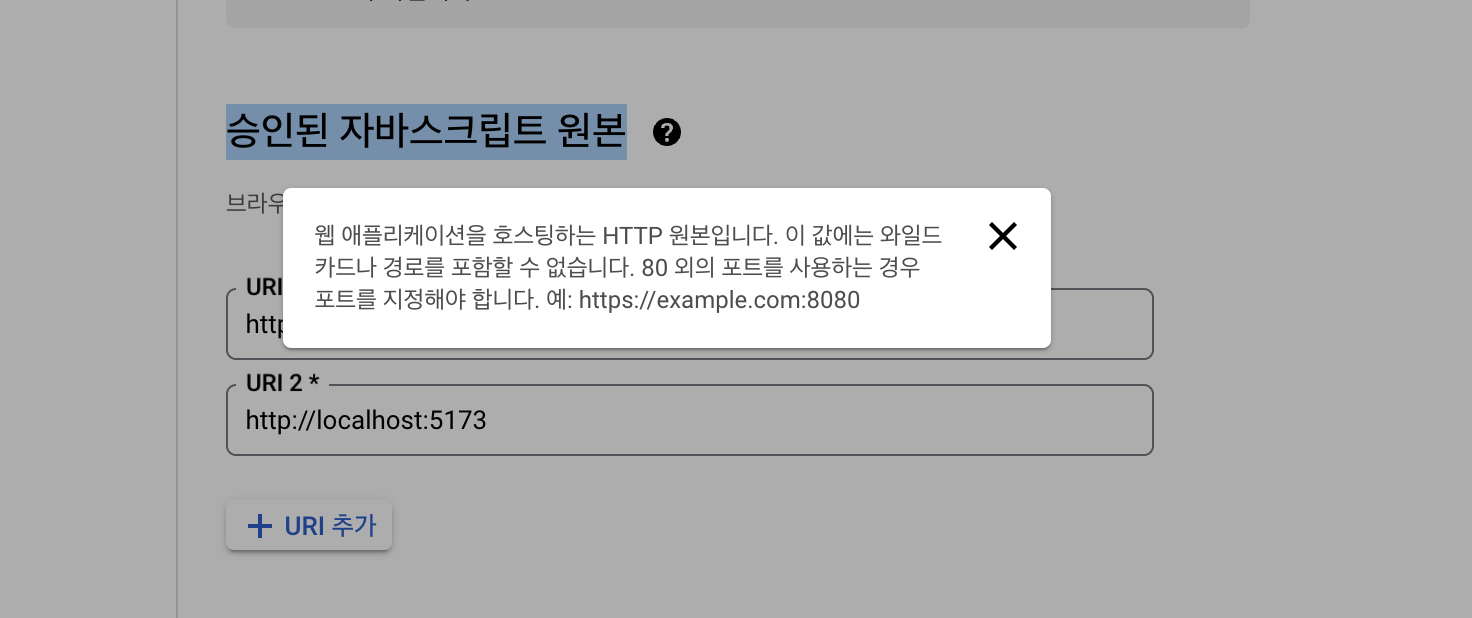
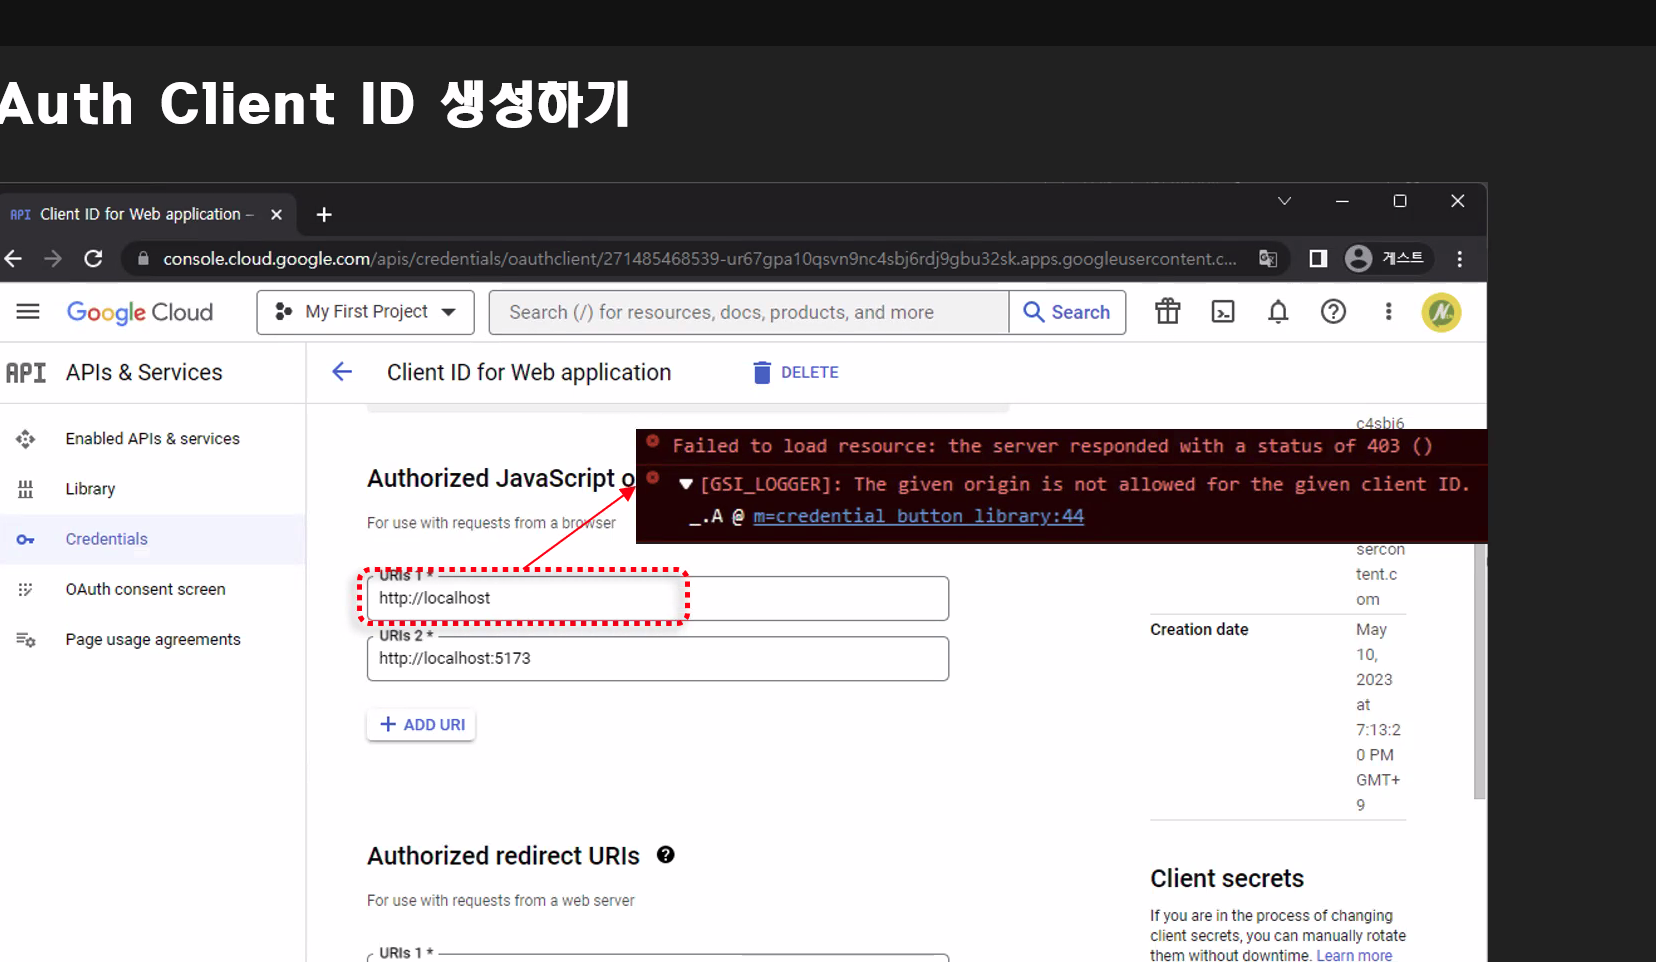
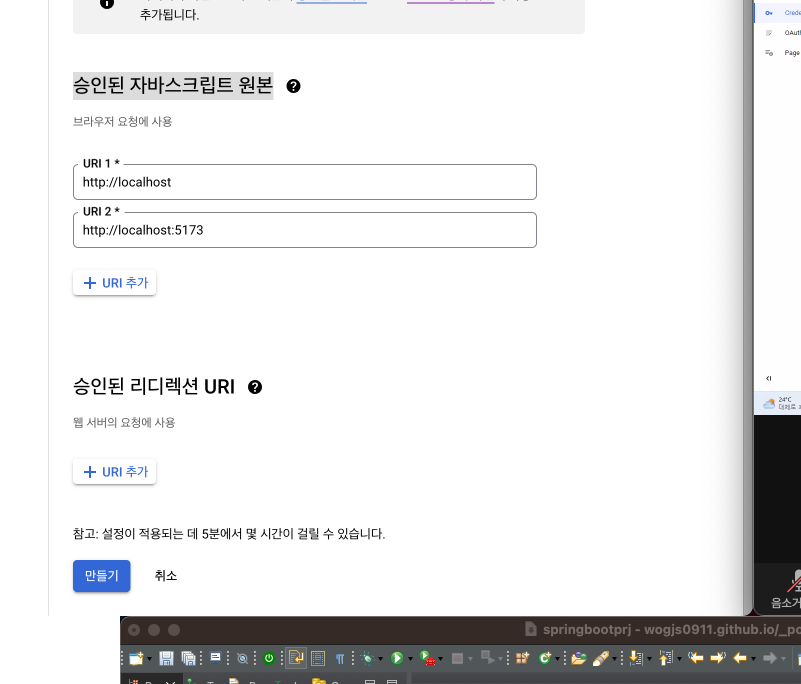
3) 승인된 자바스크립트 원본
-
origins이 자바스크립트 출처를 의미한다.
-
실제 브라우저의 port 번호도 같이 입력해줘야한다.
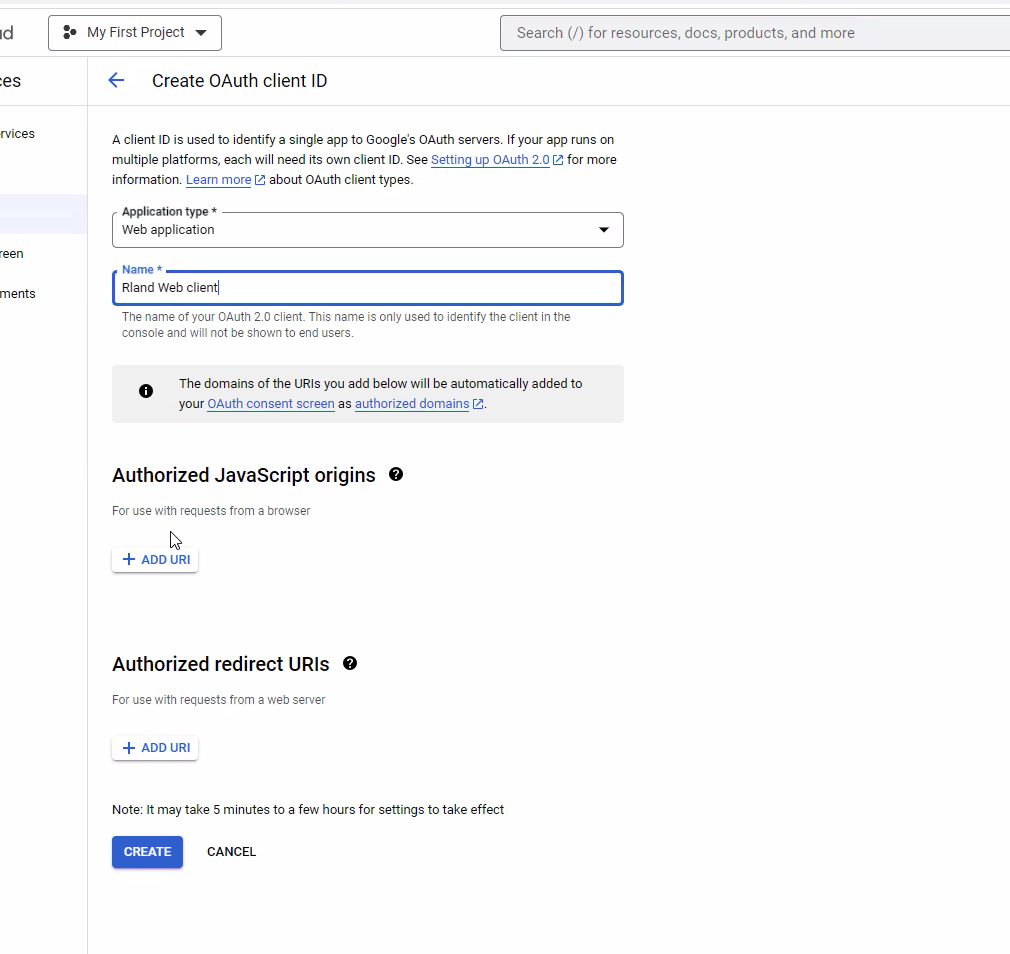
a. ‘콘솔 클라우드 구글’에서 추가로 Authorized Javascript origins 설정하기
- Javascript 이용 시, 승인된 경로를 설정해주는 것

b. ‘콘솔 클라우드 구글’에서 Authorized Javascript origins 설정 마무리하기
- Javascript 이용 시, 승인된 경로를 설정해주는 것 마무리!
4) Google OAuth2 설정이 끝나면, 다시 Vue 설정
a. Vue3에서 구글 로그인 설정 방법
5) Vue 설정이 끝나면 다시 구글 로그인 로직 구현하기
a. Vue3에서 구글 로그인 확인하기
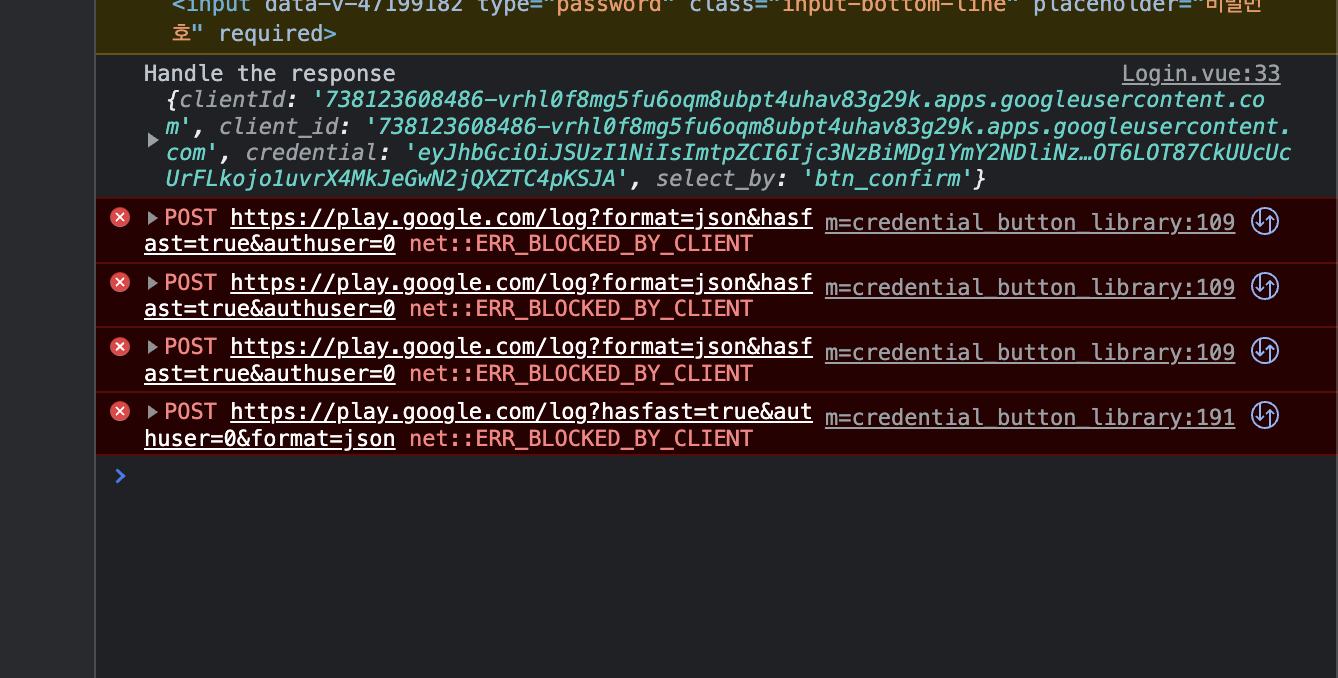
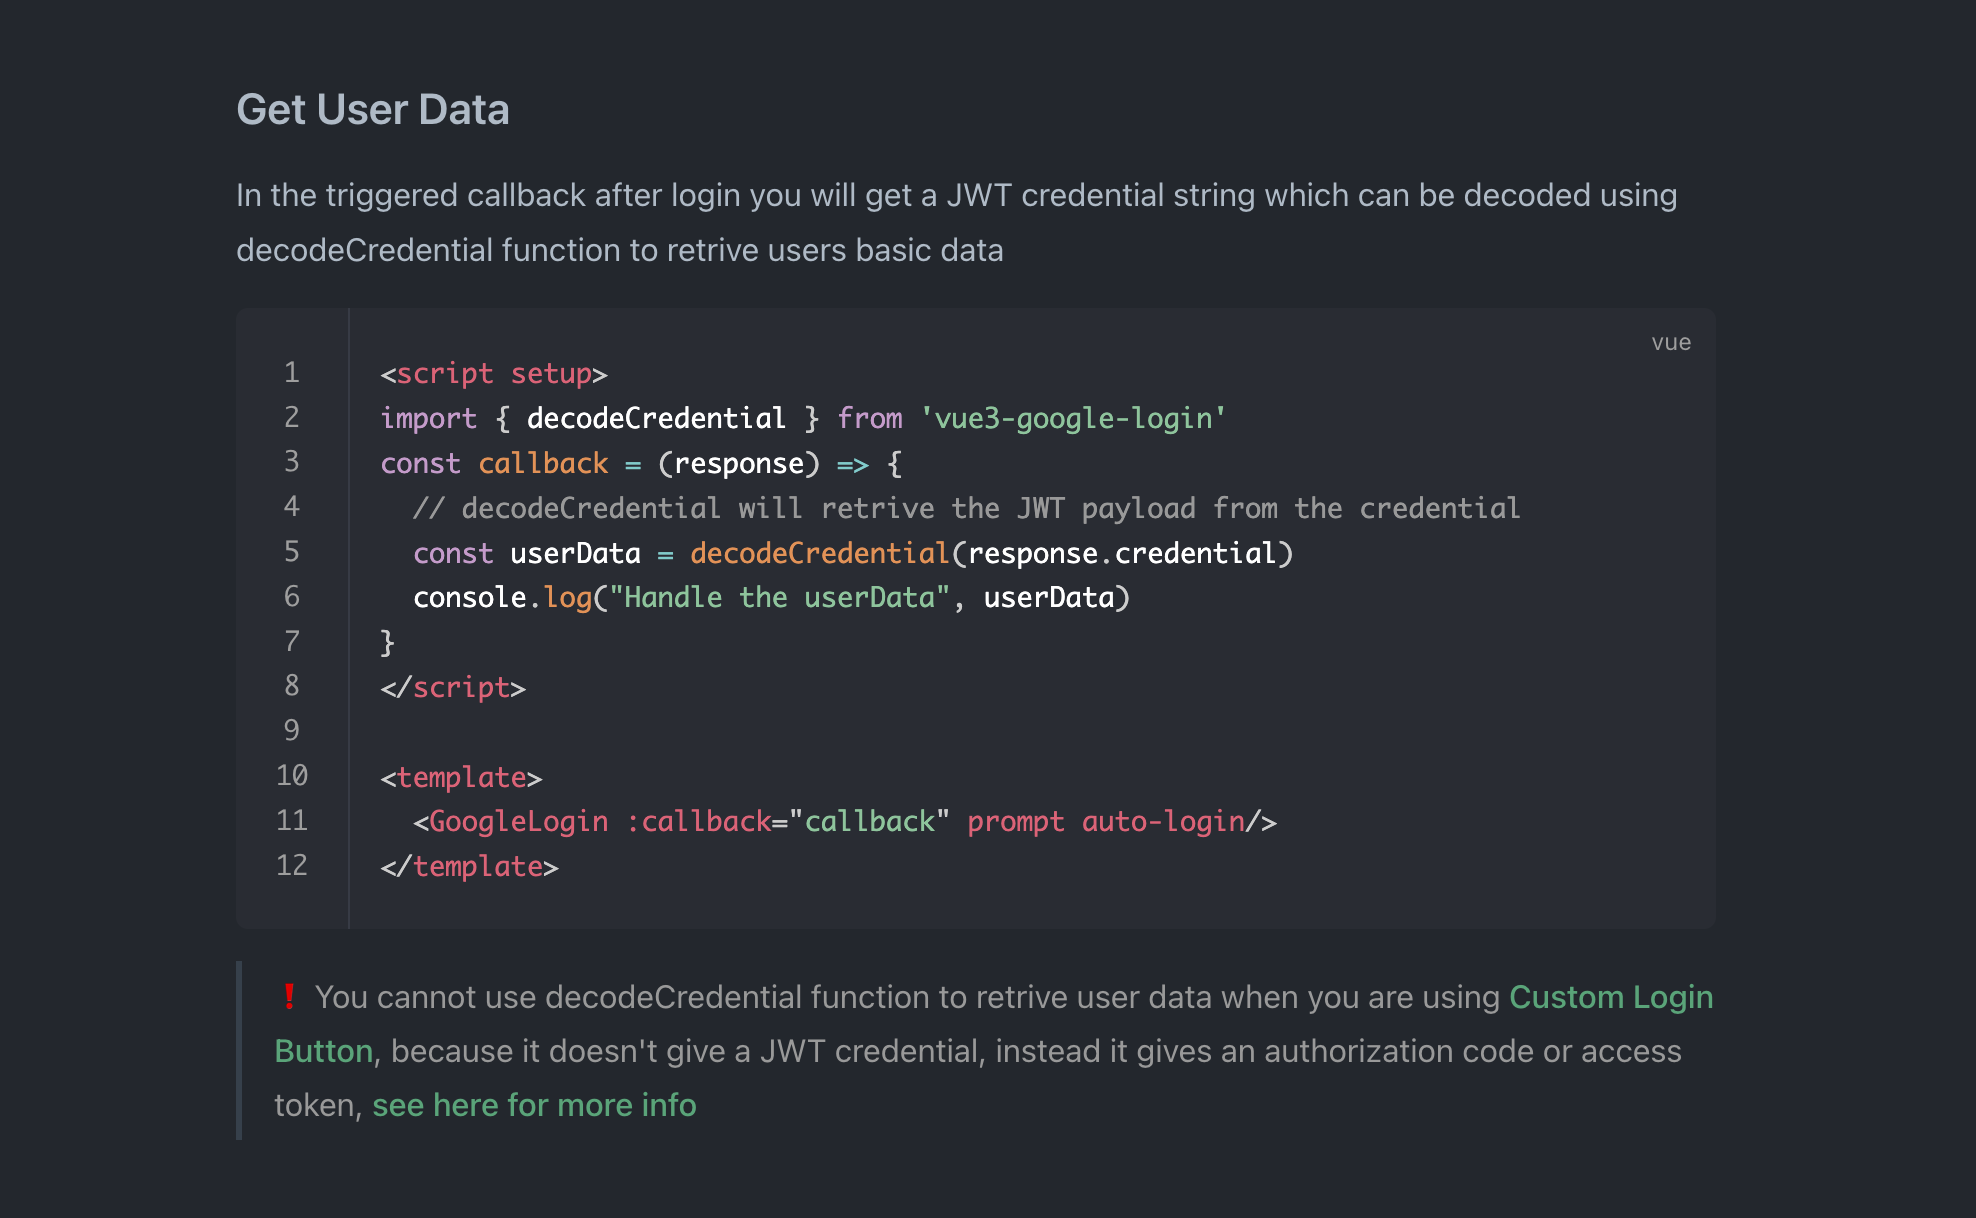
b. Vue3에서 google 아이디의 credential 정보 조회

c. Vue3에서 구글 로그인의 로그아웃 과정 설정
d. Vue3에서 구글 로그인 코드 모음
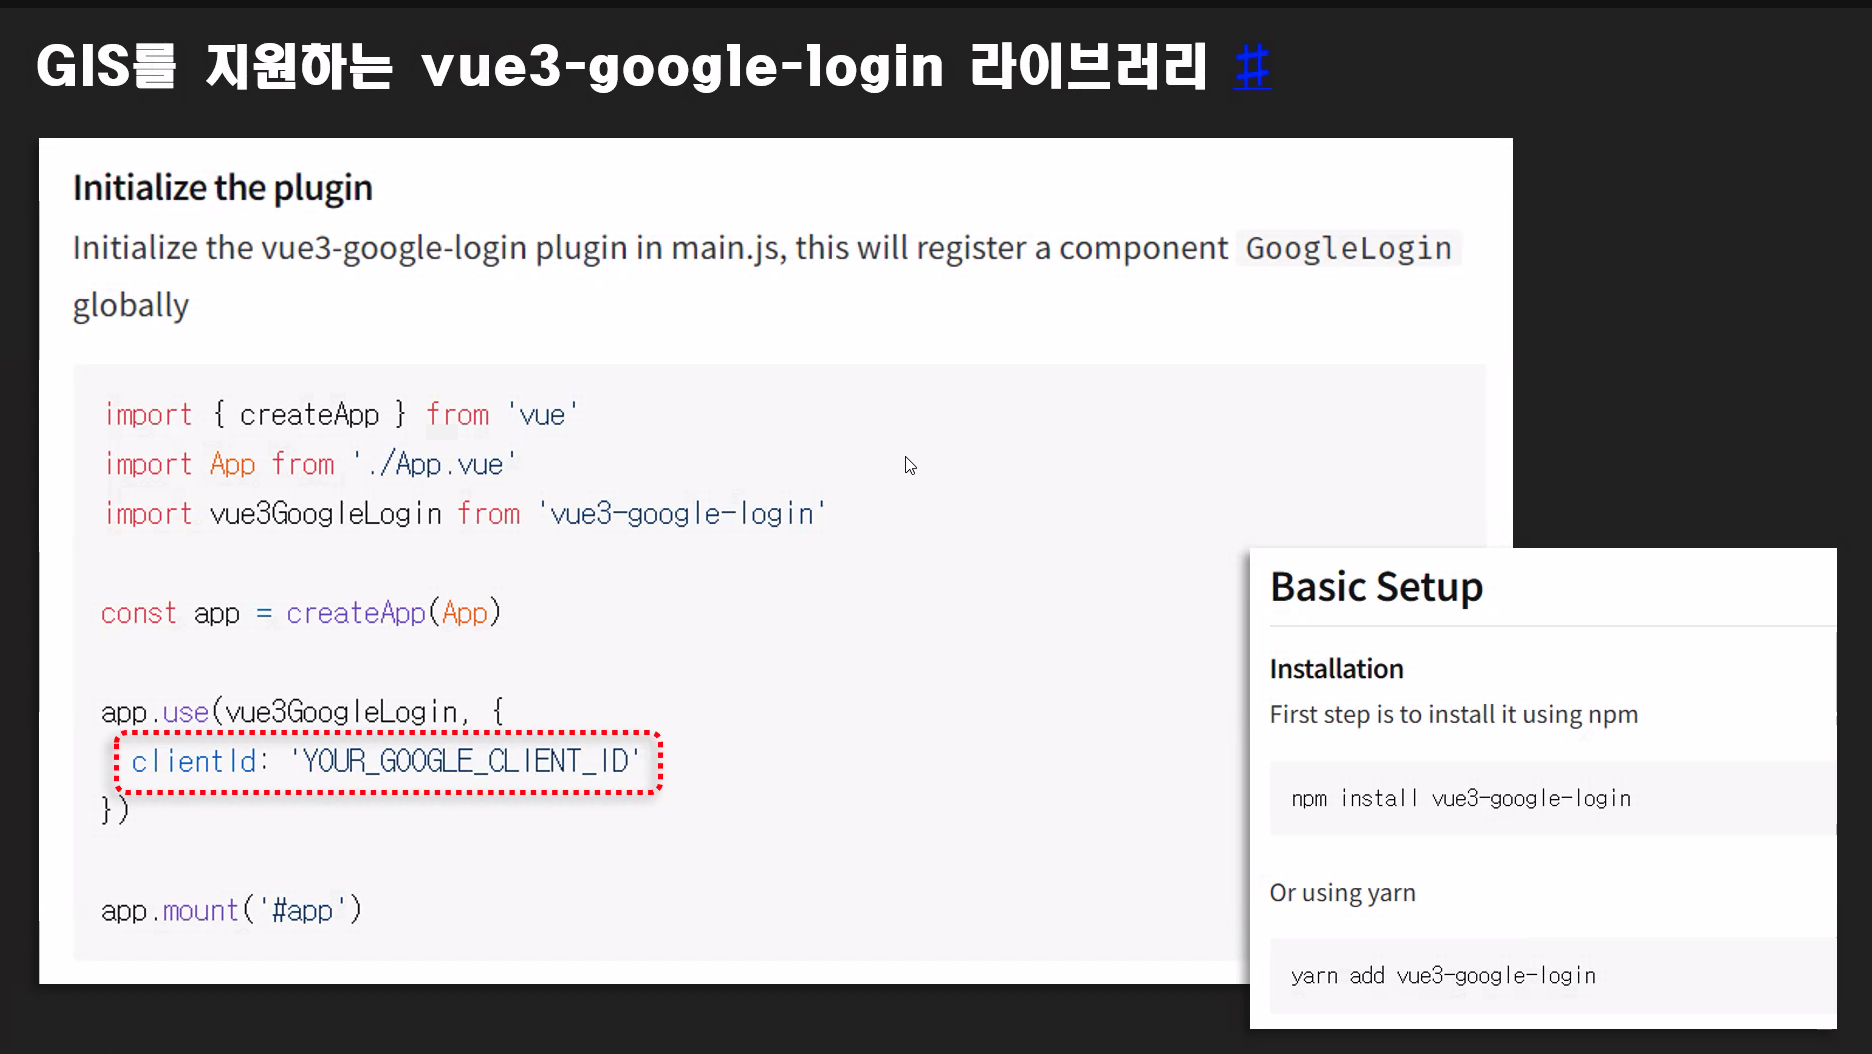
a) 구글 로그인 라이브러리 설정 추가
- main.js
import { createApp } from "vue";
import { createRouter, createWebHashHistory } from "vue-router";
import { createPinia } from "pinia";
import App from "./App.vue";
import vue3GoogleLogin from "vue3-google-login";
import rootRoute from "./components/route.js";
import adminRoute from "./components/admin/route.js";
const routes = [rootRoute, adminRoute];
const router = createRouter({
history: createWebHashHistory(),
routes // short for `routes: routes`
});
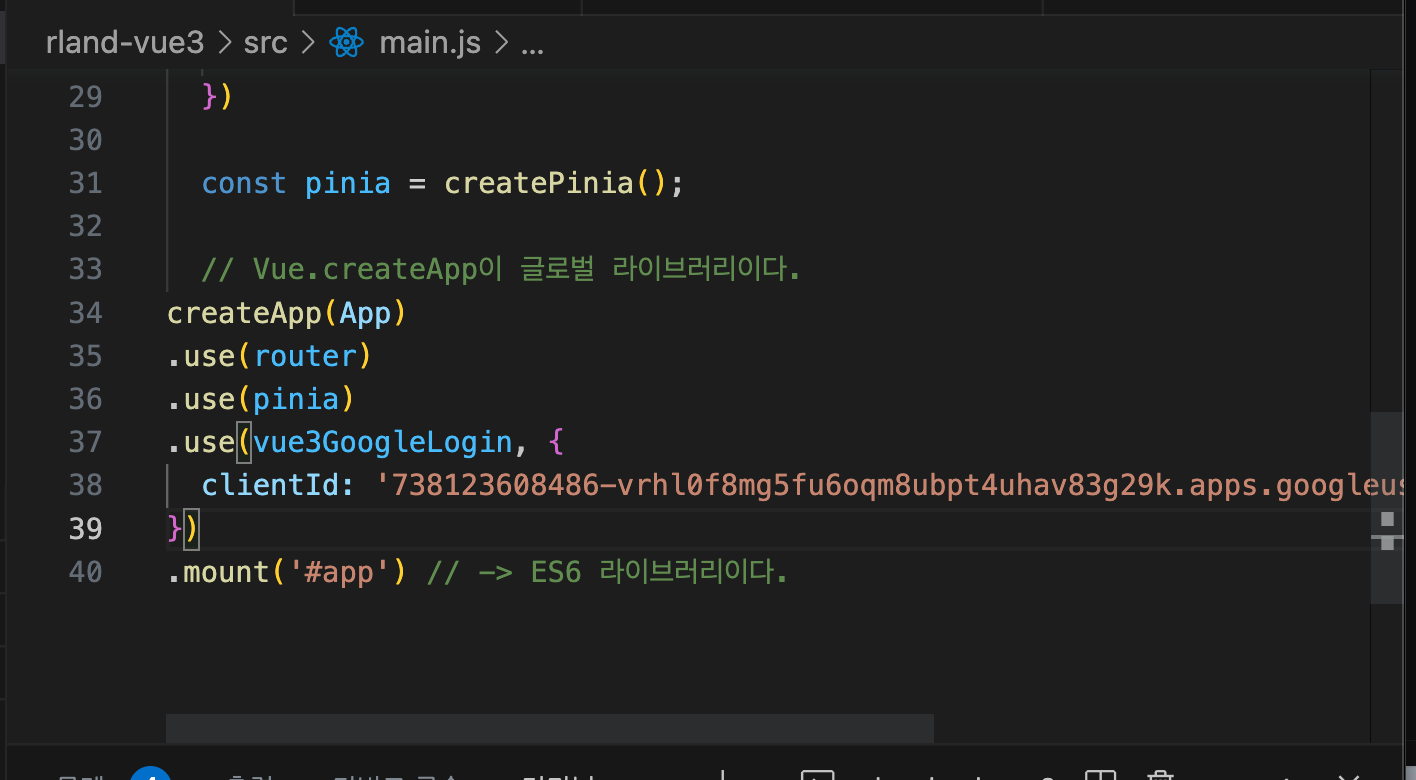
const pinia = createPinia();
//Vue.createApp() -> Global Library
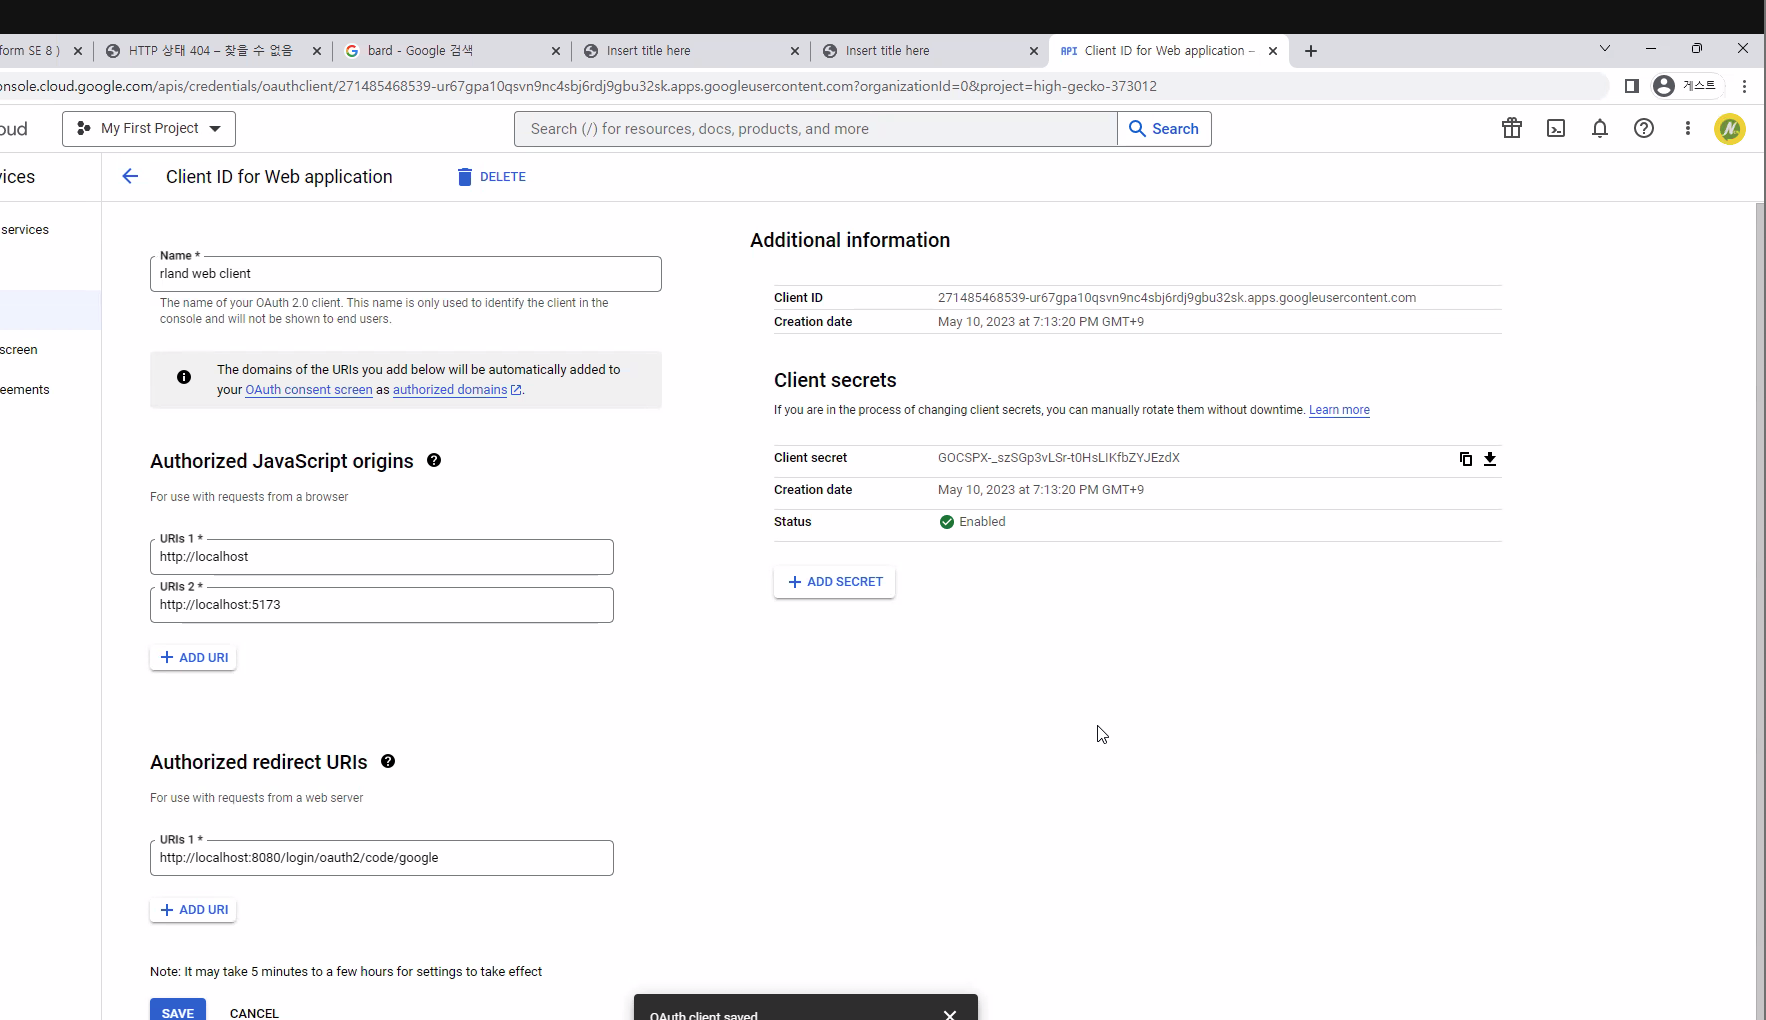
createApp(App)
.use(router)
.use(vue3GoogleLogin, {
clientId:
"738123608486-vrhl0f8mg5fu6oqm8ubpt4uhav83g29k.apps.googleusercontent.com"
})
.use(pinia)
.mount("#app"); //-> ES6 Library
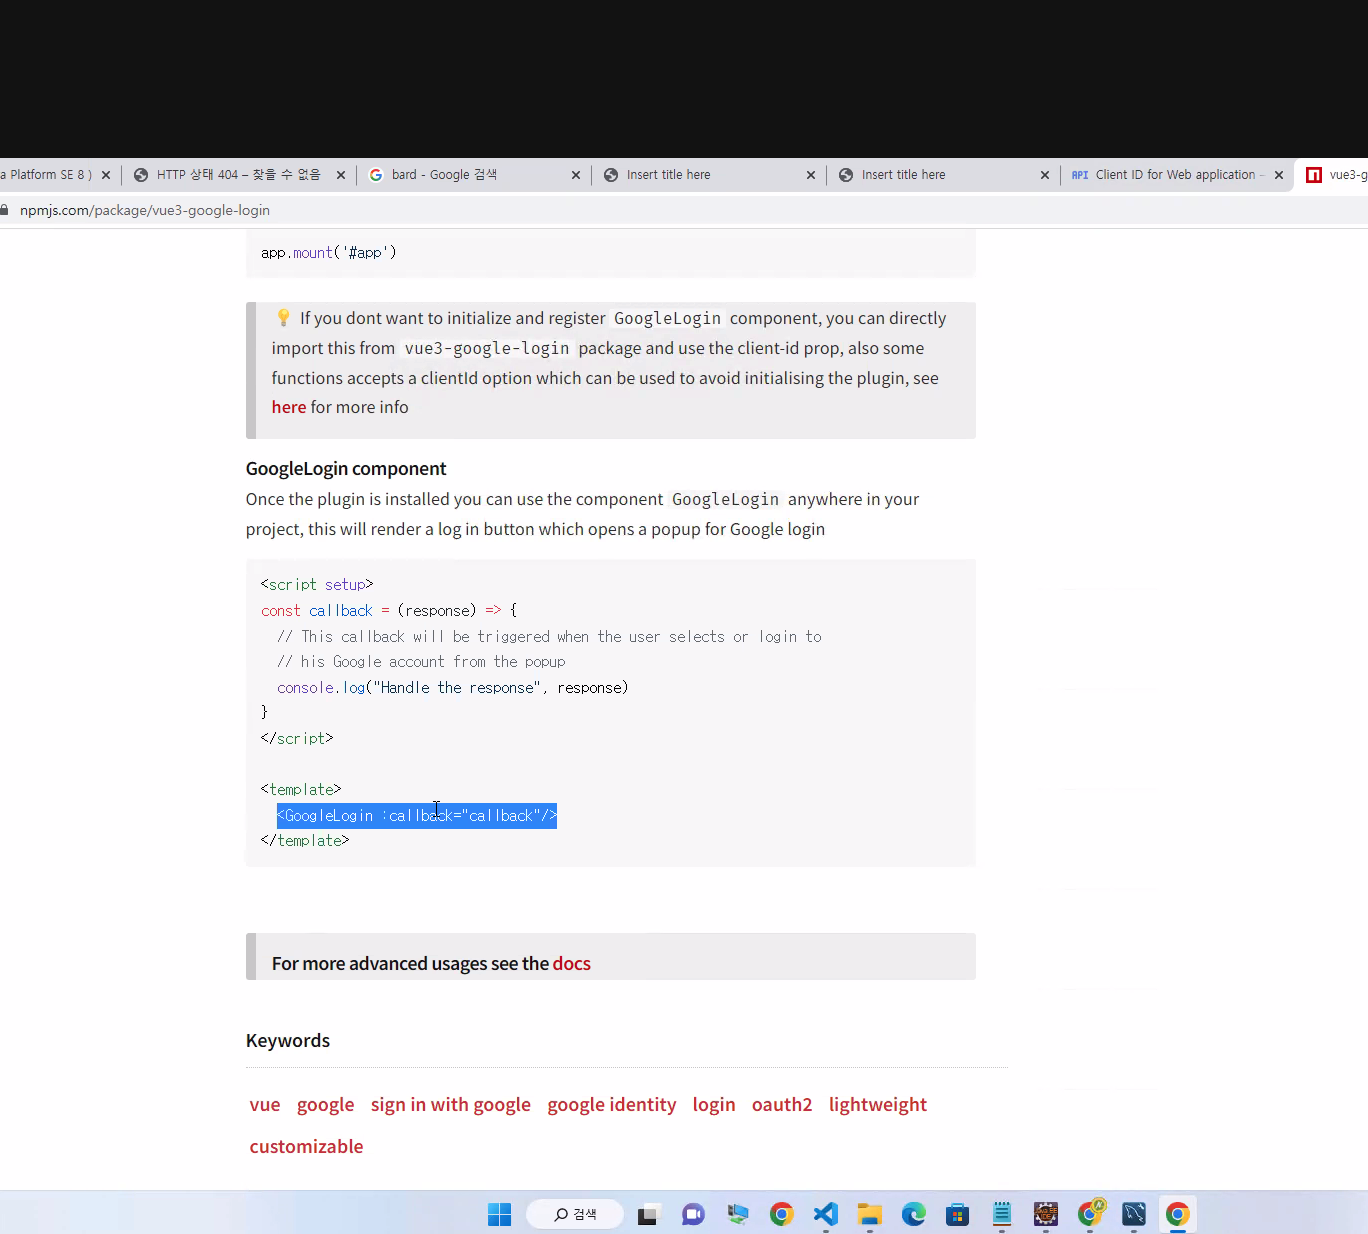
b) 로그인을 위한 구글 로그인 페이지 설정
- ‘기존 로그인 로직’과 별개로 ‘구글 로그인 로직’이 동작하게 한다.
- Login.vue
<script setup>
import { reactive } from 'vue';
import { useRouter, useRoute } from 'vue-router';
//전역변수가 필요한데 어떻게 하지? =>모듈만들어서 붙인다
//import userDetails from '../stores/UserDeatails.js';
import { useUserDetailsStore } from '../stores/useUserDetailsStore';
import { decodeCredential } from 'vue3-google-login'
let userDetails = useUserDetailsStore();
let router = useRouter();
let route = useRoute();
let user = reactive({
username:"",
password:"",
roles:"",
})
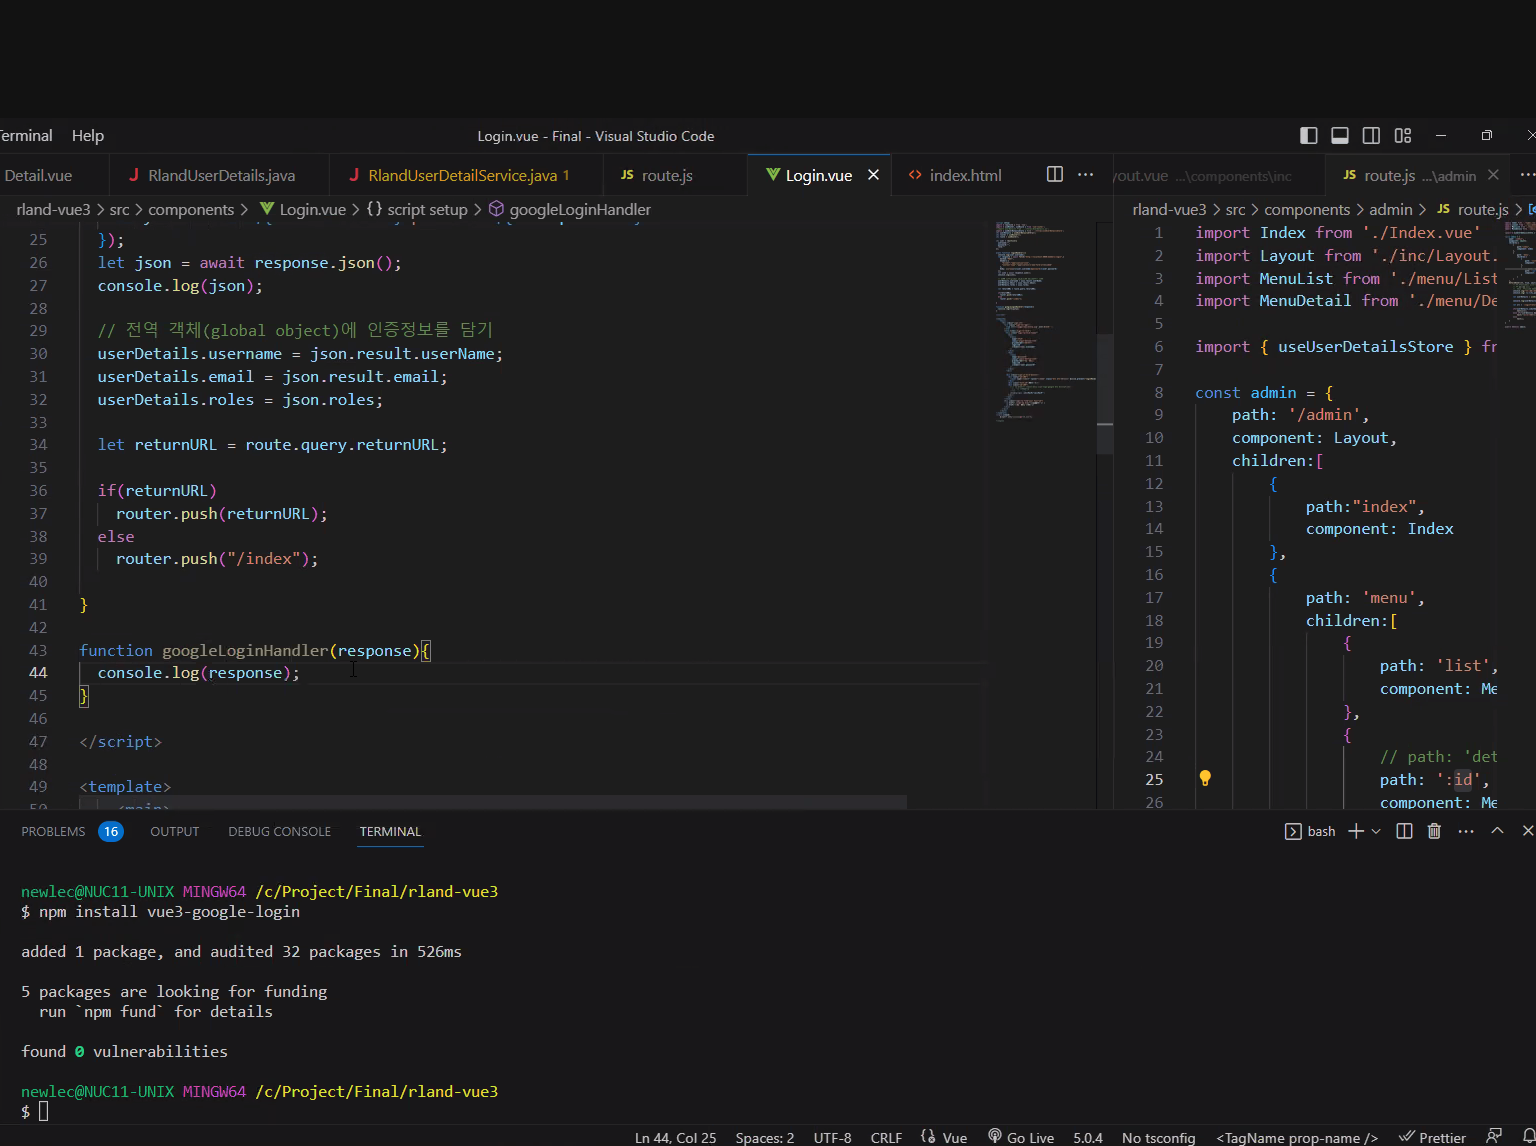
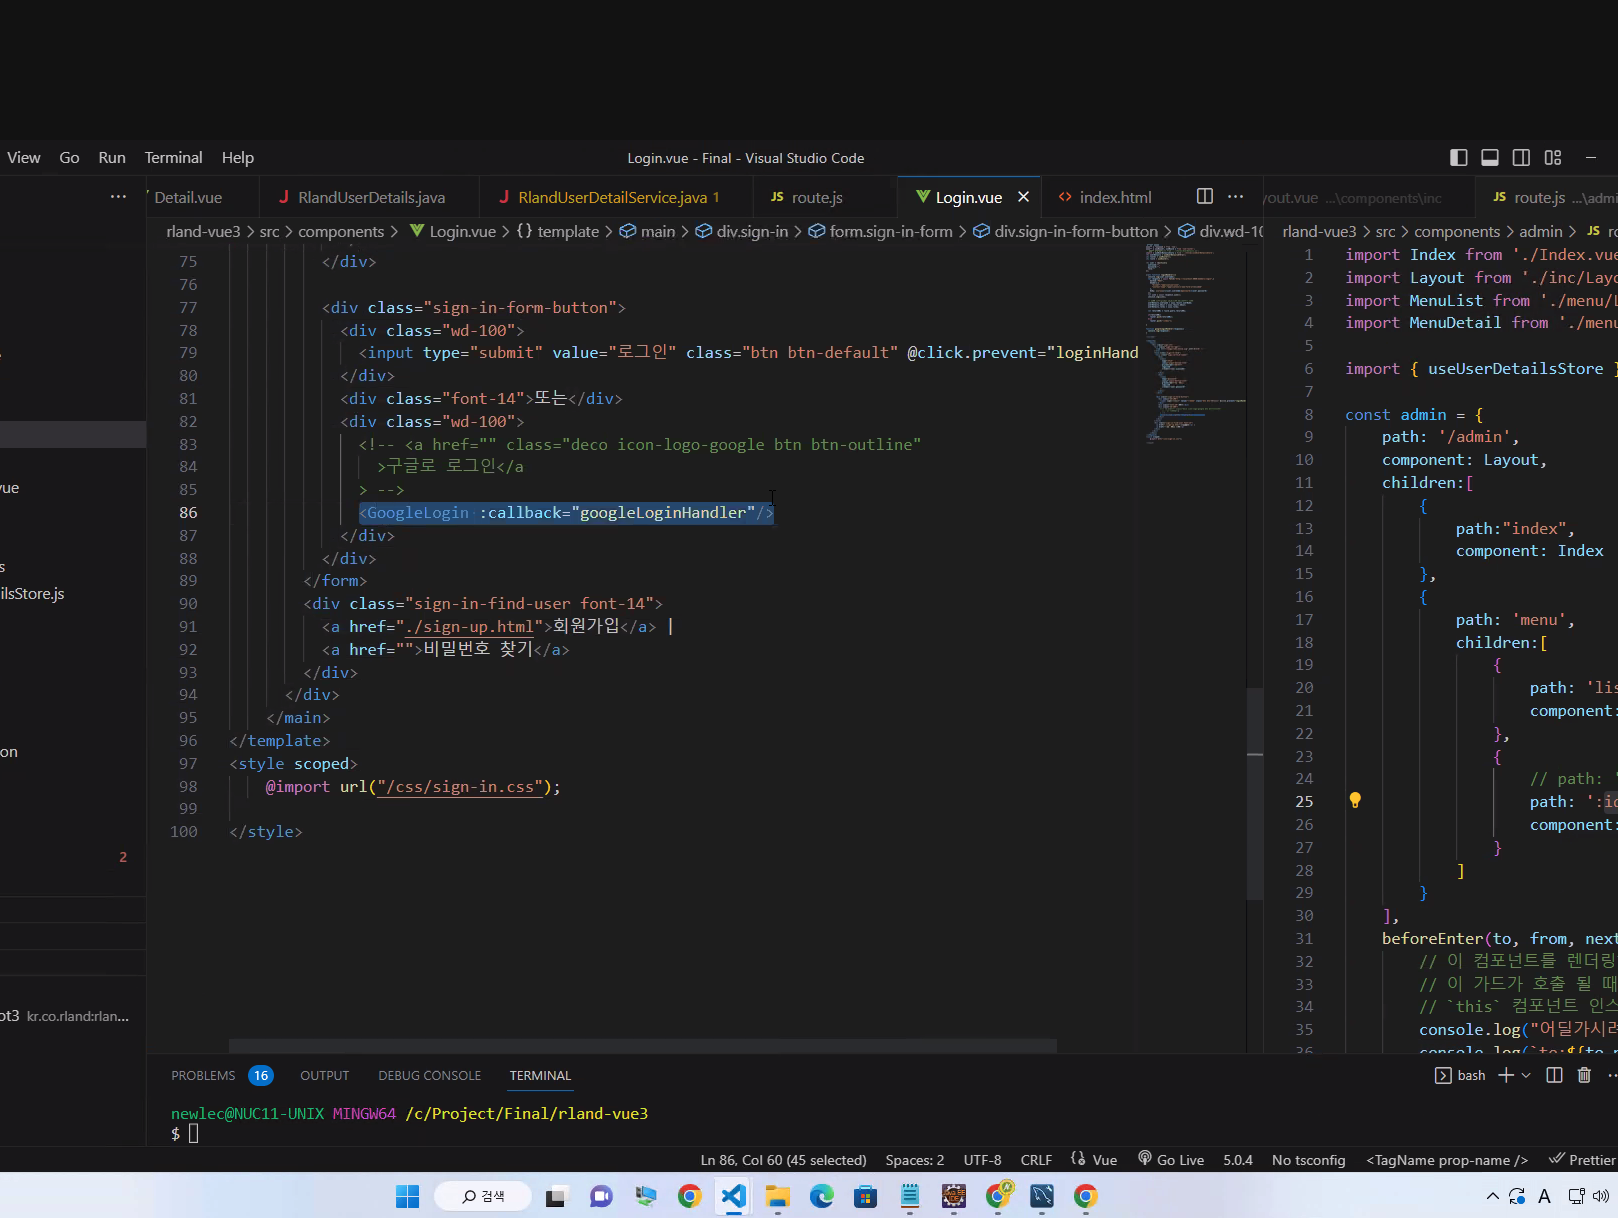
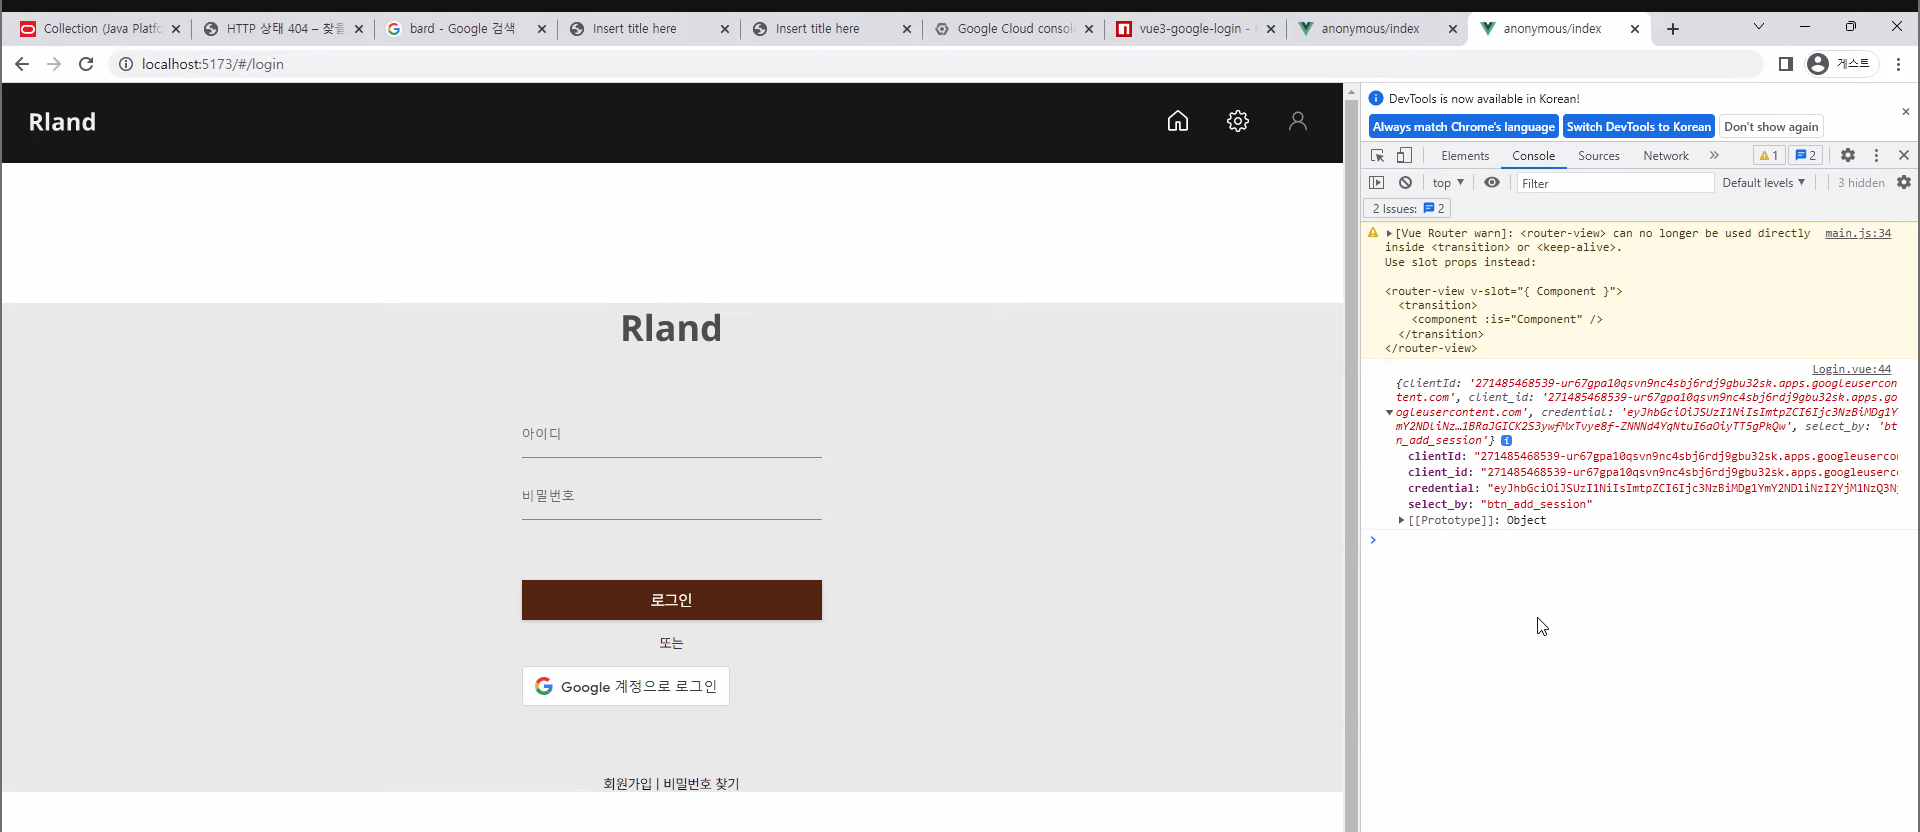
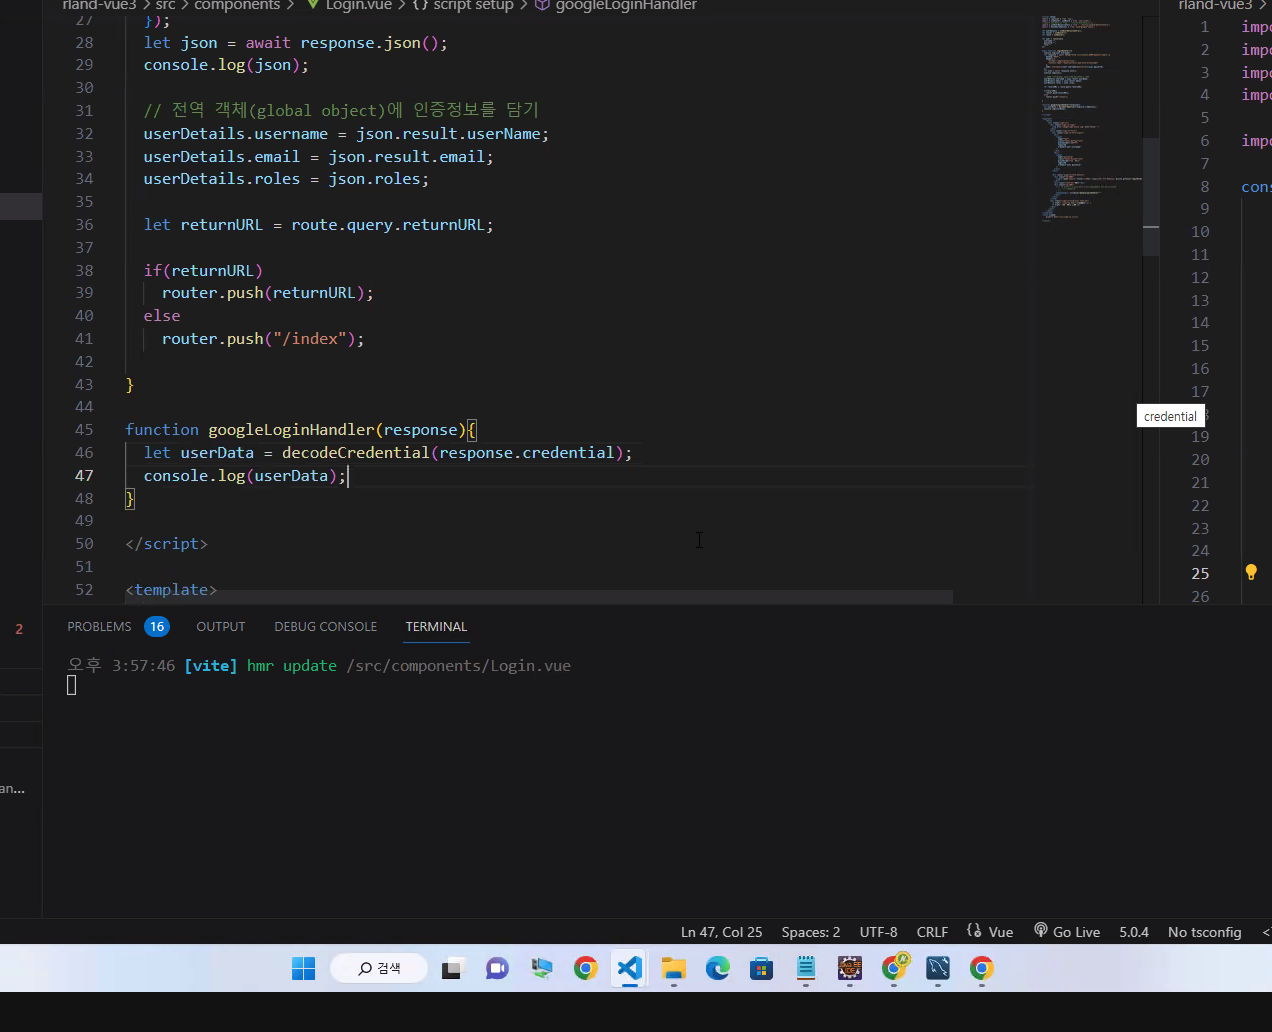
function googleLoginHandler(response){
let userData = decodeCredential(response.credential);
console.log(userData);
userDetails.username = userData.name;
userDetails.email = userData.email;
userDetails.roles=["ADMIN","MEMBER"];
let returnURL = route.query.returnURL;
if(returnURL)
router.push(returnURL);
else
router.push("/index");
}
async function loginHandler(){
console.log(user.username)
let response = await fetch("http://localhost:8080/members/login",{
method:"POST",
headers:{
"Accept": "application/json",
"Content-type":"application/x-www-form-urlencoded"
},
body:`username=${user.username}&password=${user.password}`
});
let json = await response.json();
console.log(json)
//console.log(json.result.email);
//전역 객체(global object)에 인증 정보를 담기
userDetails.username = json.result.userName;
userDetails.email = json.result.email;
userDetails.roles=json.roles;
let returnURL = route.query.returnURL;
if(returnURL)
router.push(returnURL);
else
router.push("/index");
}
</script>
<template>
<main>
<div class="sign-in">
<div class="sign-in-logo">
<img src="/image/logo-black.svg" alt="Rland" />
</div>
<form class="sign-in-form">
<div class="sign-in-form-input">
<div>
<input
type="text"
class="input-bottom-line"
placeholder="아이디"
required
v-model="user.username"
/>
</div>
<div>
<input
type="password"
class="input-bottom-line"
placeholder="비밀번호"
required
v-model="user.password"
/>
</div>
</div>
<div class="sign-in-form-button" >
<div class="wd-100">
<input type="submit" value="로그인" class="btn btn-default" @click.prevent="loginHandler" />
</div>
<div class="font-14">또는</div>
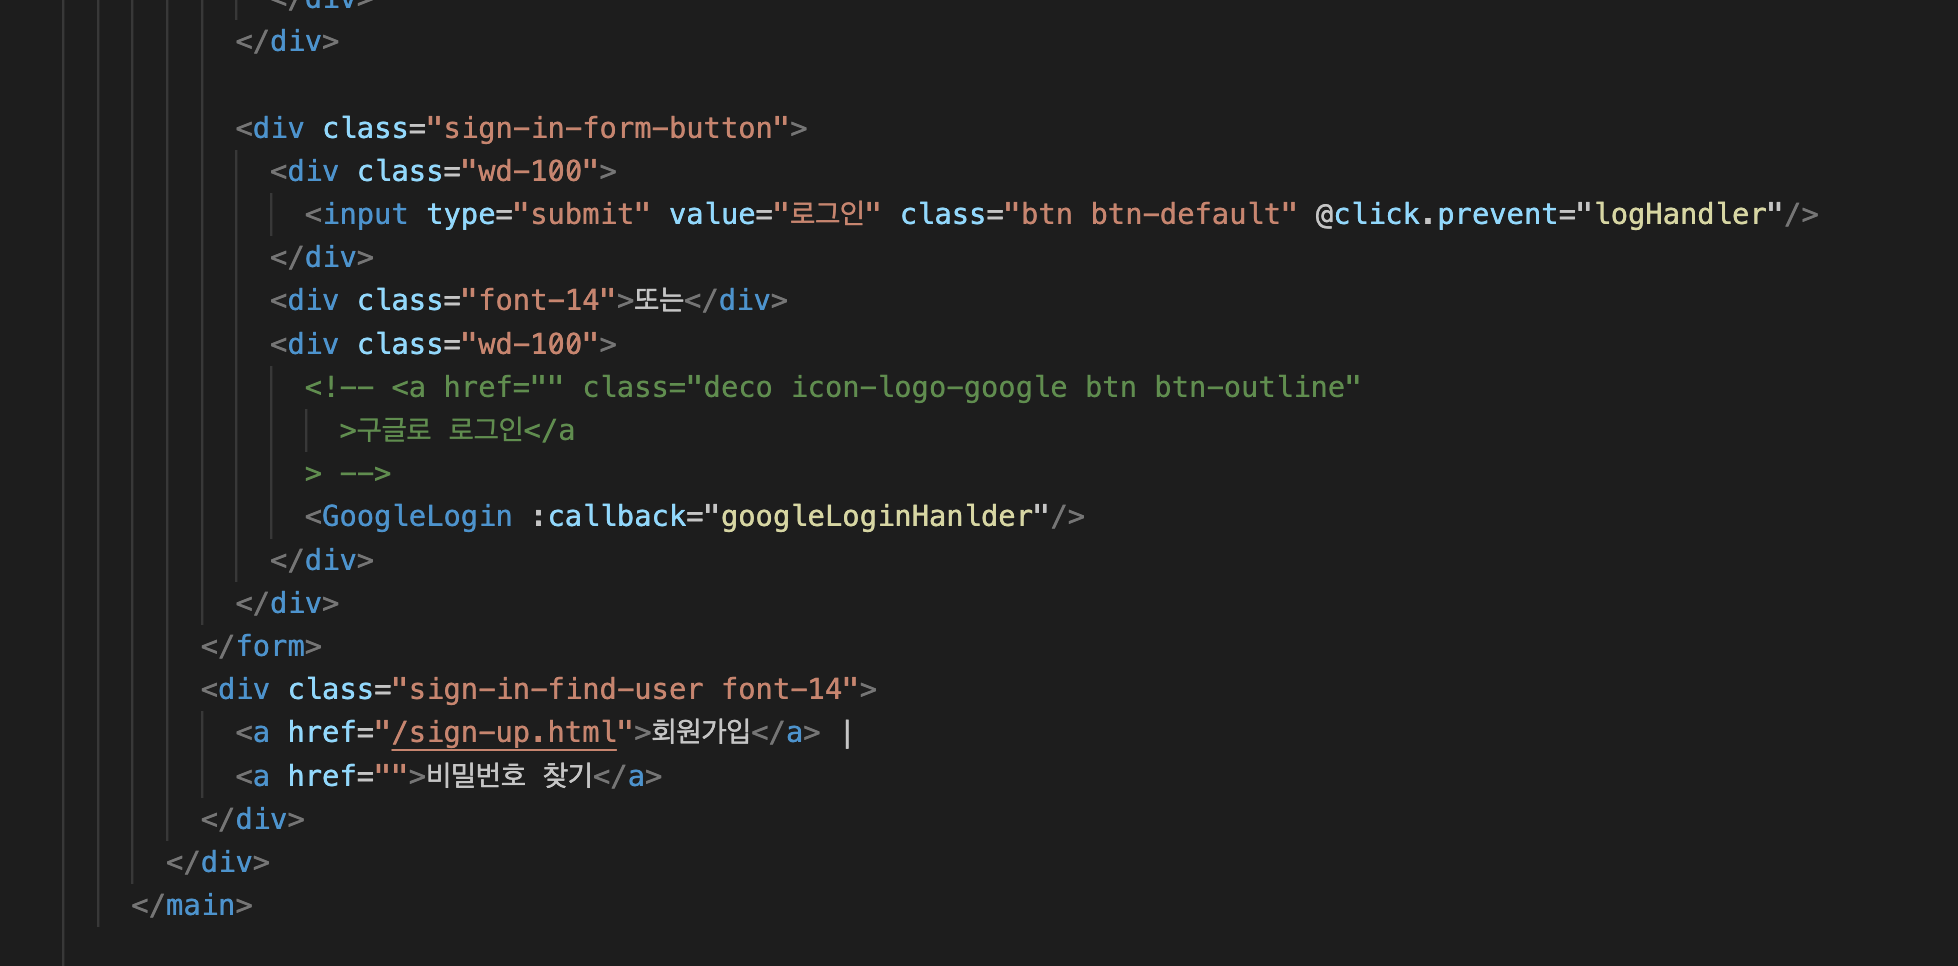
<div class="wd-100">
<!-- <a href="" class="deco icon-logo-google btn btn-outline"
>구글로 로그인</a
> -->
<GoogleLogin :callback="googleLoginHandler" />
</div>
</div>
</form>
<div class="sign-in-find-user font-14">
<a href="./sign-up.html">회원가입</a> |
<a href="">비밀번호 찾기</a>
</div>
</div>
</main>
</template>
<style scoped>
@import url("/css/sign-in.css");
main{
}
</style>
c) 구글 로그인에 대한 구글 로그아웃 구현
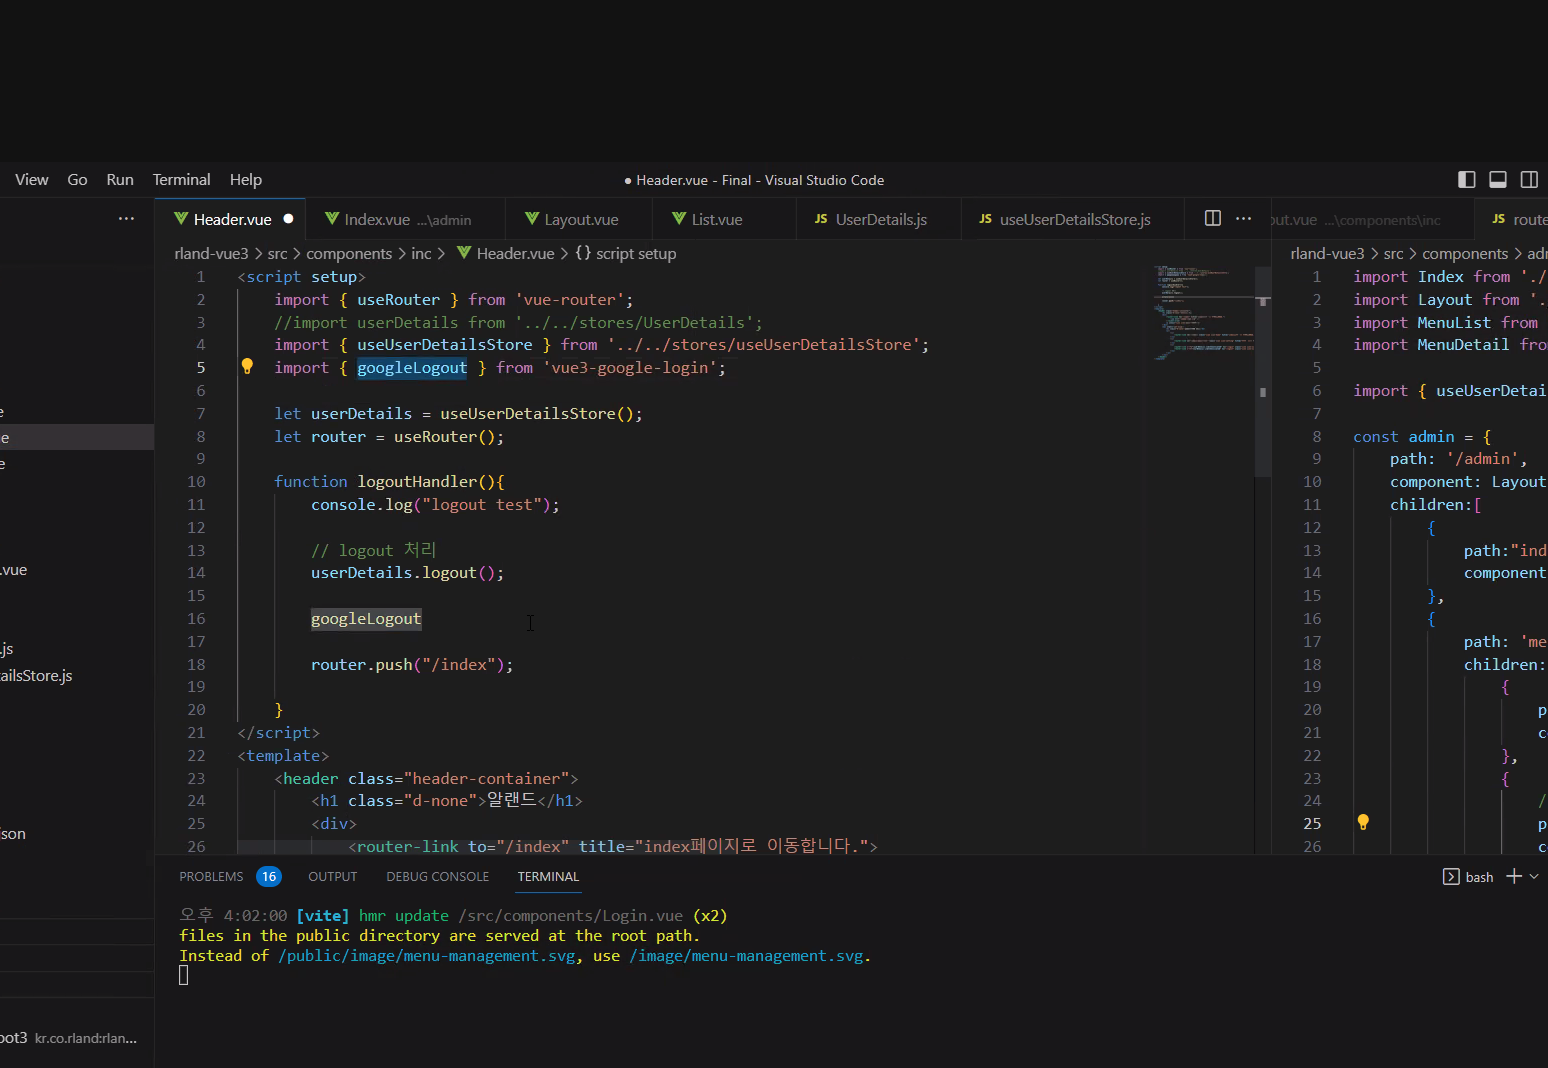
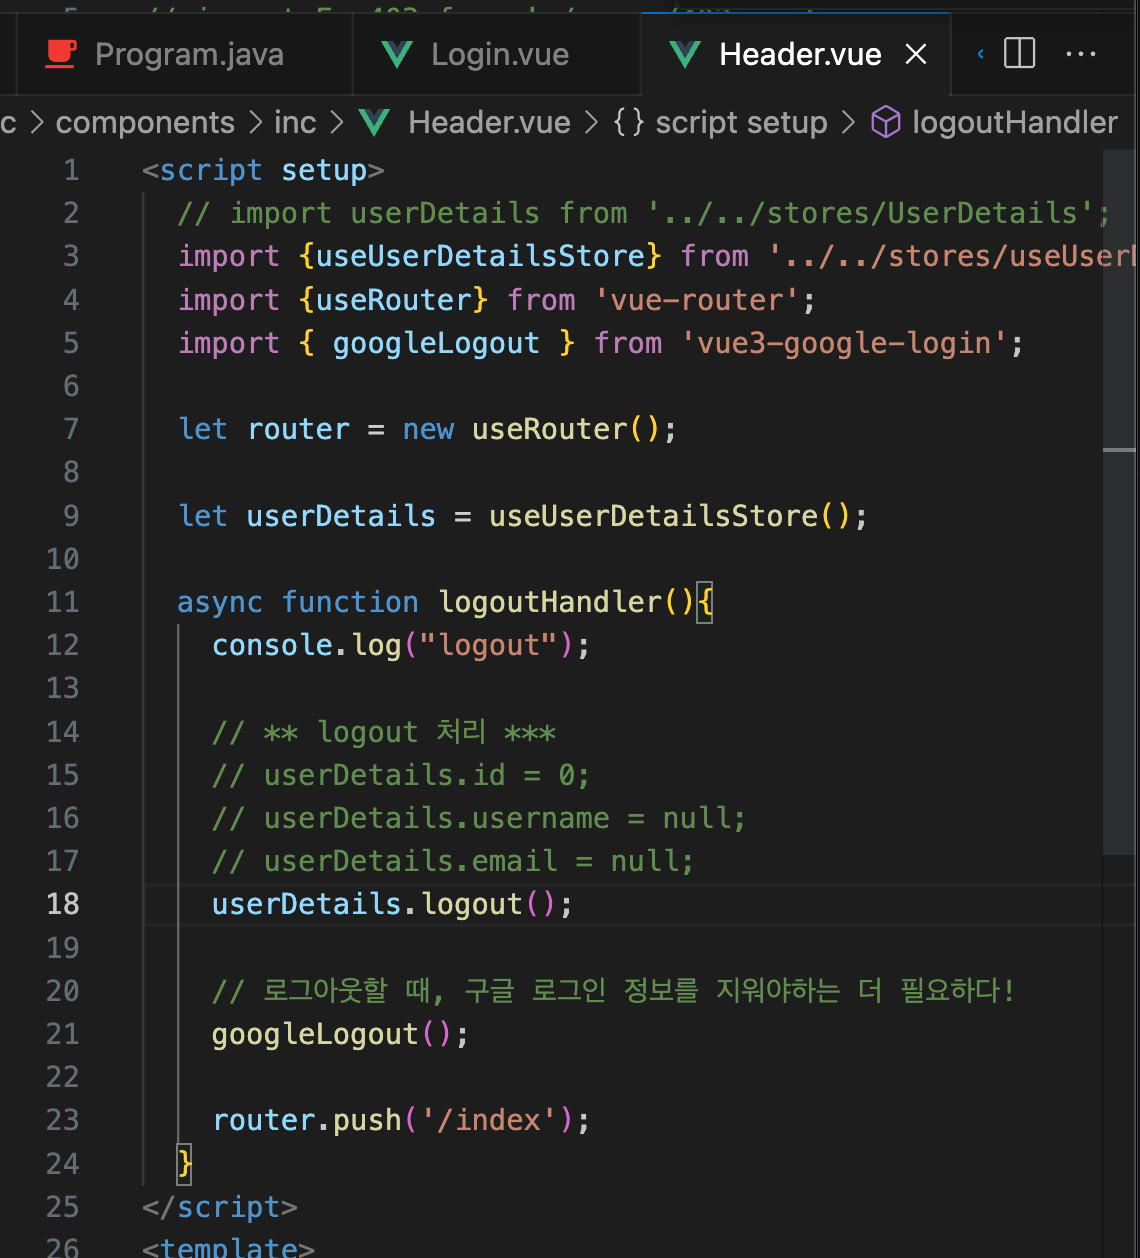
- Header.vue
<script setup>
  // import userDetails from '../../stores/UserDetails';
  import {useUserDetailsStore} from '../../stores/useUserDetailsStore';
  import {useRouter} from 'vue-router';
  import { googleLogout } from 'vue3-google-login';

  let router = new useRouter();

  let userDetails = useUserDetailsStore();

  async function logoutHandler(){
    console.log("logout");

    // ** logout 처리 ***
    // userDetails.id = 0;
    // userDetails.username = null;
    // userDetails.email = null;
    userDetails.logout();

    // 로그아웃할 때, 구글 로그인 정보를 지워야하는 더 필요하다!
    googleLogout();

    router.push('/index');
  }
</script>
<template>
    <header class="header-container">
      <h1 class="d-none">알랜드</h1>
      <div>
        <router-link to="/index" title="index페이지로 이동합니다.">
          <img src="/image/logo.svg" />
        </router-link>
        <a class="icon icon-menu">메뉴</a>
      </div>
      <nav class="nav-wrap">
        <h1 class="d-none">네비게이션 목록</h1>
        <ul>
          <li>
            <router-link
            to="/index"
            class="icon icon-home"
            title="index페이지로 이동합니다."
            >홈</router-link>
          </li>
          <li>
            <router-link to="/admin/menu/list" class="icon icon-setting" title="메뉴관리로 이동합니다.">
              메뉴관리
            </router-link>
          </li>
          <li>  <!-- v-show는 DOM이 있지만 보이지만 않는다. v-if는 DOM이 아예없어서 보이지 않는다. -->
                <!-- pinia store 대로 ''를 null로 바꾸자  -->
            <router-link v-if="!userDetails.username" to="/login" class="icon icon-sign-on" title="로그인">로그인</router-link>
            <router-link v-if="userDetails.username" to="/logout" class="icon icon-sign-out" title="로그아웃" @click="logoutHandler">로그아웃</router-link>
          </li>
        </ul>
      </nav>
    </header>
</template>
- useUserDetailsStore.js
import {defineStore} from "pinia";

// export const로 하면, 옵션s API로 기능이 사용된다. 즉, 함수인 ()로 사용해야 한다.
// export default로 쓰면, ()를 쓰면 안 된다! 변수도 지우자
// 하지만 export const가 기본이다!
export const useUserDetailsStore = defineStore("userDetails", {
    state:()=>({
        id:0,
        username:null,
        email:null,
        // 권한도 역할이 여러개 필요한 경우에 이렇게 배열로 받는다!
        roles:[] // ["ADMIN","TEACHER"]
    }),

    // Pinia의 getters 이용 방법 : 계산하는 식도 사용할 수 있거나 '속성'으로도 사용할 수 있다.
    // 속성이라서 함수의 인자를 넘겨 받을 수 없다.
    getters:{
        isAuthenticated:(state)=>state.username==null?false:true
    },

    // actions : 함수의 인자를 넘겨 받을 수 있다. 로그아웃 기능에서 사용 가능
    actions:{
        logout(){
            this.id=0;
            this.username =null;
            this.email =null;
        },
        hasRole(role){
            // 여기서 role은 ["ADMIN","TEACHER"]가 되어 role을 찾는 작업이 필요!
            // 해당 역할이 없으면 false 있으면 true 반환!
            let result = this.roles.indexOf(role)<0?false:true;
            return result;
        }

    }

    // *** 권한 : 허락받지 않는 페이지로 이동해서는 안 된다.
    // 그래서, 실습을 위해 우리는 허락 받지 않은 페이지가 필요하다!
});